
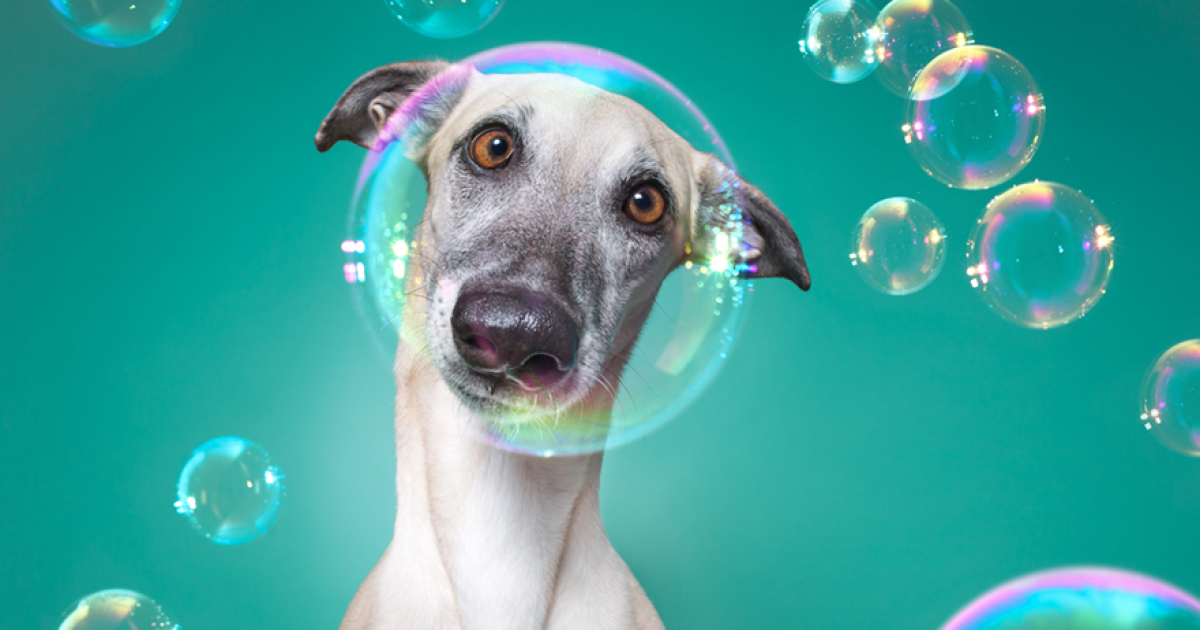
When I first brought home my rescue dog, I imagined golden-hour portraits, cute bandanas, and maybe one dramatic “looking into the distance like a tiny philosopher” shot. Reality had other plans. The moment I lifted my camera, my dog looked at me as if I had transformed into a tax auditor with a zoom lens. Ears back. Head down. Tail tucked. Exit stage left.
At first, I thought she simply hated photos. But after learning more about fearful dog behavior, rescue dog adjustment, positive reinforcement, and pet photography, I realized the camera was not the real villain. The real issue was trust. My dog did not understand what the big black object was, why it clicked, why I suddenly stared through it, or why I kept saying “just one more” like every overly optimistic photographer in history.
This is the story of how I helped my camera-shy rescue dog become a confident photo model without pressure, punishment, or turning my living room into a dog-sized reality TV set. More importantly, it is a practical guide for anyone who wants better dog photos while respecting their dog’s comfort, body language, and emotional pace.
Why Some Rescue Dogs Are Camera-Shy
Camera shyness in dogs is not stubbornness. It is often uncertainty, stress, or a learned response to unfamiliar objects and social pressure. Rescue dogs may have limited exposure to cameras, phones, lights, tripods, or people leaning toward them with intense focus. To a human, a camera is just a tool. To a nervous dog, it can look like a strange eye that clicks.
Many fearful dogs are especially sensitive to direct eye contact, sudden movement, unusual sounds, and changes in body posture. When we take photos, we often do all the things dogs find suspicious: we face them directly, lean forward, hold a device at eye level, freeze our bodies, and stare. Then we add squeaky toys, treat waving, and enthusiastic noises. Congratulations, we have created a tiny press conference for a dog who requested a quiet life.
Rescue dogs also need time to decompress. Some settle quickly, while others need weeks or months before they fully trust their environment. A dog who is still learning that the couch is safe, the dishwasher is not a dragon, and the mail carrier does not require a security briefing may not be ready for a full photo session.
The First Rule: I Stopped Trying To “Get The Shot”
The biggest shift happened when I stopped treating photography as the goal. Instead, confidence became the goal. If my dog felt safe, the photos would eventually come. If she felt pressured, even the sharpest portrait would not be worth it.
I made one rule: she could leave anytime. No blocking exits, no holding her in place, no forcing eye contact, and no repeating commands until she shut down. If she walked away, the session ended. That simple choice changed everything. When a shy dog learns that leaving is allowed, staying becomes less scary.
This approach is especially important for rescue dog photography because trust is built through predictable, low-pressure experiences. A dog who has control over her space is more likely to relax, explore, and offer natural expressions. The best dog photos rarely come from pressure. They come from safety, curiosity, and a snack budget that would concern a financial advisor.
Learning My Dog’s Body Language
Before I trained my dog to feel comfortable around the camera, I had to train myself to read her signals. Dogs communicate discomfort long before they bark, growl, or run away. Subtle stress signs can include lip licking, yawning, turning the head away, avoiding eye contact, pinned ears, tucked tail, whale eye, panting when it is not hot, freezing, pacing, or refusing treats.
That last one became my photo-session thermometer. My dog loved chicken. If chicken suddenly became “no thank you,” something was wrong. She was too stressed, too tired, or too close to the camera. Instead of pushing forward, I backed up, lowered the intensity, or stopped.
I also watched for happy signals: soft eyes, loose body, relaxed mouth, gentle sniffing, play bows, and the confident little tail wag that said, “I am interested, but I reserve the right to judge your artistic direction.” Once I paid attention to her body language, our progress became smoother and kinder.
Step One: Making The Camera Boring
My first training goal was simple: the camera should become boring. Not exciting. Not scary. Just part of the furniture, like a lamp, a shoe, or the mysterious corner of the room where dogs stare at absolutely nothing.
I placed the camera on the floor several feet away while my dog ate treats nearby. I did not pick it up. I did not point it at her. I did not click. The camera simply existed. Every time she glanced at it calmly, sniffed near it, or ignored it, good things happened. Treats appeared. Praise stayed soft. The camera became a predictor of snacks rather than stress.
This is a basic form of counterconditioning: pairing something uncertain with something the dog loves. The trick is to start at a level where the dog is still relaxed. If the camera is too close, too loud, or too active, the dog may go over threshold and stop learning. So I began with the easiest possible version of the situation.
Step Two: Adding Distance, Then Movement
Once my dog could relax around the camera on the floor, I picked it up for one second, gave her a treat, and put it down. That was the whole session. It was not glamorous. Nobody was calling Vogue. But it worked.
Over several days, I slowly increased the difficulty. I held the camera at waist level. Treat. Camera down. I lifted it near my chest. Treat. Camera down. I raised it toward my face but did not point it directly at her. Treat. Camera down.
Distance mattered. If I was too close, she looked worried. If I stood farther away and used a longer lens or zoom, she stayed relaxed. This was one of the best pet photography tips I learned: nervous dogs often do better when the photographer gives them space. You can always crop a photo. You cannot crop out a bad experience.
Step Three: Teaching A Photo Mat
Instead of asking my dog to “pose,” I taught her to relax on a mat. The mat became her safe photography station. At first, I rewarded her for looking at it, stepping on it, and eventually lying down on it. We practiced without the camera until the mat felt like a calm, familiar place.
This helped in two ways. First, it gave her a clear job. Shy dogs often gain confidence when they understand what earns rewards. Second, it helped me avoid chasing her around the room with a camera, which is not photographyit is paparazzi behavior, and my dog had not signed a media release.
Once she loved the mat, I placed it near a window with soft natural light. I let her settle, rewarded calm behavior, and took photos from a distance. Some of the first usable shots were not posed at all. She was simply lying on her mat, looking comfortable. That was the victory.
Step Four: Using Natural Light Instead Of Flash
Flash can be startling for many dogs, especially camera-shy rescue dogs. I avoided it completely. Natural light became my best friend. Window light, shaded outdoor areas, and early morning or late afternoon light created softer photos and a calmer experience.
I also turned off unnecessary camera sounds when possible. If I used my phone, I disabled loud shutter noises when allowed by the device settings. If my camera made a click, I introduced the sound gradually. Click, treat. Click, treat. Click, treat. Eventually, the noise became just another signal that snacks might be inbound.
Good dog photography does not require a studio setup. In fact, for a nervous dog, simple is usually better. A quiet room, soft light, a clean background, and a relaxed dog will beat an elaborate setup with props, lights, and a confused animal wondering why the dining room has become a magazine cover shoot.
Step Five: Rewarding Expressions, Not Perfection
At first, I wanted the classic dog portrait: ears up, eyes forward, perfect posture. But my dog had her own look. Sometimes she glanced sideways. Sometimes she gave a soft blink. Sometimes she looked past me like she had just remembered an emotional scene from a movie.
I learned to reward natural expressions. If she looked relaxed, I clicked the camera and gave a treat. If she offered eye contact, wonderful. If she looked off-camera, also wonderful. Some of the most beautiful dog photos happen when the dog is not staring straight into the lens. A side glance, a sniff, a head tilt, or a quiet moment can show more personality than a forced pose.
This mindset made our sessions more fun. Instead of correcting her, I followed her. If she wanted to sit, I photographed that. If she wanted to lie down, I photographed that. If she wanted to sniff a leaf for three minutes like it contained breaking news, I waited. Rescue dog photography is part art, part patience, and part accepting that the model may need to inspect a blade of grass before continuing.
Step Six: Keeping Sessions Ridiculously Short
My early sessions lasted two to three minutes. Sometimes less. The goal was to end before my dog became tired or worried. A successful session was not measured by how many photos I took. It was measured by whether she wanted to participate next time.
Short sessions prevented frustration for both of us. I prepared the space before inviting her in. Treats were ready. Camera settings were ready. Background clutter was reduced. Then we practiced one small thing: relaxing near the camera, settling on the mat, hearing the shutter, or holding still for half a second.
When she did well, we ended with play, praise, or a treat scatter. That last part mattered. Ending positively helped her remember the experience as safe and rewarding. The camera became part of a game, not a test.
Step Seven: Choosing The Right Rewards
For my dog, regular kibble was fine for basic training, but camera work required premium payment. Tiny pieces of chicken, cheese, or soft training treats worked best. I kept portions small so she did not fill up too quickly, and I adjusted her meals if we used a lot of rewards.
Some dogs prefer toys, praise, sniff breaks, or access to a favorite spot. The best reward is whatever your dog genuinely loves. For a camera-shy dog, the reward must be strong enough to create a positive emotional shift. If the dog is nervous and the reward is boring, the scary thing may still win.
I also used treat placement strategically. Tossing treats away from the camera gave my dog a built-in break. Hand-feeding near the mat encouraged her to return. Treats on the floor helped her relax because sniffing can be calming. The reward was not just payment; it was part of the emotional design of the session.
Step Eight: Practicing Confidence-Building Games Away From The Camera
Photo confidence did not come only from photo practice. We also played confidence-building games during normal life. I taught simple cues like touch, find it, spin, and paws up on a low platform. These games helped my dog learn that trying new things was safe and fun.
The “find it” game became especially useful. I would toss a treat and say “find it,” letting her sniff and search. Later, during photo sessions, I used the same cue to reset her if she became stiff. It gave her something familiar to do and helped prevent pressure from building.
I also introduced safe surfaces and objects slowly: a blanket, a low step, a basket without asking her to climb inside, a bandana placed nearby before it ever touched her body. Props were optional, and comfort came first. A confident dog wearing no accessories is better than a stressed dog dressed like a pumpkin against her will.
Step Nine: Building Outdoor Confidence
After indoor photos improved, we moved outside. I chose quiet locations first: the backyard, an empty park corner, or a familiar walking route. Busy streets, crowded parks, and noisy events were too much in the beginning.
Outdoor photography gave my dog more natural confidence because she had interesting things to smell and explore. Instead of asking her to sit still immediately, I let her sniff for several minutes. Then I photographed her doing normal dog things: walking, looking at birds, sniffing flowers, and proudly standing near a stick she clearly considered a major discovery.
For nervous dogs, candid outdoor photos can be easier than posed portraits. Movement reduces pressure, and familiar environments help the dog feel secure. A long leash, safe harness, and calm handling made the experience relaxed while keeping her safe.
Common Mistakes I Had To Stop Making
Repeating Commands Too Much
At first, I said “sit” too many times. That made my dog uncertain. Now I give one cue, wait, and reward effort. If she does not respond, I make the task easier instead of turning into a broken doorbell.
Getting Too Close With The Lens
A camera near the face can feel intrusive. Backing up helped my dog relax and made her expressions softer. Space is one of the most underrated tools in pet photography.
Using Too Many Props
Props can be cute, but they can also be overwhelming. I introduced one item at a time and skipped anything that made her uncomfortable. The dog is the story. The props are just decoration.
Expecting Progress To Be Linear
Some days my dog looked like a professional model. Other days she acted as if the camera had personally offended her. Progress with a rescue dog is rarely a straight line. Stress, weather, routine changes, and energy levels all matter.
When My Dog Finally Chose The Camera
The turning point came quietly. I set the camera on the table and my dog walked to her photo mat without being asked. She looked at me, then at the treat pouch, then back at me with the confidence of someone who understood the business model. I nearly cried. She was not just tolerating the camera anymore. She was volunteering.
From there, her confidence grew quickly. She learned that photo time meant treats, attention, calm praise, and the freedom to leave. Her ears softened. Her posture lifted. She began offering head tilts and relaxed eye contact. Occasionally, she gave me a look that said, “I am beauty, I am grace, I will now lick my foot.”
Today, she is not a perfect model, and I do not want her to be. She is a dog with preferences, moods, and opinions. But she is confident. She trusts me. She knows the camera is safe. That matters more than any viral photo.
Practical Tips For Photographing A Camera-Shy Rescue Dog
If you want to help your own nervous dog feel more confident in front of the camera, start slowly. Let the camera exist in the room before using it. Pair it with high-value rewards. Keep sessions short. Use natural light. Avoid flash. Give your dog space. Watch body language carefully. End while your dog is still happy.
Choose familiar locations and simple backgrounds. Photograph your dog after a calm walk or gentle play session, not when they are bursting with energy or already stressed. Use quiet praise and avoid sudden excitement. If your dog looks away, let them. If they leave, let them. If they return, reward that choice.
Most importantly, do not compare your dog to polished social media pets. Many professional-looking dog photos are the result of training, patience, editing, and many outtakes. Behind every perfect portrait are probably twelve blurry shots, one sneeze, and a dog walking directly toward the camera to investigate the treat situation.
Extra Experience: What This Journey Taught Me About Trust, Patience, And Really Good Snacks
Turning my camera-shy rescue dog into a confident photo model taught me that the photo is never just a photo. It is a record of the relationship behind it. In the beginning, I thought I was teaching my dog to pose. In reality, she was teaching me to slow down, observe better, and stop making everything about my timeline.
One of the most helpful experiences was learning to separate “cute” from “comfortable.” A pose might look adorable to me, but if my dog’s ears were pinned back or her mouth was tight, the image did not feel right. I deleted plenty of technically decent photos because they showed a dog who was trying hard but not enjoying herself. That decision changed my standards. A great photo should preserve dignity, not just detail.
I also learned that confidence grows in small deposits. The first time my dog sniffed the camera, deposit. The first time she stayed on her mat while I lifted the lens, deposit. The first time she heard the shutter and looked for a treat instead of leaving, huge deposit. None of those moments looked impressive from the outside, but they were the foundation for every beautiful portrait that came later.
Another lesson was that environment matters more than gear. I had better results with a phone near a sunny window than with a fancy camera in a stressful setting. Clean light, calm energy, and a dog who feels safe will always outperform expensive equipment used at the wrong time. I stopped chasing perfect backdrops and started looking for places where my dog naturally relaxed: the rug by the window, the shady patch near the fence, the front step after our evening walk.
There were funny failures too. Once, I arranged a lovely fall-themed setup with a blanket, a pumpkin, and a tiny decorative sign. My dog walked into the frame, took the treat, turned her back to the camera, and sat directly on the sign. Another time, she offered the most majestic head tilt I had ever seen, but I missed the shot because I was opening the treat bag with the grace of a raccoon in a pantry. These moments reminded me not to take the process too seriously.
Over time, photo sessions became a bonding ritual. I would set up the mat, she would trot over, and we would work for a few minutes. Sometimes we got beautiful images. Sometimes we got nothing but bloopers. Either way, we ended with play and praise. That consistency helped her understand that the outcome did not matter. She was not in trouble if she moved. She was not disappointing me if she looked away. She was safe.
The biggest surprise was how photo confidence spilled into other areas of life. As my dog learned to try small new things with the camera, she became braver in general. She explored new walking paths more willingly. She recovered faster from strange sounds. She checked in with me more often when uncertain. The camera had become a confidence-building tool, not because photography is magical, but because we used it as structured, positive practice.
If I could give one piece of advice to anyone with a camera-shy rescue dog, it would be this: let your dog be a collaborator, not a subject. Invite, reward, observe, and adapt. The moment your dog realizes they have choices, the camera becomes less threatening. The moment you stop demanding perfection, your photos become more honest. And the moment your rescue dog looks into the lens with soft eyes and relaxed confidence, you will understand that the real masterpiece was trust all along.
Conclusion
Helping a camera-shy rescue dog become a confident photo model is not about tricks, props, or forcing the perfect pose. It is about patience, positive reinforcement, emotional safety, and learning to see the world from your dog’s point of view. The camera should never be a source of pressure. It should become a familiar part of a rewarding routine.
My rescue dog did not become confident because I found the perfect lens or discovered one magical training hack. She became confident because I listened when she said “too much,” rewarded her when she tried, and let her move at her own pace. The photos improved, yes. But the real win was watching a once-worried dog step onto her mat, lift her head, and choose to shine.
That is the heart of rescue dog photography: not capturing a dog who performs perfectly, but celebrating a dog who feels safe enough to be seen.













