
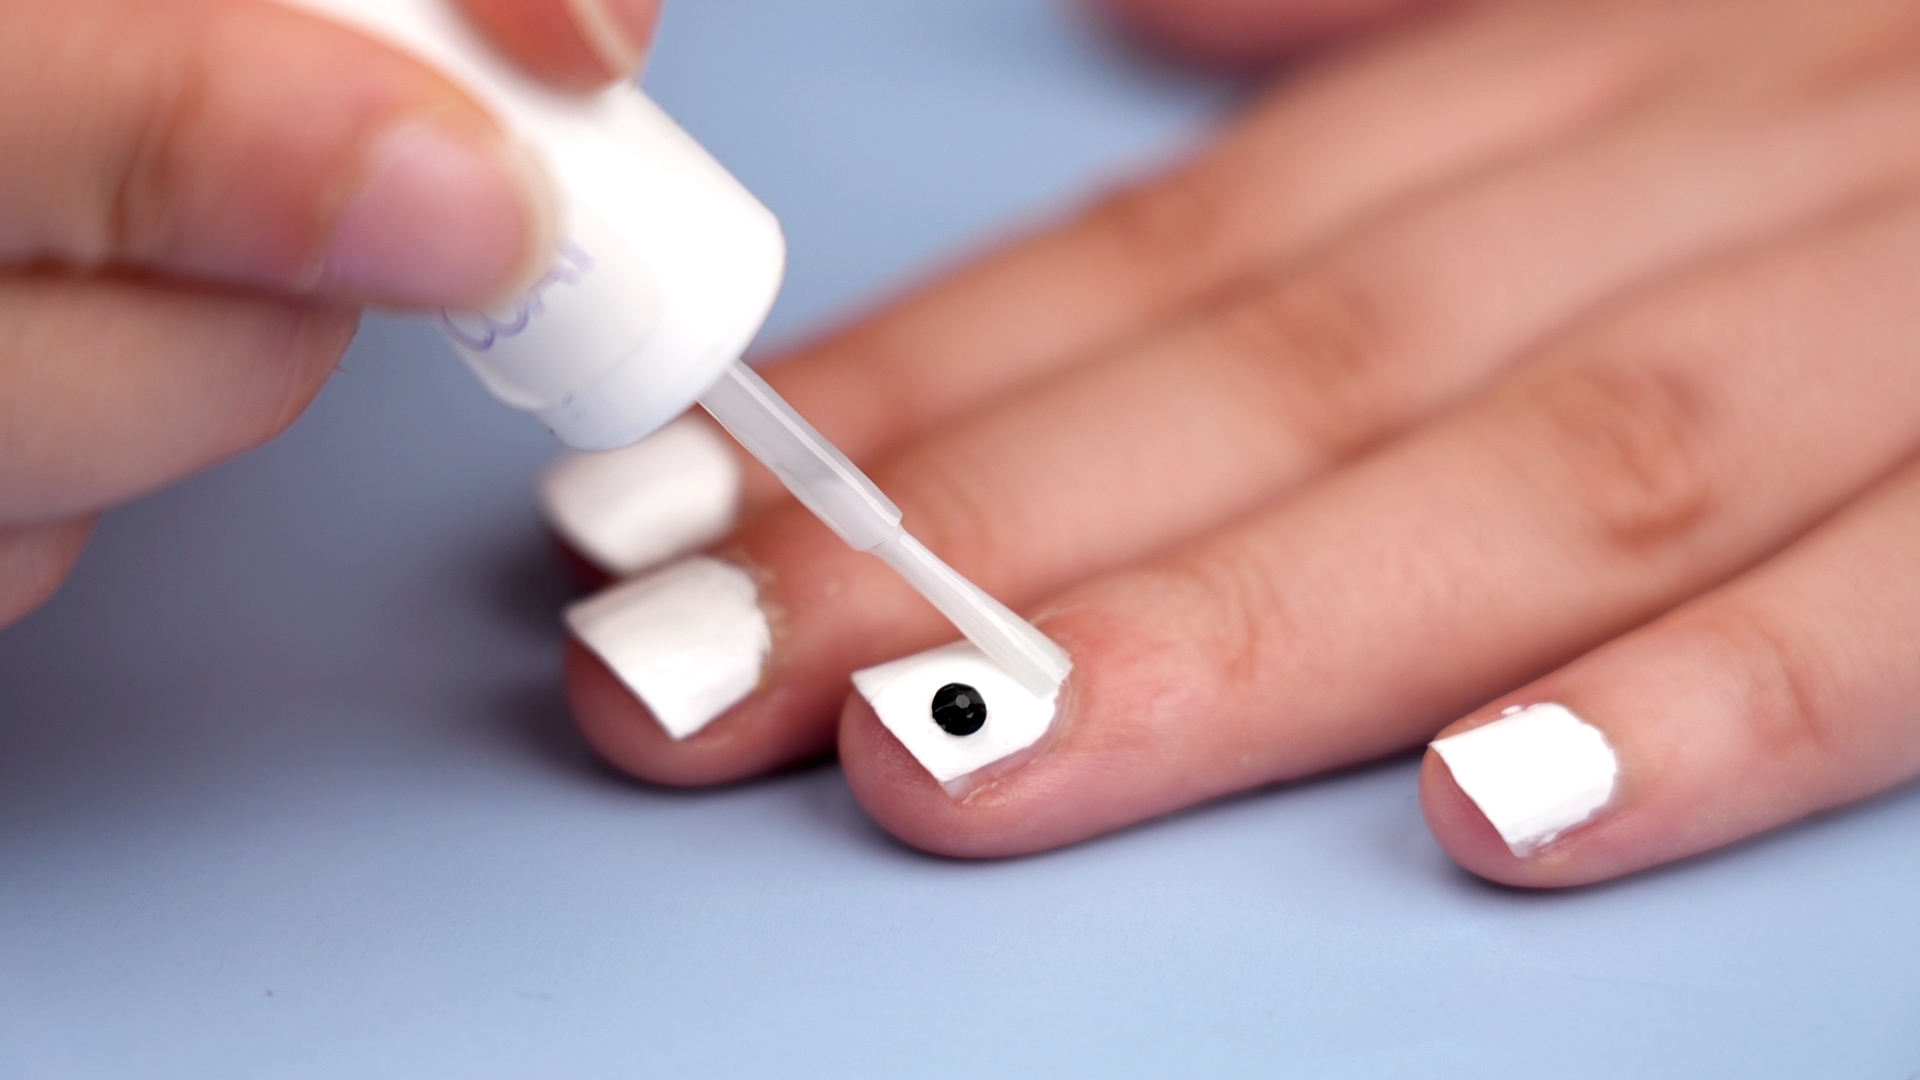
Rhinestone nails are the tiny disco balls of the manicure world: small, shiny, slightly dramatic, and absolutely capable of turning a regular hand wave into a public event. Whether you want one dainty crystal near the cuticle or a full “my nails have entered the ballroom” moment, learning how to attach rhinestones to nails correctly makes the difference between a design that lasts and one that abandons ship before lunch.
The good news? You do not need to be a professional nail tech to create a clean, sparkly design at home. The not-so-glamorous news? Rhinestones need proper prep, the right adhesive, smart placement, and a little patience. If you skip those steps, your gems may pop off, snag your hair, dull under too much top coat, or look like they were applied during a mild earthquake.
This guide breaks down how to attach rhinestones to nails in 13 easy steps, covering regular polish, gel polish, nail glue, rhinestone gel, tools, sealing techniques, removal, and practical tips that keep your manicure looking intentional instead of “craft drawer explosion.”
What You Need Before You Start
Before the sparkle begins, gather your tools. Rhinestone nail art is easier when everything is within reach, because once polish or gel adhesive is wet, it waits for no one. Not even your cat, your phone, or your sudden need to reorganize your desk.
Basic Supplies
- Flat-back nail rhinestones in your preferred size and color
- Base coat
- Nail polish or gel polish
- Top coat or no-wipe gel top coat
- Nail glue, rhinestone gel, builder gel, or thick gel top coat
- Wax pencil, rhinestone picker, tweezers, or dotting tool
- Lint-free wipes
- Rubbing alcohol or nail cleanser
- Cuticle pusher or orange stick
- Nail file and buffer
- Small nail art brush
- UV/LED lamp if using gel products
- Cuticle oil for aftercare
How to Attach Rhinestones to Nails: 13 Steps
Step 1: Choose the Right Rhinestones
For nail art, flat-back rhinestones are usually the best choice. Their smooth underside sits more securely on the nail than pointed-back craft crystals. Tiny stones are easier for beginners because they lie flatter and are less likely to catch on clothes or hair. Larger rhinestones create more drama, but they need stronger adhesive and more careful sealing around the edges.
If you are new to nail rhinestones, start with small clear crystals, pearls, or metallic studs. They match almost any polish color and forgive beginner placement mistakes better than neon stars the size of breakfast cereal.
Step 2: Wash and Dry Your Hands
Clean hands are not optional. Oils, lotion, dust, and leftover polish can weaken the bond between the nail and adhesive. Wash your hands, dry them completely, and make sure your nails are free from old polish or residue.
A clean nail surface helps polish last longer and lowers the chance of trapping debris under nail products. Avoid cutting your cuticles, because cuticles help protect the area around the nail from irritation and infection. Gently pushing them back is safer than snipping them aggressively.
Step 3: Shape and Lightly Buff the Nails
File your nails into your desired shape before adding rhinestones. Short square, almond, oval, and coffin nails can all wear rhinestones beautifully, but your design should match the nail length. A giant gem on a very short nail may look less “elegant accent” and more “tiny chandelier landed here.”
Lightly buff the nail surface only if needed. Do not over-file natural nails. Over-buffing can weaken them, making them more prone to peeling or bending. The goal is smooth, clean, and balancednot sanded into architectural dust.
Step 4: Dehydrate the Nail Plate
Use a lint-free wipe with nail cleanser or rubbing alcohol to remove oils from the nail plate. This step is especially important if you used hand cream earlier. Oil is wonderful for dry skin, but it is terrible for rhinestone adhesion. Think of it as the polite bouncer telling your crystals, “Not tonight.”
After cleansing, avoid touching the nail surface with your fingertips. Skin oils can transfer right back onto the nail.
Step 5: Apply Base Coat
Apply a thin layer of base coat. If you are using regular polish, let the base coat dry according to the product directions. If you are using gel, cure the base coat under your UV/LED lamp as directed by the manufacturer.
Thin coats matter. Thick coats can wrinkle, bubble, or cure unevenly. A rhinestone design is only as strong as the layers underneath it, so build your manicure like a tiny house: solid foundation first, fancy roof later.
Step 6: Apply Your Nail Color
Apply your chosen polish color in thin, even coats. For regular polish, allow each layer to dry before adding the next. For gel polish, cure each layer fully. If the color is still soft, dented, sticky in the wrong way, or sliding around, wait before placing rhinestones.
Light colors make clear rhinestones look soft and bridal. Black, navy, red, and deep green create a bolder jewelry effect. Nude polish with a single cuticle crystal is minimal and elegant, while chrome polish with scattered gems says, “Yes, I did come here to sparkle aggressively.”
Step 7: Plan Your Rhinestone Placement
Before touching glue, decide where each rhinestone will go. You can arrange stones on a small tray or piece of paper to preview the design. Popular rhinestone nail designs include a single accent gem, a cuticle crescent, a diagonal trail, a French-tip sparkle line, or a cluster near one side of the nail.
For beginners, symmetry is easier when you keep the design simple. Try one rhinestone at the base of each nail or three small stones in a vertical line on an accent nail. Once you master that, you can graduate to more complicated designs without your manicure looking like it lost a fight with a jewelry box.
Step 8: Pick the Best Adhesive for Your Manicure
The best adhesive depends on your nail system and how long you want the rhinestones to last.
- Regular top coat: Works for tiny rhinestones and short-term designs, but it is the least durable option.
- Nail glue: Good for regular polish and press-on nails. Use a tiny amount to avoid messy edges.
- Gel top coat: Useful for small rhinestones on gel nails, especially when cured properly.
- Rhinestone gel: Best for stronger hold, larger crystals, charms, and 3D nail art.
- Builder gel: Great for securing heavier decorations because it has a thicker texture.
If you use gel adhesive, remember that it must be cured with the correct lamp. Regular nail glue does not cure in a UV/LED lamp. Gel products do. Mixing systems randomly can lead to weak adhesion or uncured product, which is not the glamorous kind of surprise.
Step 9: Apply a Tiny Dot of Adhesive
Place a small dot of adhesive exactly where the rhinestone will sit. Use a dotting tool, toothpick, or thin nail brush for better control. The dot should be big enough to grip the rhinestone, but not so large that glue floods around the stone like a tiny swimming pool.
For larger stones, use a slightly thicker bead of rhinestone gel or builder gel. The goal is to “seat” the stone into the adhesive so the base is supported. If only one corner touches glue, the stone can lift quickly.
Step 10: Pick Up and Place the Rhinestone
Use a wax pencil, rhinestone picker, tweezers, or orange stick to pick up the rhinestone. A wax pencil is often easiest because it gently grips the shiny top without launching the stone across the room. Place the stone into the adhesive and press lightly.
Do not smash it down. A gentle press is enough. You want the rhinestone secure, not buried like treasure. If the stone slides, use a clean tool to nudge it into position before the adhesive dries or cures.
Step 11: Cure or Let the Adhesive Dry
If you are using gel adhesive, cure the nail under your UV/LED lamp according to the product instructions. Do not guess curing time. Different gels need different curing lengths depending on thickness, lamp strength, and formula.
If you are using nail glue, allow it to dry fully. Avoid touching the rhinestones while the glue sets. This is the part where patience becomes a beauty tool. Wave your hands dramatically only after the stones are secure.
Step 12: Seal Around the Rhinestones
Use a small nail art brush to apply top coat around the base of each rhinestone. This creates a protective border that helps lock the stone in place. For gel nails, use gel top coat around the edges and cure again.
Try not to paint directly over the top of faceted rhinestones. Too much top coat can dull their sparkle and make them look cloudy. For flat studs, pearls, or smooth decorations, covering them may be fine, but faceted crystals usually shine best when the top surface stays clean.
Step 13: Finish, Hydrate, and Protect Your Manicure
Once everything is dry or cured, wipe away any tacky gel layer if your system requires it. Apply cuticle oil around the nail, not directly over fresh glue. Hydrated skin makes a manicure look better and helps prevent dry, ragged edges.
For the next few hours, avoid heavy cleaning, soaking, or using your nails as tools. Rhinestones are decoration, not tiny screwdrivers. Open cans with a spoon, peel labels with patience, and let your nails live their sparkly little lives in peace.
Regular Polish vs. Gel Polish: Which Holds Rhinestones Better?
Gel polish usually holds rhinestones better than regular polish because gel products cure into a harder surface. Rhinestone gel and builder gel can create a strong grip around crystals, especially when sealed carefully around the edges.
Regular polish can still work beautifully, especially for short-term wear or simple designs. Nail glue is usually stronger than wet top coat for regular polish. However, regular polish must be completely dry before glue is added. If the polish underneath is soft, the rhinestone may shift or leave a dent.
If you use gel manicures often, protect your hands during curing by following common gel safety habits, such as using broad-spectrum sunscreen on the backs of your hands or wearing dark fingerless gloves. Also avoid curing longer than the product recommends. More lamp time does not automatically mean a better manicure.
Common Mistakes When Applying Nail Rhinestones
Using Too Much Glue
More glue does not always mean more hold. Too much adhesive can spill out around the stone, create bumps, trap dust, or make the design look messy. Start small and add more only when needed.
Putting Top Coat Over Every Crystal
Top coat can protect rhinestones, but it can also reduce sparkle if applied over faceted crystals. Instead, seal around the stone. Imagine building a tiny protective moat, not pouring syrup over a diamond.
Skipping Nail Prep
If the nail is oily, dusty, or uneven, rhinestones will not stay put. Prep is not the glamorous part, but it is the reason the glamorous part survives handwashing.
Choosing Stones That Are Too Large
Large stones are pretty, but they need more support. On short or curved nails, oversized gems can lift at the edges. If you want a large centerpiece, surround it with smaller stones and secure the base with thicker gel.
How to Make Rhinestones Stay on Nails Longer
To keep rhinestones attached longer, use the right adhesive, clean the nail surface, seal around each stone, and avoid soaking your hands for long periods. Wear gloves when washing dishes or cleaning. Reapply a thin layer of top coat around the rhinestones every few days if you are wearing regular polish.
Also, be realistic about your lifestyle. If you play sports, type all day, work with your hands, or constantly zip bags and button jackets, choose lower-profile stones. A smooth, practical rhinestone design can still sparkle without trying to catch every sweater in the room.
How to Remove Rhinestones Safely
Do not rip rhinestones off your nails. Pulling them can remove layers of natural nail or damage polish underneath. For regular polish, soak a cotton pad in remover, place it over the nail, and wait until the polish and adhesive soften. For gel nails, follow proper gel removal steps or visit a nail professional if the stones are heavily secured.
If a rhinestone falls off and leaves glue behind, gently buff only the leftover productnot the natural nail. If the nail looks irritated, painful, greenish, swollen, or separated from the nail bed, skip reapplication and let the nail recover. When in doubt, ask a licensed nail professional or healthcare provider.
Design Ideas for Rhinestone Nails
Minimalist Rhinestone Nails
Place one tiny crystal near the cuticle of each nail. This style is simple, clean, and perfect for school, work, weddings, or anyone who wants sparkle without announcing it via megaphone.
Accent Nail Sparkle
Apply rhinestones to one or two accent nails only. Try a diagonal line, a half-moon at the base, or a small cluster on the ring finger. This gives drama without making every nail feel busy.
French Tip with Rhinestones
Add tiny crystals along the smile line of a French manicure. Clear stones on a nude base look classic, while colored rhinestones can make the design playful and modern.
Full Glam Crystal Cluster
For special events, create a cluster using different stone sizes. Place the largest stone first, then add smaller stones around it. This creates a jewelry-like design with better balance.
My Real-World Experience With Rhinestone Nails
After trying rhinestone nails several times, the biggest lesson is simple: the tiny details matter more than the tiny diamonds. The first time many beginners apply rhinestones, they usually focus on the fun partchoosing the sparkly pieces. That is understandable. Rhinestones are basically candy for your manicure. But the less exciting steps, like cleaning the nail, using the right amount of adhesive, and sealing the edges, are what decide whether the design lasts two hours or two weeks.
One practical experience is that small rhinestones are much easier to manage than large charms. A single tiny crystal placed near the cuticle can stay secure with a good top coat or a small dot of nail glue. Larger gems, however, need thicker support. If the nail surface is curved and the rhinestone is flat, the sides may not touch the nail completely. That little gap becomes the perfect place for water, hair, or fabric to catch. Once that happens, the stone starts lifting, and suddenly your manicure has commitment issues.
Another useful lesson is to work one nail at a time. It may seem faster to add adhesive dots to every nail first, but by the time you return to the first finger, the glue may be too dry or the gel may have shifted. Working nail by nail gives you more control. Apply adhesive, place the stone, adjust it, cure or let it dry, then move on. It feels slower, but the final design looks cleaner.
A wax pencil also makes a huge difference. Tweezers work, but they can be clumsy with very small rhinestones. Sometimes the stone flips upside down, flies away, or lands in the wrong place with the confidence of someone who pays rent there. A wax picker lifts the rhinestone gently and lets you place it more accurately. For beginners, that one tool can save a surprising amount of frustration.
Top coat technique is another area where experience helps. Brushing top coat directly over rhinestones may seem like the safest way to secure them, but it often dulls the shine. The better method is to use a thin brush and seal around the base. This keeps the crystal faces clear while still reinforcing the edges. For gel manicures, curing after sealing around the stones creates a stronger finish.
Finally, rhinestone nails last longer when you treat them like accessories instead of tools. Do not use them to open packages, scrape stickers, or pry anything loose. Wear gloves for cleaning, be careful with tight pockets, and avoid long hot soaks right after application. Rhinestone nails can be surprisingly durable, but they are still decoration. Treat them kindly, and they will reward you by sparkling through your day instead of disappearing into your bedsheets like tiny glamorous fugitives.
Final Thoughts
Learning how to attach rhinestones to nails is a mix of technique, patience, and sparkle management. The best results come from clean nail prep, smart adhesive choice, careful placement, and sealing around the rhinestones without drowning them in top coat. Start with simple designs, practice your placement, and build your confidence one crystal at a time.
Whether you are creating a soft bridal manicure, a bold party look, or a casual “yes, my nails are shinier than your phone case” design, rhinestones can make your manicure feel custom and polished. Keep your tools clean, protect your natural nails, and remember: sparkle is fun, but secure sparkle is better.
Note: This article is for educational nail-art guidance. Always follow product directions, avoid applying nail products to irritated or damaged skin, and consult a licensed nail professional for complex gel, acrylic, or heavily embellished designs.










