
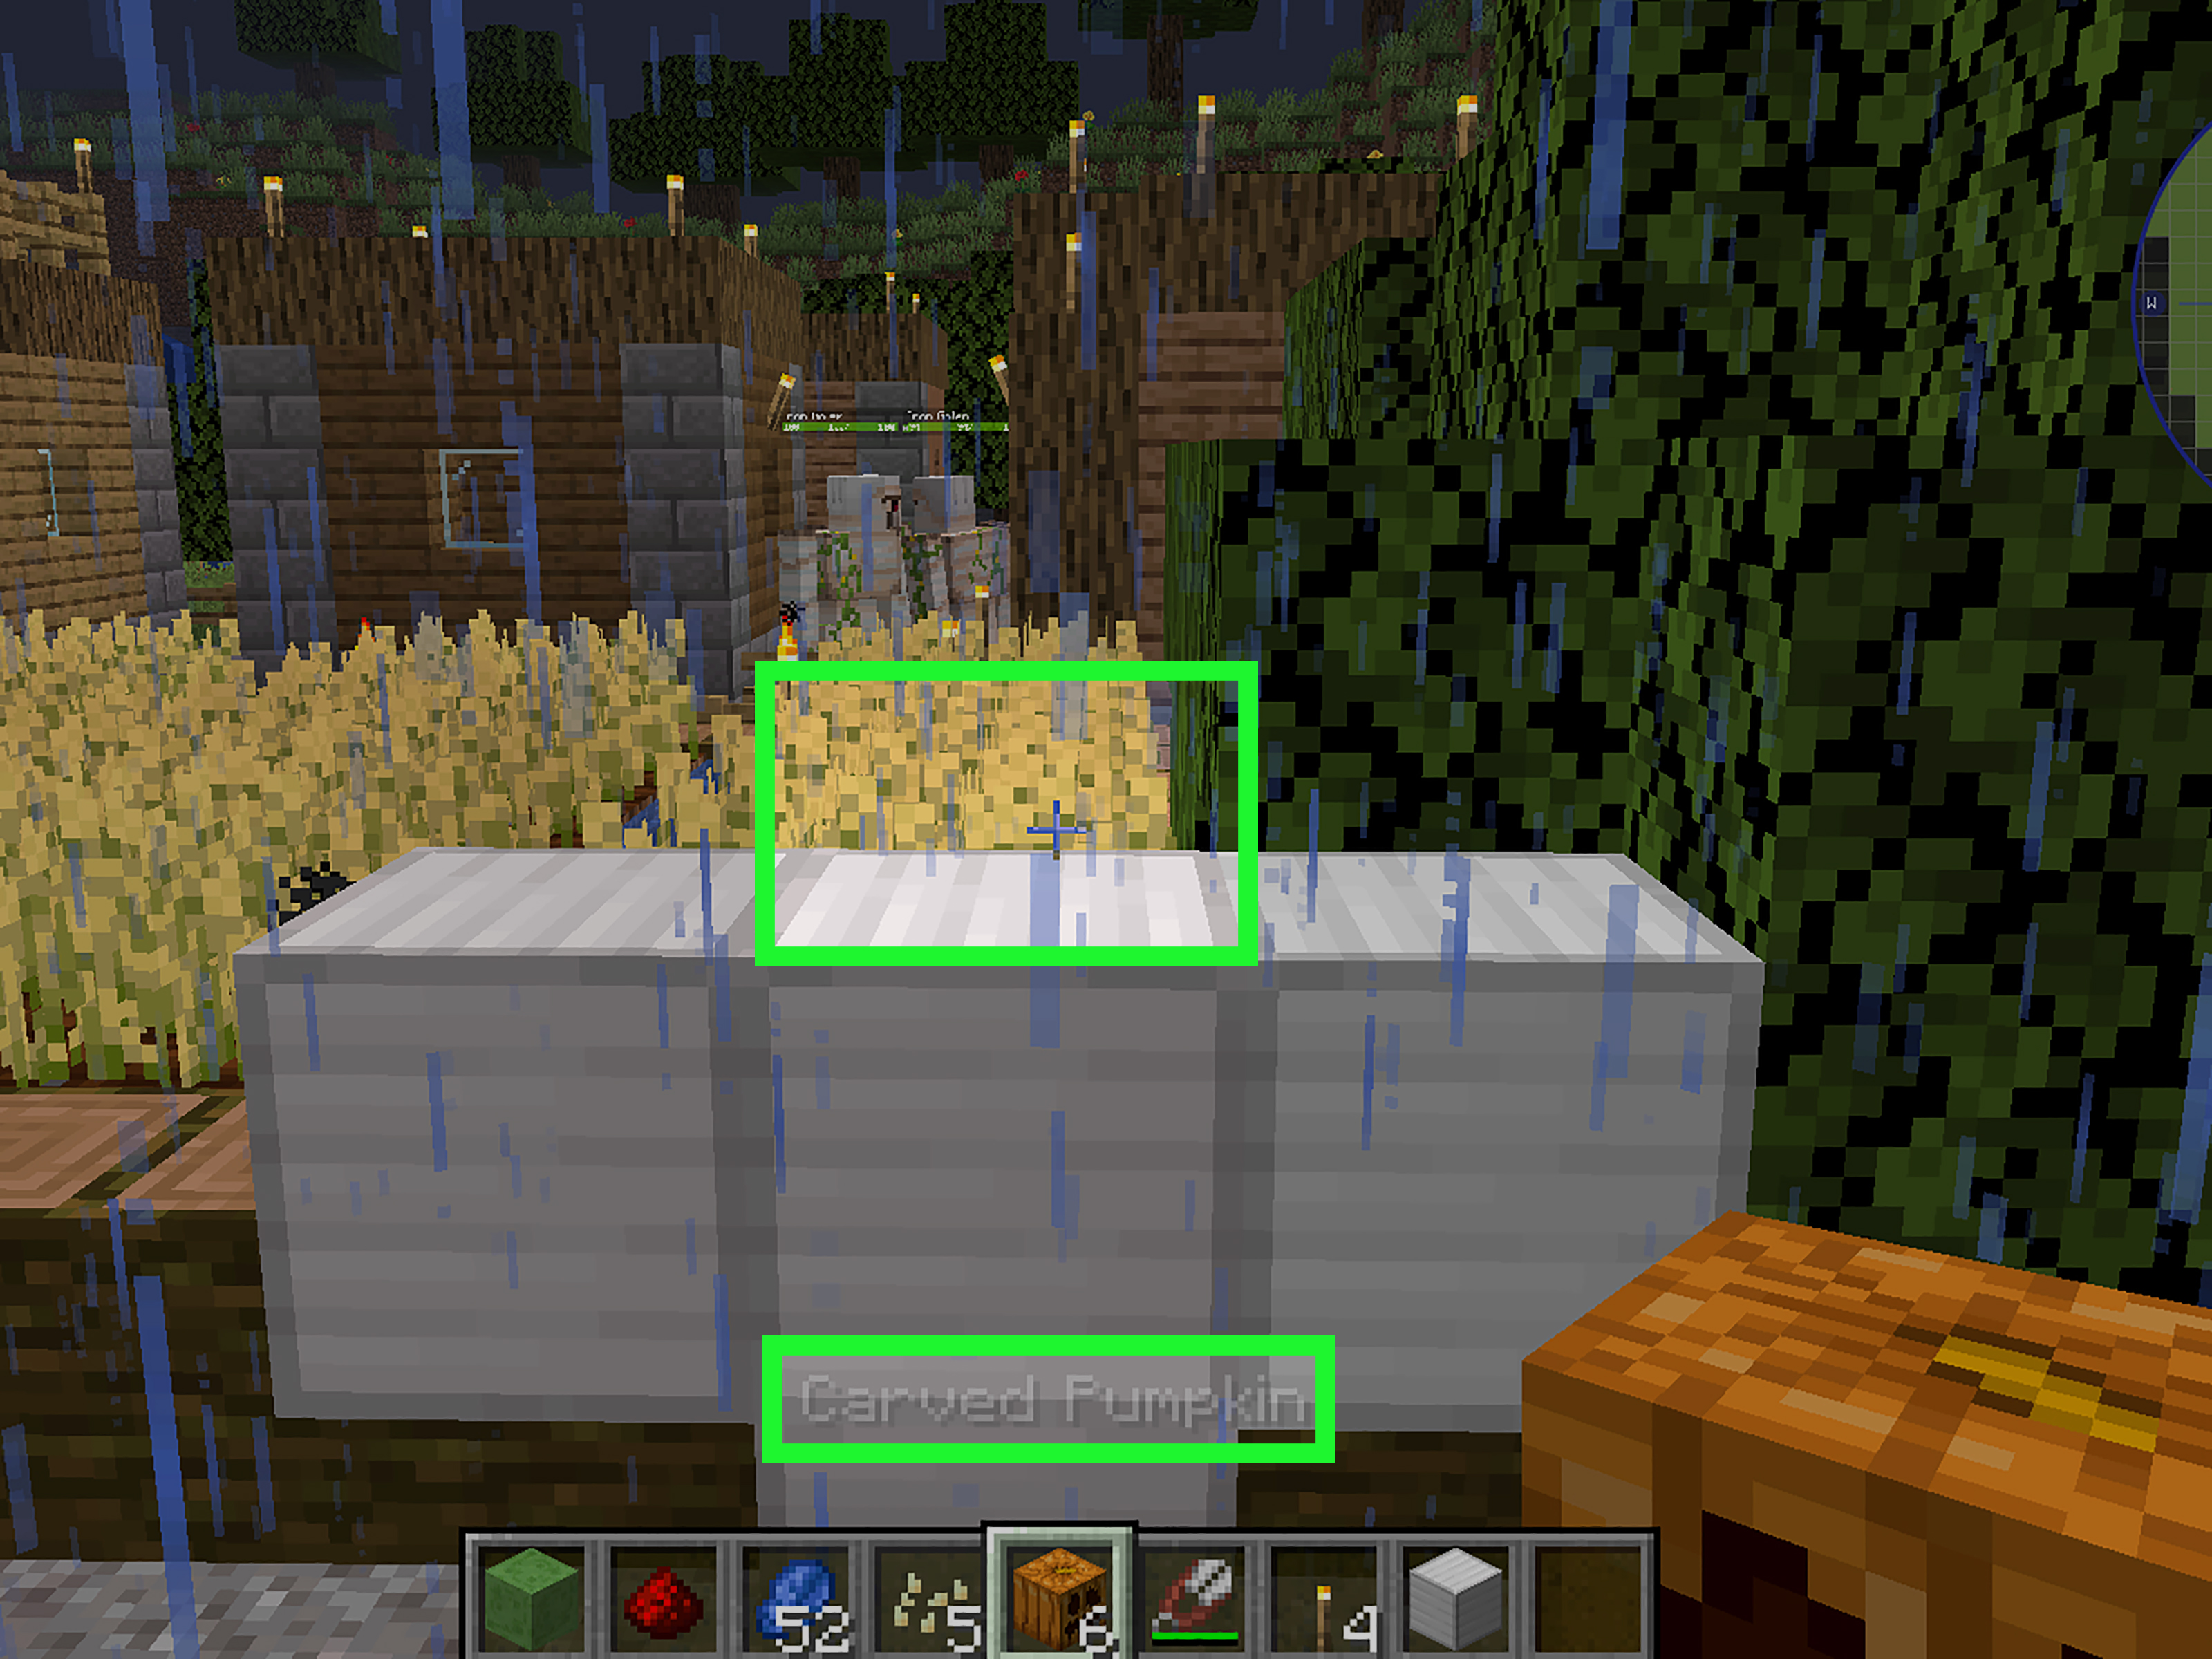
Carving a Minecraft pumpkin sounds like one of those tiny tasks that should take five seconds, right up until you are standing in a field with a pumpkin, a confused inventory, and absolutely no carved face in sight. The good news is that the easy method is genuinely easy once you know the trick: you do not craft a carved pumpkin from a regular pumpkin. You place the pumpkin, use shears on it, collect the seeds, and enjoy your brand-new blocky little masterpiece.
But because “Minecraft pumpkin” can mean two delightful things, this guide covers both: how to carve a pumpkin inside Minecraft and how to carve a real-life Minecraft-style pumpkin for Halloween, parties, gaming rooms, or that one porch on the block that refuses to do normal triangles. Whether you want a carved pumpkin for a jack o’lantern, a golem, Enderman-proof headwear, or a real pumpkin that looks like it escaped from a pixelated biome, this beginner-friendly guide keeps the process simple, safe, and fun.
What Is a Minecraft Pumpkin?
In Minecraft, a pumpkin is a naturally appearing block that can be found in grassy Overworld areas, grown from pumpkin seeds, traded for in some situations, or discovered in generated structures. A carved pumpkin is the face-bearing version of that block. It can be worn as a helmet, used to build snow golems and iron golems, and crafted into a jack o’lantern with a torch.
The important thing to remember is that the carved pumpkin is not just a decorative reskin. It has practical uses. A carved pumpkin can become a light source when turned into a jack o’lantern, serve as a mob-building ingredient, and help players look at Endermen without instantly starting an angry teleporting staring contest. That is a lot of personality for one orange cube.
How to Carve a Pumpkin in Minecraft: The Easy Method
The fastest way to carve a pumpkin in Minecraft is to use shears on a pumpkin that has already been placed in the world. This works because carving is an interaction, not a crafting-table recipe. Many beginners open the crafting grid first, stare at the pumpkin, try random item combinations, and wonder whether the game is judging them. It is not. Well, probably not.
What You Need
- One regular pumpkin
- One pair of shears
- A place to set the pumpkin down
- Optional: a torch if you want to make a jack o’lantern
To make shears in Survival mode, craft them with two iron ingots. Once you have shears, put them in your hotbar. Place your pumpkin on the ground or another valid block, select the shears, and use them on the pumpkin. The plain pumpkin will immediately become a carved pumpkin, and pumpkin seeds will pop out as a bonus. Congratulations: you have performed Minecraft surgery, and the patient is now festive.
Step-by-Step: Carving in Survival Mode
- Find or grow a pumpkin. Search grassy areas, grow one from seeds, or obtain one through exploration or trading.
- Craft shears. Use two iron ingots to make shears.
- Place the pumpkin. A pumpkin must be placed in the world before it can be carved.
- Select the shears. Hold the shears in your hand.
- Use the shears on the pumpkin. The pumpkin becomes a carved pumpkin, and seeds drop.
- Harvest it if needed. Break the carved pumpkin and pick it up for crafting, decorating, or wearing.
One small warning: once a pumpkin is carved in Minecraft, you cannot turn that exact block back into a plain pumpkin. If you need an uncarved pumpkin for decoration or farming, use another pumpkin. Minecraft is forgiving about creeper explosions, suspicious stews, and falling into ravines twice in one afternoon, but it does not offer pumpkin un-carving.
How to Make a Minecraft Jack o’Lantern
After carving a pumpkin, you can turn it into a jack o’lantern by combining a carved pumpkin with a torch in the crafting grid. The result is a glowing block that works beautifully for paths, farms, spooky builds, underwater lighting, and cozy autumn houses. Unlike a plain torch, a jack o’lantern has a blocky face, which means it can illuminate your base and silently judge your storage system at the same time.
Easy Jack o’Lantern Recipe
- One carved pumpkin
- One torch
Place the carved pumpkin and torch in the crafting area to create a jack o’lantern. This is one of the simplest recipes in the game, and it is especially useful for players who want decorative lighting that feels more intentional than “I panicked and spammed torches everywhere.”
Best Uses for a Carved Pumpkin in Minecraft
1. Wear It Around Endermen
A carved pumpkin can be equipped in the helmet slot. When worn, it limits your view with a pumpkin overlay, but it also helps prevent Endermen from becoming hostile when you look at them. This makes it handy in the End or anywhere Endermen are wandering around like tall, dramatic librarians.
2. Build Snow Golems and Iron Golems
Carved pumpkins are used as heads for snow golems and iron golems. The pumpkin is usually placed last to activate the structure. This makes carved pumpkins important for players who want defense, snow generation, or the satisfaction of creating a helpful mob that immediately develops its own agenda.
3. Decorate Builds
Carved pumpkins and jack o’lanterns fit perfectly in Halloween builds, village markets, farmhouses, autumn paths, haunted mansions, and cozy survival bases. They also work well in medieval villages, pumpkin patches, scarecrow designs, barn entrances, and fantasy forests.
4. Create Hidden Lighting
Jack o’lanterns can be hidden under carpets, leaves, trapdoors, or decorative structures depending on your build style. They are useful when you want light without ruining the atmosphere. Nobody wants a haunted castle that looks like it was decorated by a torch salesman with a quota.
How to Carve a Real-Life Minecraft Pumpkin
Now for the hands-on version: carving a real pumpkin to look like it belongs in Minecraft. This project is perfect for Halloween, gaming parties, classroom activities, family craft nights, or a front porch display that says, “Yes, we have candy, and yes, we know what redstone is.”
Supplies You Need
- A medium or large pumpkin with a stable base
- A printed Minecraft pumpkin, jack o’lantern, or creeper-face template
- Pumpkin carving kit or small serrated carving saw
- Scoop, large spoon, or ice cream scoop
- Tape
- Washable marker or pencil
- Pushpin, toothpick, or stencil poker
- Paper towels
- Battery-powered LED tea light
- Optional: petroleum jelly for cut edges
For the easiest Minecraft-style design, choose a face made from squares and rectangles. The classic blocky pumpkin face has simple eyes and a jagged mouth. A creeper face is another popular option because it is instantly recognizable and already built from geometric shapes. The simpler the template, the cleaner the final pumpkin will look.
Step-by-Step Real Pumpkin Carving Method
Step 1: Choose the Right Pumpkin
Pick a fresh pumpkin with a sturdy stem, firm skin, and a flat bottom. Avoid pumpkins with soft spots, deep bruises, or cracks. A medium-to-large pumpkin is easier for beginners because it gives you more room for square cuts. If you can find one with a slightly tall, flat front, grab it like you just found diamonds.
Step 2: Clean the Outside
Wipe the pumpkin with a damp cloth to remove dirt. Dry it well before carving. A clean, dry surface makes it easier to tape on a stencil, draw guide marks, and keep your hands from slipping while you work.
Step 3: Cut from the Bottom
Instead of cutting a lid around the stem, cut a circular or square opening in the bottom of the pumpkin. This keeps the stem intact, helps the pumpkin hold its shape, and makes lighting easier because you can simply set the pumpkin over an LED candle. It also avoids the classic “lid fell into the pumpkin” problem, which is the craft-world equivalent of stepping on a pressure plate in a desert temple.
Step 4: Scoop Out the Inside
Remove the seeds and stringy pulp with a scoop or sturdy spoon. Scrape the inner wall behind the design area until it is thinner and easier to cut. For most pumpkins, a wall thickness of about one inch to one and a quarter inches works well. Too thick, and the carving tool struggles. Too thin, and your square design may become pumpkin confetti.
Step 5: Attach the Minecraft Template
Tape your printed design to the front of the pumpkin. If the paper wrinkles, cut small slits around the edges so it can curve around the pumpkin more smoothly. Use a pushpin or stencil tool to poke small holes along the outline of the design. Remove the paper, and you will have a dotted guide to follow.
Step 6: Carve the Smallest Areas First
Start with the smallest interior cuts, then move to larger sections. For a Minecraft pumpkin, keep the cuts straight and deliberate. Use short sawing motions instead of forcing the blade through the wall. Square corners are easier when you cut one side at a time and gently pop the piece out after the whole shape is outlined.
Step 7: Clean the Edges
Once the main pieces are removed, tidy up the edges with your carving saw or a small scraping tool. Minecraft designs look best when the lines are crisp. If a corner breaks, do not panic. Toothpicks can pin a loose piece back into place, and from the sidewalk at night, nobody will know your pumpkin briefly experienced structural drama.
Step 8: Light It Safely
Use a battery-powered LED tea light or small LED puck light instead of a real candle. LED lights are safer, cooler, and better for preserving the pumpkin. They also make it easy to turn your Minecraft pumpkin on and off without reaching into a slimy orange cave.
Easy Minecraft Pumpkin Face Ideas
Classic Minecraft Jack o’Lantern Face
This is the best beginner design. Use two square eyes and a blocky mouth with stepped edges. Keep the mouth wide enough so the pumpkin does not collapse between thin cuts. The result looks game-accurate and charmingly spooky.
Creeper Pumpkin
A creeper face is a crowd favorite. Use two tall rectangular eyes and the famous long, pixelated mouth. For a dramatic display, place a green LED light inside or set the pumpkin near green decorations. Just do not let it sneak up behind anyone. The emotional damage is real.
Enderman-Inspired Pumpkin
For an Enderman look, carve two narrow horizontal eyes and leave the rest of the pumpkin mostly solid. A purple LED light makes the design pop. This is one of the easiest Minecraft pumpkin carving ideas because it requires fewer cuts.
Pixel Smile Pumpkin
For younger kids, try a friendly pixel smile. Adults can handle the cutting while children draw the design, scoop seeds, choose lights, and name the pumpkin something important like “Sir Squashington.”
Safety Tips for Minecraft Pumpkin Carving
Pumpkin carving should be fun, not a side quest to urgent care. Use tools designed for pumpkin carving instead of large kitchen knives. Pumpkin saws are smaller, easier to control, and usually safer for detailed designs. Keep hands and tools dry, carve slowly, and always cut away from your body.
Children can help by choosing the design, taping the stencil, poking guide holes with supervision, scooping seeds, and placing the LED light. Adults or older teens should handle the actual cutting. If you are working with very young kids, consider painting a Minecraft face instead of carving it. A painted creeper pumpkin still looks fantastic and has a much lower “oops” rating.
How to Make Your Minecraft Pumpkin Last Longer
Carved pumpkins naturally dry out, soften, and collapse over time. To help your Minecraft pumpkin stay fresh, carve it close to the day you plan to display it. Keep it in a cool, shaded spot, and bring it indoors or refrigerate it overnight if your weather is warm.
After carving, pat the inside dry with paper towels. Moisture encourages mold, and mold is not the aesthetic unless your theme is “abandoned swamp biome.” You can also apply a thin layer of petroleum jelly to the carved edges to help seal in moisture. Avoid real candles because heat can dry the pumpkin faster. LED lights are safer and gentler.
Common Mistakes to Avoid
Making the Design Too Small
Tiny pixel squares may look accurate on paper, but they are difficult to cut into pumpkin skin. Make the design large enough that every cut has room to breathe.
Leaving Too Much Pulp Inside
Stringy pulp blocks light and makes carving messier. Scrape the inside until the front wall is smooth and manageable.
Using a Dull or Oversized Knife
A big kitchen knife is hard to control and can slip. Use a carving kit or small serrated pumpkin saw for safer, cleaner cuts.
Carving Too Early
A carved pumpkin looks best during its first few days. If you carve it a week before Halloween, it may look less like Minecraft and more like a retired slime block.
Extra Experience Notes: What Actually Makes This Project Easier
The best real-world Minecraft pumpkin projects usually succeed because the design stays bold. The first instinct is often to copy the game texture exactly, pixel for pixel, but pumpkins are not computer screens. They are round, uneven, moist, and occasionally determined to humble you. A slightly simplified design almost always looks better than a tiny complicated one. Two square eyes and one chunky mouth can look more “Minecraft” than a detailed face with fragile bridges and narrow corners.
One useful trick is to draw the face on graph paper before printing or tracing it. Each square on the paper can become one “pixel,” which keeps the design balanced. For example, a creeper face might use two vertical rectangles for the eyes, a central rectangle for the upper mouth, and two lower blocks for the frown. When transferred to a pumpkin, that layout stays readable from across the yard. Remember, most people will see your pumpkin from several feet away, not with a jeweler’s loupe and a pumpkin-scoring clipboard.
Another lesson: cut the bottom opening large enough for your hand and scoop. Beginners often make the access hole too small, then spend fifteen minutes trying to scrape pumpkin strings through an opening the size of a teacup. A wider bottom cut makes cleaning easier and lets the pumpkin sit neatly over a light. It also preserves the top stem, which helps the whole pumpkin look fresher and more complete.
Lighting changes everything. A design that looks plain in daylight can become fantastic at night with the right LED. Warm white gives the classic jack o’lantern glow. Green works beautifully for creepers. Purple gives Enderman energy. A small puck light is brighter than a tea light and works well for larger pumpkins. If the face is not glowing evenly, scrape the inside wall behind the design a little thinner, but do it gently. The goal is “brighter pumpkin,” not “accidental window.”
If part of the design breaks, do not throw the pumpkin into the compost bin in despair. Toothpicks are excellent repair tools. Insert a toothpick halfway into the broken piece, line it back up, and push the other half into the pumpkin wall. At night, the repair usually disappears. You can also use broken cutouts creatively as eyebrows, teeth, or blocky accessories.
For families, the smoothest experience is to divide the job. Kids choose the Minecraft mob, draw the face, scoop seeds, and decide where the pumpkin goes. Adults handle the sharp tools. Teens can help with stencil transfer and edge cleanup. Put seeds in a bowl for roasting later, keep paper towels nearby, and accept that pumpkin carving is messy. That mess is part of the charm. A perfect pumpkin is nice, but a funny, slightly crooked Minecraft pumpkin with a good story behind it is even better.
Final Thoughts
Learning how to carve a Minecraft pumpkin is easy once you understand the method. In the game, place a pumpkin and use shears to turn it into a carved pumpkin. Add a torch in the crafting grid, and you have a jack o’lantern ready for lighting builds, decorating farms, or creating spooky seasonal scenes. In real life, choose a sturdy pumpkin, use a simple blocky stencil, cut from the bottom, scoop thoroughly, carve slowly, and light it with an LED.
The magic of a Minecraft pumpkin is that it is simple but instantly recognizable. It does not need fancy curves, professional tools, or museum-level pumpkin artistry. It just needs clean squares, safe carving, and a little blocky imagination. Whether your final pumpkin becomes a porch decoration, a gaming-party centerpiece, or a glowing tribute to your favorite sandbox world, it should make people smile. And if it looks slightly goofy? Perfect. That is basically the official language of pumpkins.













