
A fuse is tiny, humble, and easy to ignoreright up until your lamp goes dark, your car radio gives you the silent treatment, or your air conditioner decides it has entered retirement. The good news? Learning how to check fuses is one of the most useful troubleshooting skills a homeowner, driver, or DIY beginner can learn. It is simple, affordable, and, when done safely, can save you from replacing perfectly good devices.
A fuse is a safety device designed to protect a circuit from too much electrical current. When the current gets too high, the fuse “blows,” meaning the internal metal strip melts and opens the circuit. That stops electricity from flowing before wires overheat, parts burn out, or something much worse happens. In other words, a blown fuse is not just an inconvenienceit is a little electrical bodyguard that threw itself in front of trouble.
This guide explains how to check fuses in a home fuse box, car fuse panel, appliance, holiday light plug, HVAC disconnect, and small electronics. You will learn how to inspect a fuse visually, test it with a multimeter, understand the readings, replace it correctly, and recognize when the problem is bigger than the fuse.
What Is a Fuse and Why Does It Blow?
A fuse is a protective component placed inside an electrical circuit. It contains a metal element sized to carry a safe amount of current. If the circuit pulls too many amps, that element heats up and melts. Once it melts, the circuit opens and power stops flowing.
Fuses blow for several common reasons. A circuit may be overloaded because too many devices are plugged in at once. A short circuit may allow electricity to take an unintended path. An appliance may have an internal fault. A car accessory may have damaged wiring. Sometimes a surge, moisture, corrosion, loose connection, or aging component is the culprit.
The key point is this: a blown fuse is a symptom, not always the whole problem. Replacing one fuse that failed after years of service is normal. Replacing the same fuse every Saturday like it is part of your weekend routine is not normal. That is the electrical system raising its hand and saying, “Excuse me, we need to talk.”
Tools You Need to Check Fuses
You do not need a truck full of professional tools to check most fuses. For basic troubleshooting, gather the following:
- A digital multimeter with continuity or resistance mode
- A fuse puller or needle-nose pliers for automotive blade fuses
- A flashlight
- Safety glasses
- Insulated gloves when appropriate
- Replacement fuses with the exact same amp rating, voltage rating, and type
- The owner’s manual, fuse box diagram, or appliance service guide
A multimeter is the most reliable tool for checking a fuse. A visual inspection can help, but it is not perfect. Some blown fuses look obviously damaged, while others appear innocent enough to be running for mayor. A continuity test removes the guesswork.
Safety First: Before You Touch Any Fuse
Before checking fuses, disconnect power whenever possible. For a small appliance, unplug it. For holiday lights, pull the plug from the outlet. For a car fuse, turn the ignition off and remove the key. For certain automotive work, disconnecting the negative battery terminal may be wise, especially if you are working near sensitive electronics.
For a home fuse box or HVAC disconnect, take extra care. Do not touch exposed metal parts. Do not remove panel covers that expose live wiring unless you are qualified. If you see burn marks, melted insulation, buzzing, warmth, smoke, corrosion, or signs of water intrusion, stop and call a licensed electrician or qualified technician.
Never replace a fuse with a higher-amp fuse. If a 15-amp fuse blows, installing a 20-amp or 30-amp fuse does not “upgrade” the circuit. It removes an important safety limit and may allow wiring to overheat. That is not a repair; that is a bad idea wearing a tiny metal hat.
How to Check Fuses Visually
Visual inspection is the fastest first step. It works especially well with glass tube fuses, plug fuses, and many automotive blade fuses.
Step 1: Remove Power
Make sure the circuit or device is off. Unplug appliances, switch off the circuit, or turn off the vehicle. Do not inspect or remove fuses from live equipment unless the design specifically allows safe access and you know what you are doing.
Step 2: Remove the Fuse Carefully
Use a fuse puller, the puller built into many car fuse boxes, or needle-nose pliers. Pull straight out when possible. Avoid twisting blade fuses aggressively because you can loosen the fuse socket.
Step 3: Look for Damage
For a glass fuse, look through the tube. A good fuse usually has an unbroken metal strip. A blown fuse may show a broken strip, darkened glass, cloudy residue, or a metallic smear inside. For a blade fuse, look through the colored plastic body. If the U-shaped metal bridge inside is broken, the fuse is bad.
Step 4: Inspect the Fuse Holder
Do not stop at the fuse. Check the fuse socket or holder for corrosion, looseness, melted plastic, discoloration, or a burned smell. A new fuse may fail quickly if the holder itself is damaged.
Visual inspection is helpful, but it should not be your only test. If the fuse looks questionableor if the circuit still does not workuse a multimeter.
How to Check a Fuse With a Multimeter
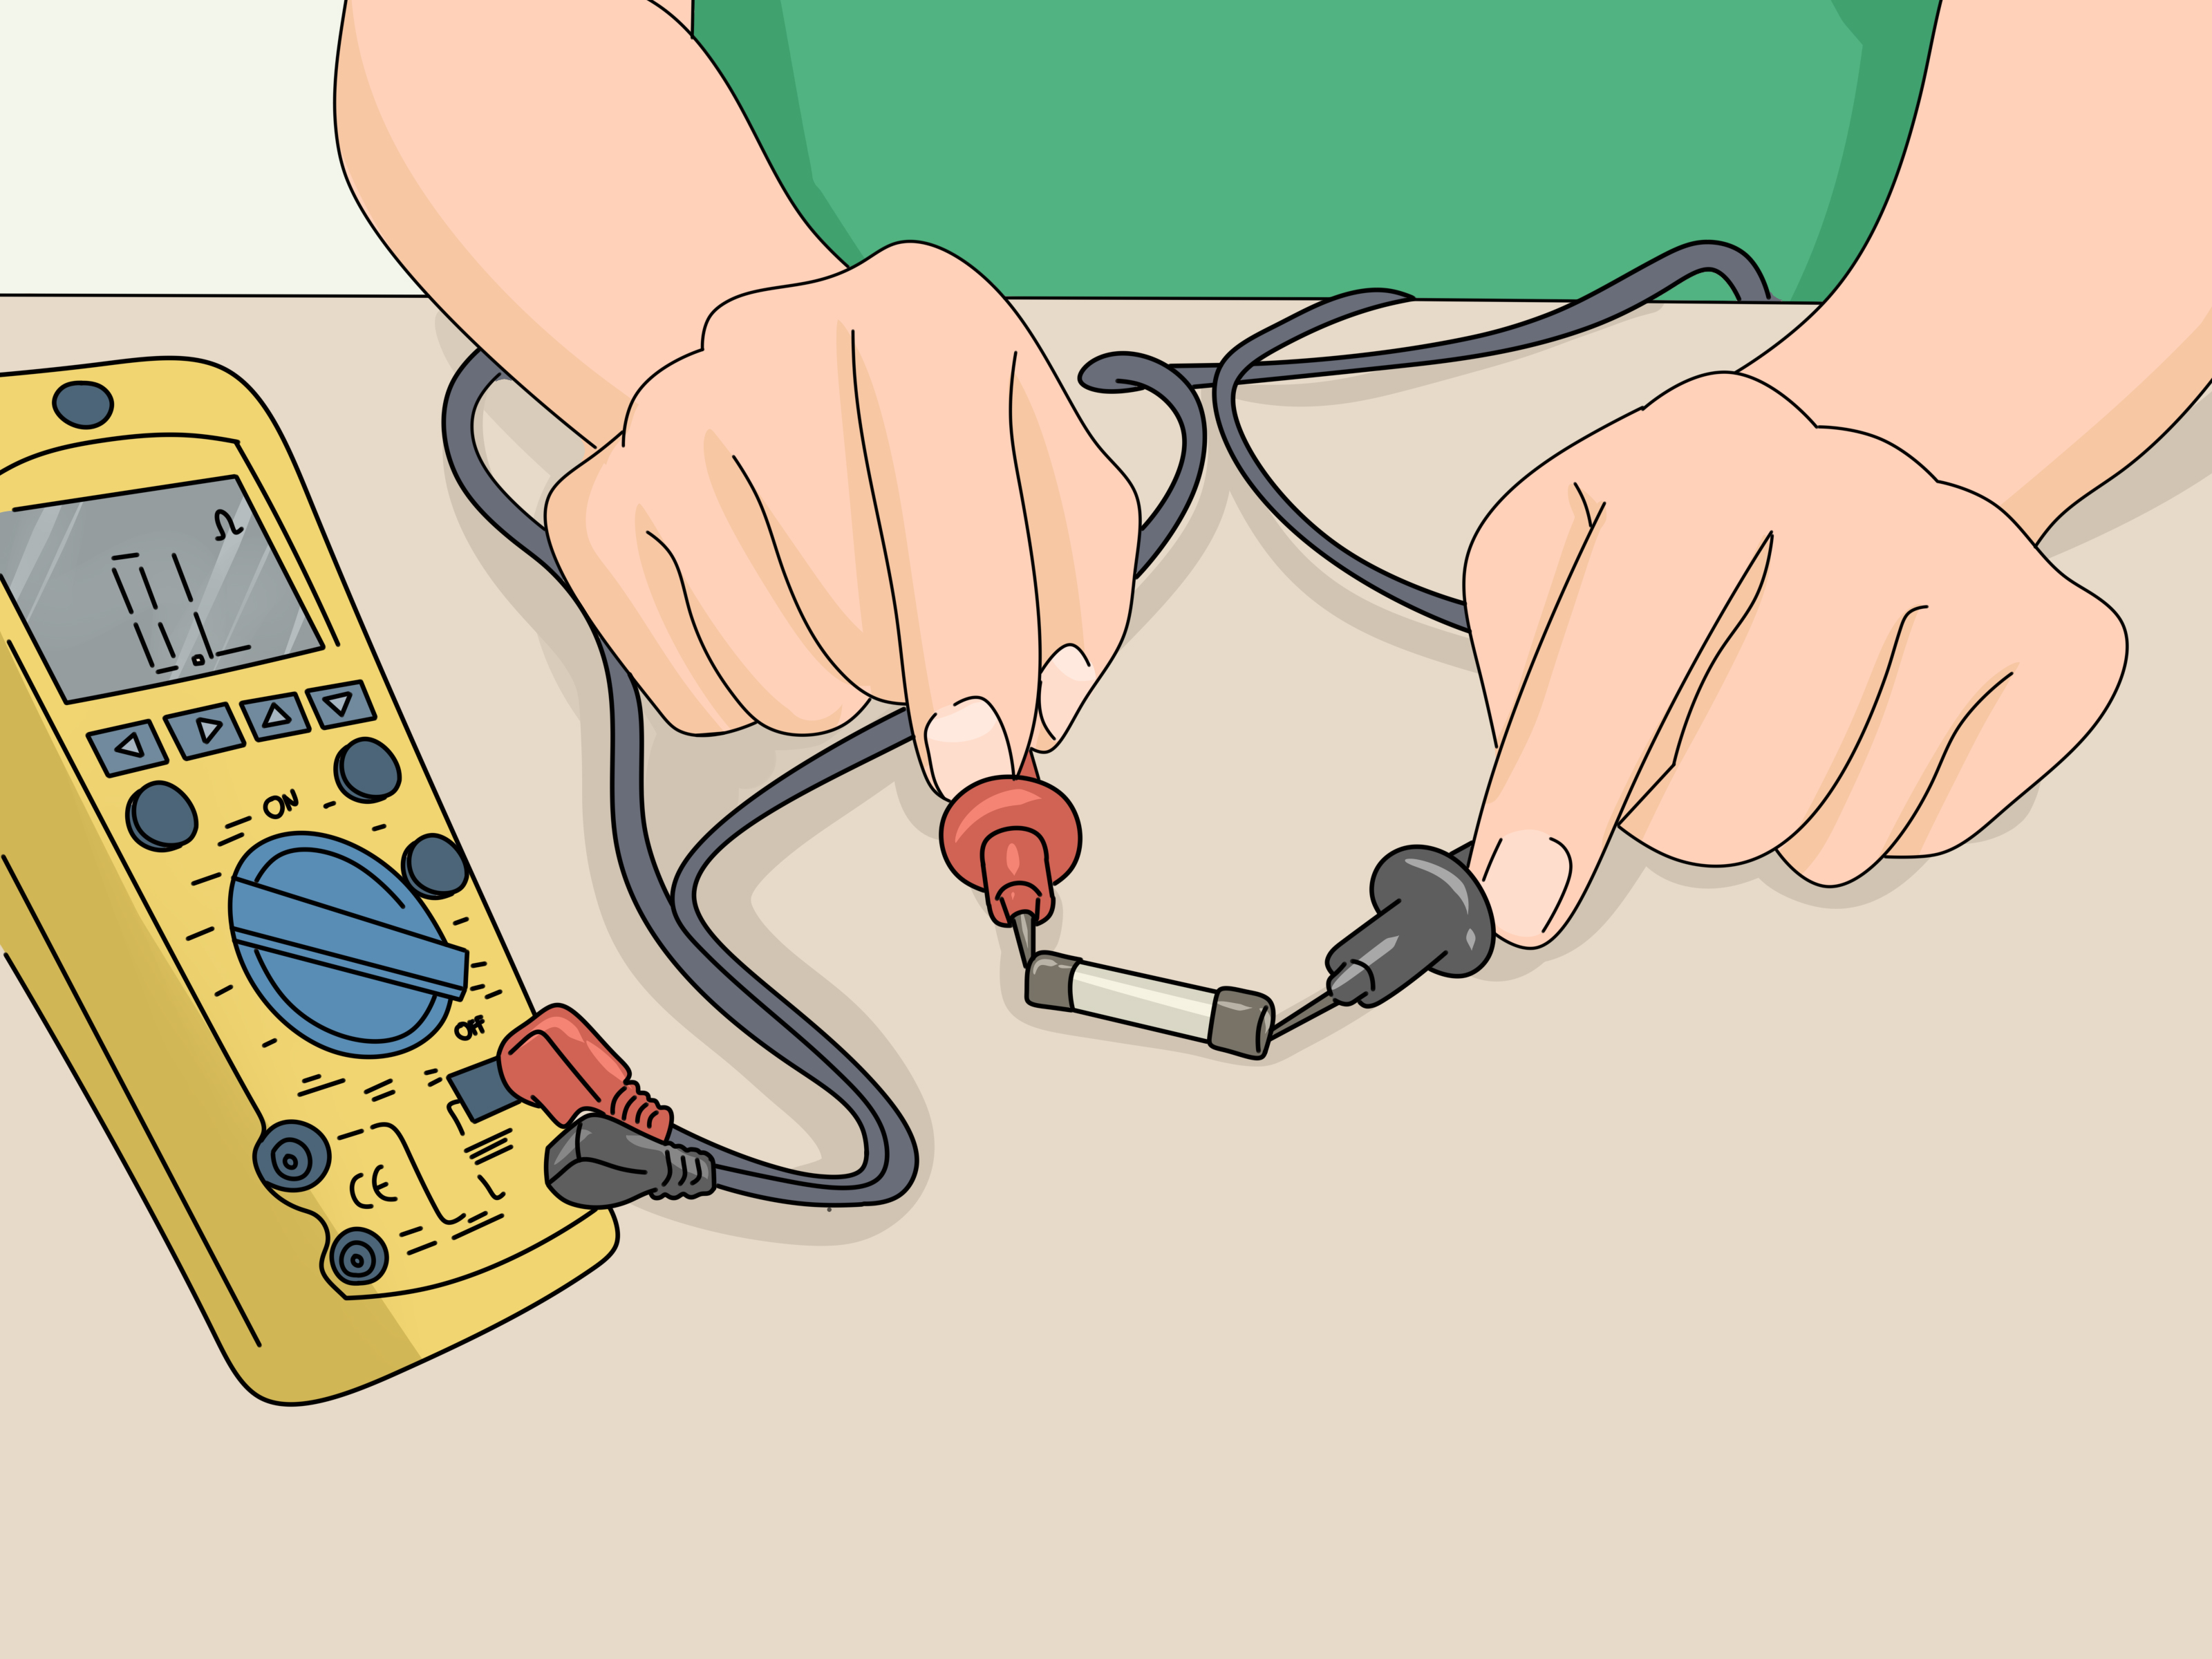
A multimeter can test whether electricity can pass through the fuse. This is called a continuity test. A good fuse has continuity. A blown fuse does not.
Step 1: Set the Multimeter
Turn the multimeter dial to continuity mode. The symbol often looks like a sound wave or sideways Wi-Fi icon. If your meter does not have continuity mode, set it to resistance, also called ohms. The ohm symbol looks like Ω.
Step 2: Test the Meter
Touch the two multimeter probes together. In continuity mode, the meter should beep. In resistance mode, it should show a very low reading, often close to 0 ohms. This confirms the meter and probes are working.
Step 3: Touch the Fuse Ends
Place one probe on one metal end of the fuse and the second probe on the other end. For a blade fuse, touch the two exposed metal tabs or test points. For a glass tube fuse, touch the metal caps at each end.
Step 4: Read the Result
If the meter beeps, the fuse is good. If the resistance reading is close to zero, the fuse is good. If the meter shows OL, open loop, infinite resistance, or does not beep, the fuse is blown.
Step 5: Confirm the Rating
Before replacing a fuse, read the marking on the fuse body. Match the amperage, voltage, speed, size, and type. For example, do not replace a time-delay fuse with a fast-acting fuse unless the manufacturer allows it. The fuse is not a random accessory; it is a carefully chosen safety part.
How to Check Fuses in a Home Fuse Box
Older homes may have screw-in plug fuses instead of circuit breakers. These fuses protect branch circuits for lights, outlets, and appliances. If part of your home suddenly loses power, a blown fuse may be the cause.
Step 1: Identify the Affected Area
Find out which lights, outlets, or appliances stopped working. Unplug devices on that circuit before replacing the fuse. This reduces the chance of immediately blowing the replacement.
Step 2: Open the Fuse Box Door
Stand on a dry surface, use a flashlight, and avoid touching anything except the fuse handle or insulated parts. If the panel looks damaged, hot, smoky, or wet, do not continue.
Step 3: Find the Blown Fuse
Some plug fuses have a small window. A blown fuse may appear dark, cloudy, or broken inside. Cartridge fuses may need to be removed and checked with a multimeter.
Step 4: Replace With the Same Rating
If the fuse is bad, replace it only with the same amp rating and type. Common household plug fuses may be 15, 20, or 30 amps, but the correct size depends on the circuit wiring. Bigger is not better. Bigger can be dangerous.
Step 5: Restore Power and Watch
After installing the correct fuse, restore power. If the fuse blows again right away, stop replacing it. The circuit may be overloaded, shorted, or connected to a faulty appliance. Call a professional.
How to Check Car Fuses
Car fuses protect electrical systems such as headlights, power windows, radios, interior lights, windshield wipers, and charging ports. Most modern vehicles use blade-style fuses in one or more fuse boxes.
Step 1: Locate the Fuse Box
Check the owner’s manual. Many vehicles have one fuse panel under the dashboard and another under the hood. The fuse box cover usually includes a diagram showing which fuse controls each system.
Step 2: Turn the Vehicle Off
Switch off the ignition and accessories. For sensitive circuits, follow the vehicle manual before removing fuses. Some systems, including airbags, require extra caution.
Step 3: Pull the Suspect Fuse
Use a fuse puller or needle-nose pliers. Hold the plastic body, not the metal contacts.
Step 4: Inspect or Test
Look through the plastic body. If the metal bridge is broken, the fuse is blown. To be certain, test the fuse with a multimeter in continuity mode. A beep means the fuse is good. No beep means it is bad.
Step 5: Replace Correctly
Use the same amperage and fuse style: mini, low-profile mini, standard blade, micro, maxi, or another exact match. Automotive fuses are color-coded by amperage, but always confirm the number printed on the top.
If a car fuse blows repeatedly, do not keep feeding it replacements like snacks. A repeated failure may point to a shorted wire, bad motor, failing relay, water intrusion, or aftermarket accessory problem.
How to Check Appliance Fuses
Many appliances contain internal fuses or thermal fuses. Dryers, microwaves, dishwashers, coffee makers, power supplies, and electronics may all use fuses to stop current during a fault or overheating event.
First, unplug the appliance. Then check the manual or service diagram for the fuse location. Some fuses are easy to access; others require removing panels. If the appliance contains high-voltage components, such as a microwave capacitor, do not attempt repair unless you are trained. Microwaves can store dangerous voltage even after being unplugged.
Once the fuse is accessible and removed, test it with a multimeter in continuity mode. A good fuse beeps. A blown fuse does not. Replace it only with the exact type and rating specified by the manufacturer.
How to Check Fuses in Christmas Lights and Small Electronics
Holiday light strings often include tiny fuses inside the plug. If the whole string goes dark, unplug it and slide open the small fuse compartment on the male plug. Remove the fuses with a small screwdriver, inspect them, and test with a multimeter if needed.
Replace the tiny glass fuses only with the rating specified on the plug or package. If the lights still do not work after replacing the fuses, the problem may be a broken wire, loose bulb, damaged socket, or corroded plug. At that point, it may be time to retire the string and let it enjoy a peaceful afterlife in the garage.
Good Fuse vs. Blown Fuse: What the Results Mean
A good fuse allows current to pass. On a multimeter, that means continuity, a beep, or a resistance reading close to zero. A blown fuse creates an open circuit. On a multimeter, that means no beep, OL, or infinite resistance.
If the fuse tests good but the device still does not work, the fuse is not the problem. Check the power source, switch, outlet, relay, wiring, battery, breaker, connector, or the device itself. A fuse is only one link in the electrical chain.
Common Mistakes to Avoid When Checking Fuses
Using the Wrong Replacement Fuse
The most dangerous mistake is installing a fuse with a higher amp rating. This may stop the fuse from blowing, but it can allow wires or components to overheat. Always match the rating.
Assuming a Fuse Is Good Because It Looks Fine
Some fuses fail in ways that are hard to see. A multimeter test is quick, simple, and far more reliable than squinting at a tiny strip of metal like you are reading ancient runes.
Ignoring Repeated Failures
If the same fuse keeps blowing, the fuse is doing its job. The real problem may be an overloaded circuit, damaged wire, failing appliance, moisture, or a short.
Testing on a Live Circuit Without Knowing the Risk
Continuity and resistance tests should be performed on de-energized components. Testing continuity on a live circuit can damage the meter and create a safety hazard.
Forgetting the Fuse Holder
A corroded or loose fuse holder can mimic a bad fuse. Always inspect the contacts and surrounding area.
When to Call a Professional
Call a licensed electrician, mechanic, HVAC technician, or appliance repair professional if you see burning smells, melted plastic, warm outlets, buzzing panels, sparks, water damage, repeated blown fuses, or signs of damaged wiring. Also call a pro if you are dealing with a main service panel, high-voltage appliance, HVAC equipment, or any system you do not fully understand.
DIY troubleshooting is useful, but electricity does not award bonus points for confidence. If something feels wrong, stop. The smartest repair is often knowing when not to continue.
Quick Troubleshooting Examples
Example 1: A Bedroom Outlet Stops Working
First, test another device in the outlet. If nothing works, check nearby GFCI outlets and the fuse box. If a fuse is blown, unplug devices from that room before replacing it with the same amp rating. If it blows again, call an electrician.
Example 2: A Car Radio Suddenly Dies
Find the radio fuse using the vehicle manual. Pull the fuse, inspect the metal bridge, and test with a multimeter. If the fuse is blown, replace it with the same amperage. If the new fuse blows, the radio circuit may have a short or faulty component.
Example 3: A Dryer Runs but Does Not Heat
A thermal fuse, heating element, thermostat, or power supply issue may be involved. Unplug the dryer before checking anything. If you can access the thermal fuse safely, test it for continuity. If the fuse is blown, investigate airflow problems such as clogged vents, because the fuse may have opened due to overheating.
Experience-Based Lessons About Checking Fuses
One of the most useful lessons about checking fuses is that the fuse is rarely the villain. It is usually the messenger. Many people discover this the funny way: they replace a fuse, celebrate for three seconds, and then watch the new one blow immediately. That tiny pop is the circuit saying, “Nice try, detective.”
In real-world troubleshooting, the best approach is to slow down and follow the chain. Start with the simplest question: what stopped working? Then ask what else is on the same circuit. If a room lost power after a space heater, gaming computer, and hair dryer were all running, the fuse probably blew because the circuit was overloaded. If a car fuse blows every time you turn on the wipers, the problem may be in the wiper motor, wiring, or switch. If an appliance fuse fails after overheating, the cause may be blocked airflow, a stuck motor, or a failed internal component.
Another practical lesson is to label everything. A labeled home fuse box is a gift to your future self. So is keeping a small fuse kit in the garage, a fuse puller in the car, and a basic digital multimeter in the toolbox. When something quits working at the worst possible momentand electrical problems have a suspicious talent for choosing the worst possible momentyou will not have to wander around flipping switches and whispering negotiations to the universe.
It also helps to treat fuse ratings with respect. A fuse is not chosen at random. Its amp rating is matched to the circuit or device it protects. Using a higher-rated fuse because it is “close enough” is like putting a larger cork in a pressure cooker and hoping physics is in a forgiving mood. The correct fuse should be the same amperage, voltage, size, speed, and type recommended by the manufacturer or circuit design.
Visual checks are useful, but the multimeter is the grown-up in the room. A fuse can look fine and still be open. A continuity test takes only a few seconds and gives a clear answer. Once you get comfortable using a multimeter, checking fuses becomes less mysterious. Touch the probes to each end, listen for the beep, and read the display. Beep means the path is complete. No beep means the fuse has opened.
The final experience-based tip is to respect patterns. One blown fuse after years of normal use may simply be a failed fuse. Two or three blown fuses on the same circuit are a clue. Repeated failure means something is drawing too much current or creating a fault. At that point, replacing fuses is not repairit is postponement. Whether the issue is in a home, vehicle, HVAC unit, or appliance, repeated blown fuses deserve a deeper inspection.
Checking fuses is a small skill with a big payoff. It can help you restore power, diagnose a device, avoid unnecessary replacements, and speak more clearly with a professional when you need one. Best of all, it turns one of electricity’s most annoying mysteries into a simple process: power off, remove, inspect, test, replace correctly, and investigate the cause.
Conclusion
Knowing how to check fuses is practical, affordable, and surprisingly empowering. Whether you are troubleshooting a dead outlet, silent car radio, dark holiday lights, or stubborn appliance, the process is usually the same: disconnect power, remove the fuse safely, inspect it, test it with a multimeter, and replace it only with an exact match.
The most important rule is simple: never oversize a fuse. A fuse protects wiring and equipment from overheating. If it keeps blowing, do not blame the fuse. Look for the overload, short, faulty appliance, damaged wiring, or failing component behind the problem. When in doubt, bring in a qualified professional. Electricity is useful, but it has terrible manners when handled carelessly.
With a basic multimeter, a little patience, and the right safety habits, you can check fuses confidently and avoid turning a small electrical problem into a big expensive drama. And honestly, life already has enough drama. Your fuse box does not need to audition.














