
If your bike has started sounding like a coffee grinder filled with gravel, congratulations: your chain is asking for attention. The good news is that cleaning a bicycle chain is not mysterious, expensive, or reserved for pro mechanics with hands permanently stained black. It is one of the most useful bike maintenance habits you can learn, and it pays you back with smoother shifting, less drivetrain wear, fewer squeaks, and a bike that feels noticeably happier on the road or trail.
A dirty chain is not just ugly. It also becomes a gritty paste factory, mixing old lubricant with dust, road grime, sand, and moisture. That muck works its way into the rollers and links, speeds up wear on the cassette and chainrings, and can make every ride feel slightly worse than it should. Clean the chain regularly, though, and your whole drivetrain lasts longer. That means better performance now and fewer painful bike-shop bills later.
This guide walks you through exactly how to clean a bicycle chain in 12 practical steps. You do not need fancy tools, though a chain-cleaning device can make the job faster and less messy. You also do not need to turn the task into a sacred ceremony involving twelve solvents and a moon phase chart. Just follow the steps, be thorough, and remember one golden rule: a clean chain still needs lube. A squeaky “clean” chain is just a sad chain in a tuxedo.
Why Chain Cleaning Matters
Your bike chain is the hardworking middle manager of the drivetrain. It transfers your pedaling power to the rear wheel, deals with weather, road spray, trail grit, and whatever mystery crumbs ended up on your garage floor, and still gets blamed whenever shifting feels weird. Keeping it clean reduces friction, improves efficiency, and helps your bike shift more crisply. It also gives you a chance to spot problems early, such as rust, stiff links, or wear that suggests the chain may be ready for replacement.
In other words, cleaning your bike chain is not cosmetic. It is preventive maintenance. Think of it as flossing, but for people who own helmets.
What You Need Before You Start
- Bike-specific degreaser
- Clean rags or shop towels
- A stiff brush, old toothbrush, or drivetrain brush
- Optional: chain-cleaning tool
- Warm water and mild soap, if your product directions allow a rinse
- Chain lubricant suitable for your riding conditions
- Gloves, if you prefer not to look like you fought a chimney
How to Clean a Bicycle Chain: 12 Steps
Step 1: Set up your bike and your workspace
Put the bike in a repair stand if you have one. If not, lean it securely against a wall or flip it carefully if your bike allows that without damaging accessories. Work somewhere ventilated and easy to wipe down, because chain grime has a special talent for migrating onto things you love. Lay down cardboard or an old towel under the drivetrain to catch drips.
Step 2: Shift into a good cleaning position
Shift the chain onto the smallest rear cog and a middle or small front chainring. This gives you better access to the chain and makes it easier to backpedal while cleaning. It also keeps the chain line straighter, which makes brushing and wiping less awkward. Small setup detail, big “why is this suddenly easier?” payoff.
Step 3: Wipe off the loose grime first
Before you reach for degreaser, grab a dry rag and wrap it lightly around the lower section of chain. Backpedal several rotations. This removes the surface dirt, old oily film, and loose grit that would otherwise turn into instant black soup. If your chain is only mildly dirty, this simple wipe-down may remove more grime than you expect.
This first pass matters because it keeps you from smearing the mess deeper into the links. Think of it as sweeping before mopping, except the floor is metal and your mop is your hand.
Step 4: Apply degreaser to the chain
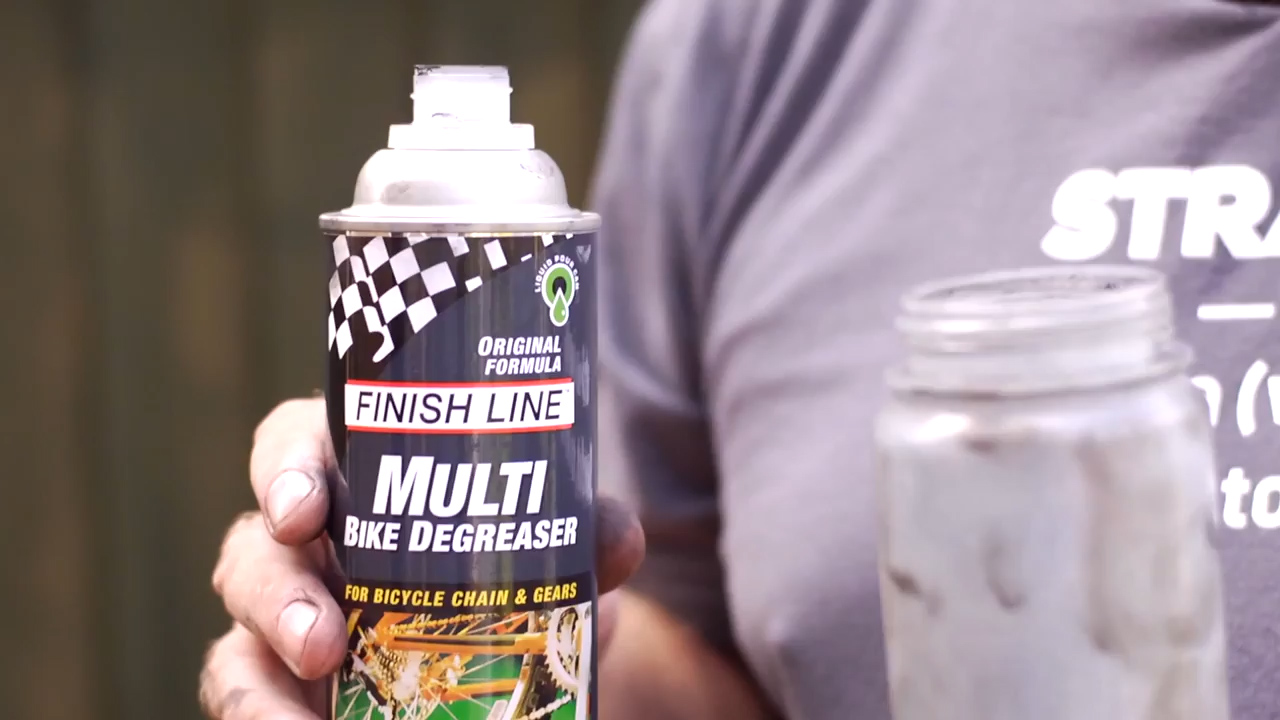
Now it is time for the real cleaning. Apply a bike-specific degreaser to the chain. You can spray it on, drip it onto a rag, or pour it into a chain-cleaning tool, depending on the product and the tools you have. Focus on getting the degreaser into the rollers and side plates where gunk likes to hide.
If you are cleaning by hand, hold the brush or rag against the chain and backpedal slowly. If you are using a chain scrubber, run the chain through it according to the tool directions. One pass is often good; two passes are better when your chain looks like it has been marinating in road tar.
Step 5: Scrub the chain thoroughly
Use a brush to scrub the top, bottom, and sides of the chain. Pay extra attention to any sticky sections where dirt has turned into a crunchy paste. The goal is not just to make the chain look better from three feet away. The goal is to free up the moving parts so each link can articulate smoothly.
If you see stubborn buildup, let the degreaser sit briefly, then scrub again. Short patience here saves a lot of rubbing later. It is the bicycle equivalent of letting lasagna cool before cutting it: annoying, but wise.
Step 6: Clean the cassette, chainrings, and pulley wheels too
A freshly cleaned chain running over filthy gears is like putting on clean socks and stepping straight into a mud puddle. Use your brush and rag to clean the cassette cogs, front chainrings, and derailleur pulley wheels. You can floss between cassette cogs with a rag, scrub chainring teeth, and knock built-up gunk off the pulley wheels.
This step makes a real difference in shifting performance, especially if you ride in dusty, wet, or gritty conditions. It also helps your chain stay clean longer because you are not feeding it fresh grime the moment you pedal away.
Step 7: Wipe or rinse away the degreaser residue
Once the grime is loosened, wipe the chain thoroughly with a clean rag. If your degreaser directions call for rinsing, use a gentle rinse with water rather than blasting the bike with high pressure. The point is to remove residue, not to force water into bearings and other places that prefer a quiet life.
If you are not rinsing, keep wiping until the rag comes away significantly cleaner. This part may feel repetitive, but it is where the chain starts turning from “still kind of gross” to “actually clean.”
Step 8: Dry the chain completely
This step is easy to rush and surprisingly important. Dry the chain with a clean, dry rag and let any remaining moisture evaporate before adding lubricant. Water left inside the links can dilute lube, encourage rust, and waste the effort you just put in. If you washed other parts of the bike, give them time to dry too.
A rushed lube job on a wet chain is one of the most common maintenance mistakes. It looks productive. It feels productive. It is secretly sabotage.
Step 9: Inspect the chain for wear and trouble spots
Now that the chain is clean, inspect it. Look for rust, stiff links, damaged rollers, or sections that do not flex smoothly. This is also the ideal time to measure chain wear with a chain checker if you own one. A chain that is too worn can damage the cassette and chainrings, so catching wear early is a money-saving move.
If the chain skips under load, has frozen links, or shows obvious rust and wear, cleaning alone may not solve the problem. Sometimes the correct maintenance step is not “clean harder.” Sometimes it is “replace the part and stop negotiating with physics.”
Step 10: Apply chain lubricant the right way
Once the chain is fully dry, apply bicycle chain lube one drop at a time to the inside of each link while slowly backpedaling. Yes, one drop per link takes a little patience. No, spraying it everywhere like lawn fertilizer does not count as technique. The lubricant needs to reach the rollers, because that is where the important movement happens.
Use a dry lube in dry, dusty conditions and a wet lube for wet rides, muddy routes, or frequent rain. If you ride in mixed conditions, an all-conditions lube can be a practical middle ground. The best lube is the one that matches your riding and actually gets used.
Step 11: Let the lube settle in, then backpedal and shift
After applying lube, backpedal for several rotations so it works into the chain. If you want to be extra careful, shift through the gears while the bike is in the stand. This helps spread the lubricant and confirms that everything feels smoother after cleaning. You are listening for a quieter drivetrain and looking for consistent movement, not weird jumps or clicks.
Many riders get to this point and think, “Excellent, I am done.” Not yet. You are one wipe away from doing this correctly.
Step 12: Wipe off the excess and make a habit of it
Use a clean rag to wipe off the excess lube from the outer plates of the chain. This is not optional polishing for perfectionists. Excess lubricant on the outside attracts dirt, and dirt is exactly what you just spent half your afternoon removing. The useful lubricant stays inside the chain. The extra stuff on the outside mostly collects grime and bad decisions.
Finally, make chain cleaning part of your routine. If you ride often, wipe and relube regularly and do a more thorough clean whenever the chain looks dirty, sounds noisy, or has been through rain, mud, or gritty roads. Consistency beats heroic one-time scrubbing sessions every single time.
Common Mistakes to Avoid
- Using household degreasers or random solvents that are too harsh for bike parts
- Spraying high-pressure water directly at the drivetrain
- Lubing a dirty or wet chain
- Applying far too much lube
- Cleaning only the chain while ignoring the cassette and pulley wheels
- Waiting until the drivetrain sounds like a maraca convention
Quick Example: Road Bike vs. Mountain Bike Chain Cleaning
If you ride a road bike on mostly dry pavement, your chain may only need a quick wipe, targeted degreasing, and fresh lube every so often. If you ride a mountain bike through mud, dust, creek crossings, and the kind of trail conditions that make your calves look breaded, you will probably need more frequent cleaning. Gravel riders live in the middle, which is also where their chains often collect a heroic amount of dust.
The point is simple: cleaning frequency depends on conditions. The dirtier the ride, the faster your chain maintenance schedule moves from “eventually” to “tonight.”
What Riders Often Experience After Cleaning a Chain
One of the funniest things about chain maintenance is how many riders do it reluctantly the first time and then become evangelical about it afterward. They expect a slightly cleaner bike. What they get is a bike that suddenly feels quieter, smoother, and oddly more expensive. The pedals seem easier to turn. Shifting feels sharper. The drivetrain stops making that embarrassing dry-metal complaint at the stoplight. It is not magic. It is just what happens when friction and grime stop running the show.
A very common experience goes like this: someone buys a bike, rides it hard for weeks, maybe months, and assumes the grinding noise is just “how bikes sound.” Then one rainy ride or dusty weekend pushes the chain over the edge. The bike starts chattering on climbs, the chain looks dark and sticky, and the rider finally gives in and cleans it. Afterward, the first block of the next ride feels like a different machine. That moment creates a convert. Suddenly chain maintenance is not a chore. It is a performance upgrade hiding inside a rag and a bottle of degreaser.
Commuters often notice another benefit first: cleanliness. A neglected chain loves to tattoo the right calf, stain pant legs, and leave black marks on anything that brushes against it. After a proper cleaning and careful lube application, the bike becomes less messy to live with. You can carry it upstairs, park it indoors, or toss it on a rack without feeling like you are transporting a greasy science experiment.
Mountain bikers and gravel riders usually talk about sound before anything else. A clean, properly lubed chain takes the edge off drivetrain noise, especially after wet or gritty rides. The bike still sounds like a bike, of course, but it loses that crunchy soundtrack that suggests your components are slowly being sanded into retirement. Riders also report fewer skipped shifts and a more confident feel when climbing under load, which makes sense because the chain can move more freely across the cassette when it is not packed with grime.
There is also the small but real emotional payoff of catching problems early. Plenty of riders discover a stiff link, rust spot, or worn chain only because they cleaned the bike closely enough to notice it. That can prevent a bigger repair later. A five-minute inspection during cleaning might save a cassette, chainring, or a frustrating ride cut short by mechanical issues. It is one of those boring grown-up victories that becomes very satisfying once you have paid for replacement drivetrain parts even once.
And then there is the ritual itself. For many cyclists, chain cleaning becomes part of the rhythm of riding. Big ride on Saturday, quick drivetrain cleanup afterward, ready for the next outing. It is calming, practical, and pleasantly low-tech. You do not need software updates, subscription services, or a torque wrench forged by mountain elves. Just a little attention and a willingness to admit that yes, the nasty black chain did need help. Most riders come away with the same conclusion: a clean bicycle chain does not just improve the bike. It improves the whole riding experience.
Conclusion
Cleaning a bicycle chain is one of those maintenance jobs that looks minor until you feel the results on your next ride. A clean, well-lubed chain runs quieter, shifts better, and helps protect the rest of your drivetrain from unnecessary wear. The process is simple: remove grime, clean thoroughly, dry fully, inspect carefully, lubricate correctly, and wipe off the extra. Do that consistently, and your bike will thank you in the universal language of smoother miles.
If your chain currently looks like it has survived a swamp expedition, do not panic. Start with Step 1, work methodically, and remember that even the grimiest drivetrain can usually be brought back from the brink. Your bike does not need perfection. It just needs a rider who owns a rag and makes better choices than “maybe the squeak will solve itself.”













