
If your electric water heater has started making strange popping noises, taking forever to heat up, or sending out rusty water that looks like it came from a horror movie, it’s probably telling you something: “Please drain me.”
Draining (and flushing) your water heater is one of those simple home maintenance jobs that sounds intimidating but is absolutely doable if you follow the steps and respect the safety rules. The payoff? A quieter heater, hotter water, lower energy bills, and a tank that’s more likely to reach its full life span instead of quitting on you early.
This guide walks you through exactly how to drain an electric water heater, why it matters, how often to do it, and what to do if things don’t go perfectly. We’ll focus on standard tank-style electric heaters commonly found in U.S. homes.
Why You Should Drain Your Electric Water Heater
Every time your water heater fills and heats, minerals and tiny bits of debris in the water supply settle to the bottom of the tank. Over time, this sediment layer gets thicker, like the “crust” at the bottom of an old pan.
That sediment layer can:
- Reduce efficiency, forcing the heater to work harder and use more electricity.
- Make cracking, popping, or rumbling noises as water bubbles through sediment.
- Shorten the life of the tank by overheating the bottom and encouraging corrosion.
- Cause discolored or rusty water and inconsistent water temperature.
Home maintenance experts and plumbing pros typically recommend draining and flushing a tank-style water heater about once a year, or every 6–12 months in areas with very hard water. Regular maintenance can add years to the life of the appliance and keep performance consistent.
Safety First: Before You Touch the Water Heater
With an electric water heater, safety starts with turning off power. Electric heating elements can burn out if they’re on when the tank is empty, and working on a live circuit is never a good plan.
1. Turn off the power at the breaker
- Go to your electrical panel and switch off the breaker labeled for the water heater.
- If it’s not labeled (it should be!), look for a double-pole breaker typically in the 20–30+ amp range and turn it off.
- Confirm power is off by trying to run hot water: it should quickly turn lukewarm and then cool.
Never rely on just the water heater’s local disconnect or a wall switch. The breaker is the safest way to cut power.
2. Let the water cool
Draining a tank full of scalding hot water is a recipe for burns. If possible, turn the heater off several hours before you plan to drain itmany pros suggest doing the prep in the morning and draining later in the day.
At minimum, open a hot-water faucet and run it for a few minutes to draw some hot water out and bring in cooler water.
3. Shut off the cold-water supply
- Locate the cold-water shutoff valve above the heater, usually on a vertical pipe entering the top of the tank.
- Turn it clockwise until it stops to shut off the incoming water.
4. Gather basic tools and choose a drain location
Most drain-and-flush jobs only require:
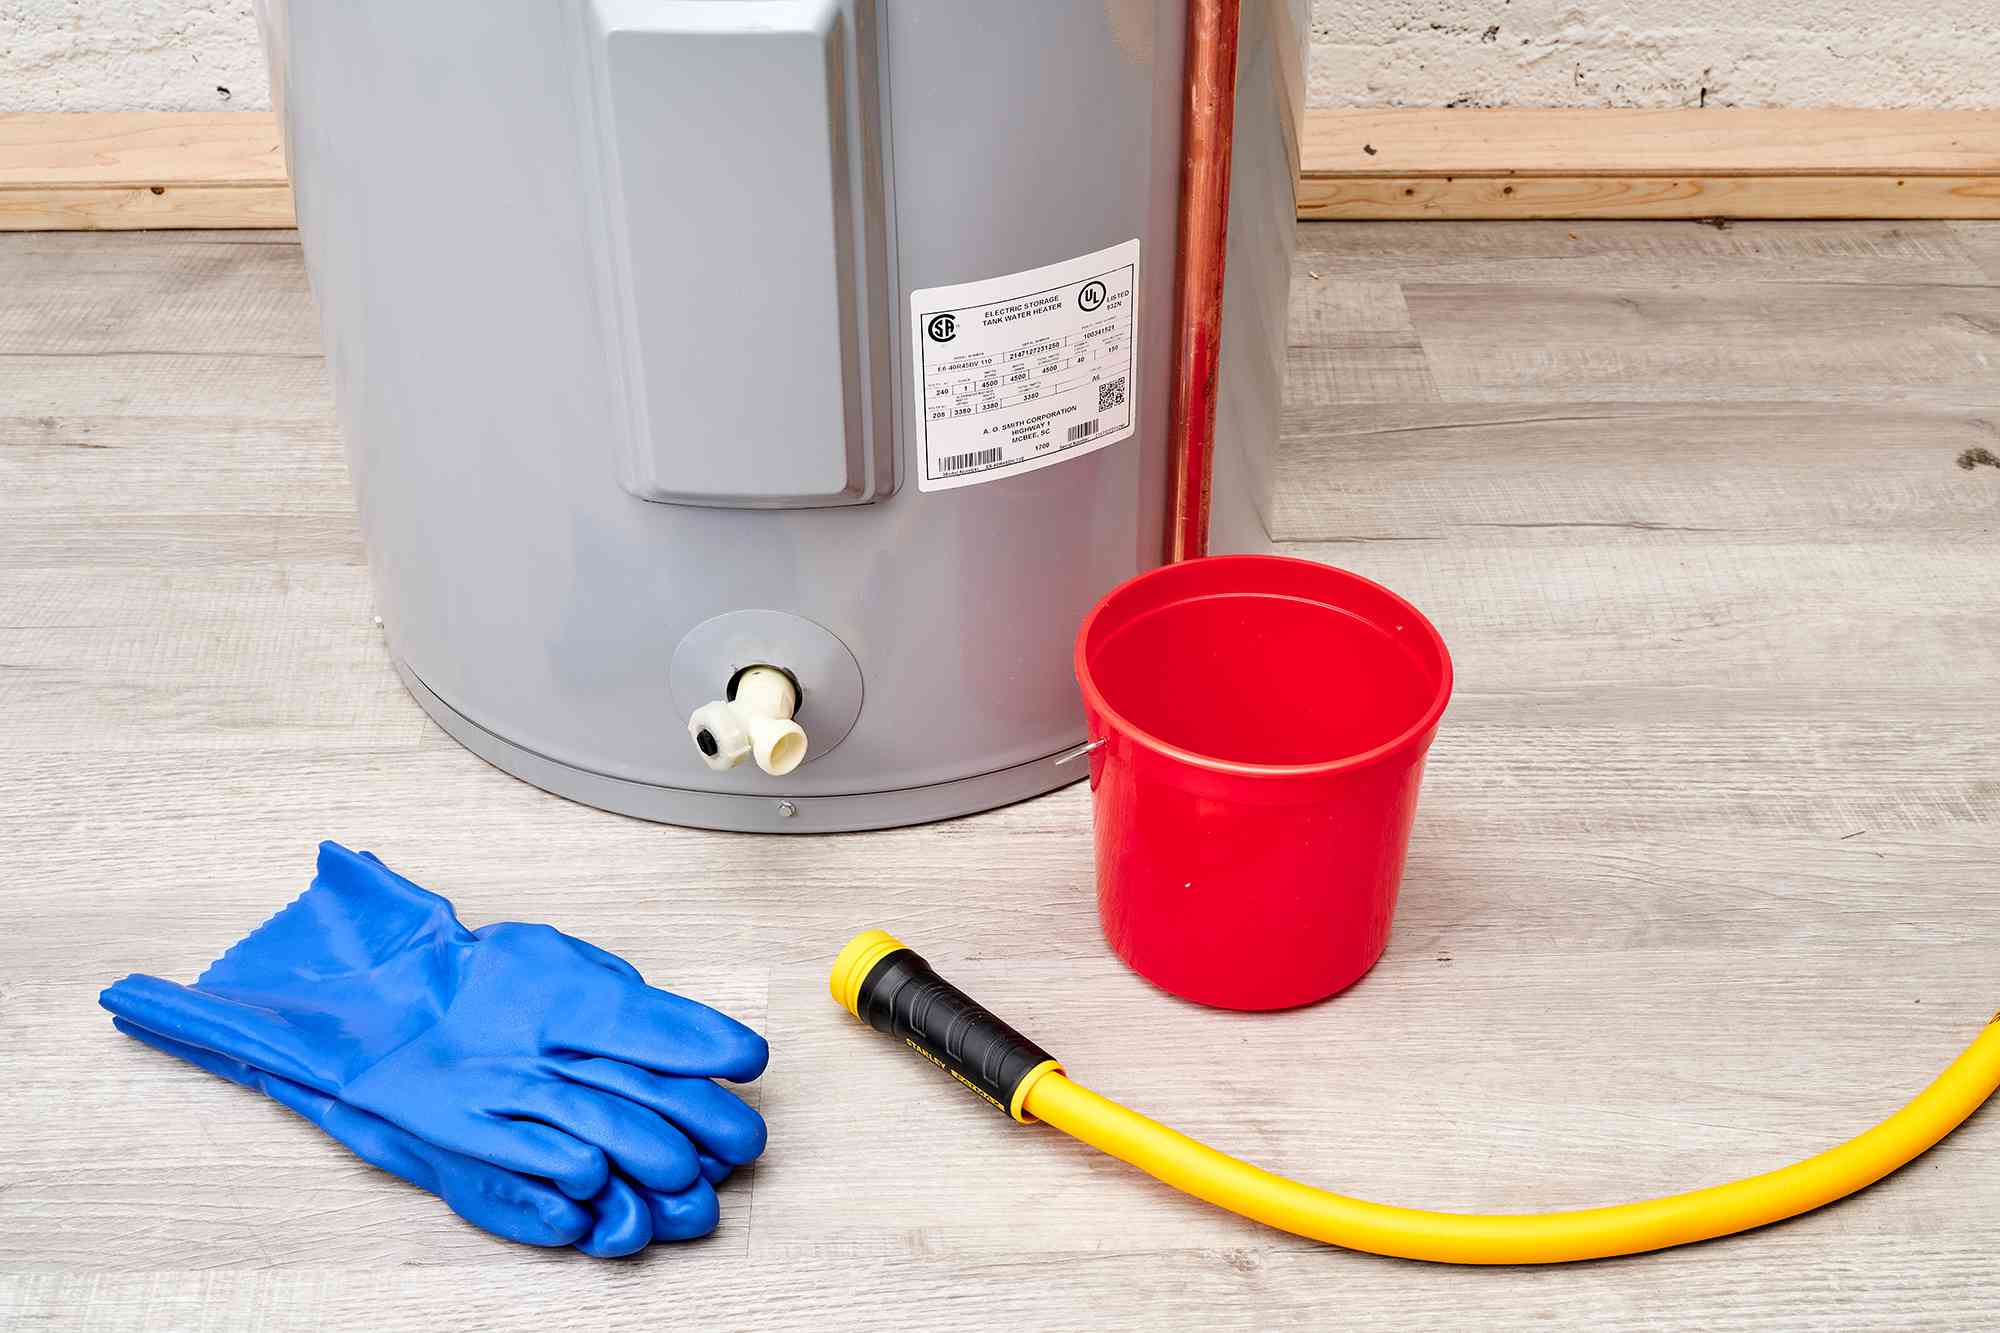
- A standard garden hose
- A bucket or floor drain
- A flat-head screwdriver (for some drain valves)
- Work gloves and optionally safety goggles
- Old towels to catch drips
Attach the hose to a drain that can safely handle hot, possibly rusty watersuch as a floor drain, utility sink, or even outdoors (where allowed). Make sure the hose end is lower than the drain valve to allow gravity to do its thing.
Step-by-Step: How to Drain an Electric Water Heater
Step 1: Locate the drain valve
The drain valve (also called a drain cock) is usually at the bottom of the tank, often brass, plastic, or silver-colored, and threaded to accept a garden hose. Make sure you know exactly which valve you’re openingdon’t confuse it with the nearby relief valve or other plumbing connections.
Step 2: Attach the garden hose
- Screw the hose onto the drain valve connection.
- Hand-tighten firmly to avoid leaks, but don’t overtighten to the point of damaging plastic threads.
- Run the other end of the hose to your chosen drain area and secure it so it won’t whip around when water starts flowing.
Step 3: Open a hot-water faucet in the house
Open a nearby hot-water faucet (like a bathtub or sink) to let air into the system. This helps the heater drain more smoothly and reduces the chance of a vacuum forming in the tank.
Step 4: Open the temperature and pressure (T&P) relief valve
The T&P valve is a safety valve located at the top or upper side of the tank with a discharge tube running down toward the floor. Lift the small metal lever on it to open it brieflythis helps relieve pressure and speeds up draining.
Note: If the T&P valve is old, stuck, or leaking, don’t force it. You may need a plumber to inspect or replace it.
Step 5: Open the drain valve
- Carefully open the drain valve at the bottom of the tank.
- Some valves use a handle; others require a flat-head screwdriver.
- Water should begin flowing through the hose. It may start out rusty or cloudythat’s the sediment you’re trying to remove.
Let the tank drain completely. This may take anywhere from 10–30 minutes depending on tank size and sediment buildup.
Step 6: Flush the tank to remove sediment
Once the tank is mostly empty, you can flush it to stir up and remove more sediment:
- With the drain valve still open and the hose connected, briefly turn the cold-water supply back on.
- Let water flow into the tank and straight out through the drain for 10–30 seconds at a time.
- Turn the cold water off and allow the tank to drain again.
- Repeat this on/off flush cycle until the water coming out of the hose runs clear.
This “pulse” flushing method is often more effective at dislodging sediment than one long continuous flow.
Step 7: Close the drain valve and T&P valve
- Turn off the drain valve completely and remove the garden hose.
- Lower the lever on the T&P relief valve to close it.
Check around the drain valve for leaks. If it drips slightly, sometimes gently tightening the valve (without over-torquing) will help. Persistent leaks may require a new valvesomething a plumber can handle.
Step 8: Refill the tank
- Make sure the drain valve is closed.
- Turn the cold-water supply valve fully back on.
- Leave that open hot-water faucet running inside the house.
As the tank refills, air will escape through the open faucet. At first, the water will sputter and spit; once it flows in a steady stream with no air bursts, the tank is full and pressurized.
Step 9: Restore poweronly after the tank is full
This step is critical. Never turn the power back on until the tank is completely full of water. “Dry firing” the electric elements can burn them out in seconds.
- Once water is flowing smoothly at the open hot faucet, shut that faucet off.
- Go to the electrical panel and flip the water heater breaker back on.
- Give the heater some time (typically 30–60 minutes, depending on size) to bring the water back up to temperature.
Your electric water heater is now drained, flushed, and ready to go.
Troubleshooting Common Problems While Draining
Problem 1: No water comes out of the drain valve
This usually means the drain valve is clogged with sediment. You can try:
- Shutting the drain valve and disconnecting the hose.
- Briefly turning the cold-water supply on with the valve open to help blast through the blockage (be prepared for a quick burst of water).
- Gently probing the opening with a small non-metallic object (never use anything that can break off inside).
If the valve remains clogged, or the heater is older and heavily rusted, it may be safer to call a plumber. Forcing it can damage the valve or even the tank itself.
Problem 2: The drain valve won’t close fully and keeps dripping
Plastic drain valves on some residential heaters are notorious for seeping after you’ve used them. Options include:
- Opening and closing the valve a few times to clear debris from the seat.
- Installing a threaded metal cap on the valve outlet as a backup seal (short-term fix).
- Having a plumber replace the drain valve with a higher-quality brass valve.
Problem 3: The T&P valve starts leaking afterward
If the T&P valve weeps after you’ve drained and refilled the tank, it could be:
- A sign of normal pressure fluctuations (occasionally minor).
- An indication the valve is worn and needs replacement.
- A symptom of excessive system pressure, which may require a pressure-reducing valve or expansion tank.
T&P valves are safety-critical parts. If you’re unsure, have a licensed plumber inspect and replace the valve as needed.
How Often Should You Drain an Electric Water Heater?
Most manufacturers and plumbing professionals suggest:
- Every 6–12 months for standard homes with municipal water.
- Every 3–6 months if you have very hard water, well water, or notice frequent sediment issues.
- At least once a year as a baseline for extending heater life.
Signs you’ve waited too long include:
- Rumbling, popping, or banging noises from the tank.
- Rust-colored or cloudy hot water.
- Hot water running out faster than it used to.
- Unusually high energy bills for the same hot-water usage.
If your heater is quite old and has never been flushed, be aware that disturbing a large amount of sediment can sometimes expose weak spots and lead to leaks. In those cases, it may be smarter to consult a pro or plan for replacement rather than aggressively flushing on your own.
Bonus Maintenance While You’re There
Since you’re already working on the water heater, this is a good time to give it a quick checkup:
- Inspect for leaks: Look around the base, top fittings, and seams for signs of moisture or rust streaks.
- Check the T&P discharge pipe: Make sure it terminates near the floor and isn’t capped or plugged.
- Vacuum dust and lint: Clean around the base and nearby area to keep the heater and its wiring clear.
- Review the thermostat setting: Many experts recommend around 120°F to balance safety, comfort, and efficiency.
If you’re comfortable with more advanced maintenance, a plumber can also inspect or replace the anode rod, which protects the tank from corrosion and can significantly extend its life.
Real-World Experiences: What Homeowners Learn After Draining a Water Heater
Every homeowner who finally drains their electric water heater for the first time seems to have the same reaction: “Why didn’t I do this sooner?” The task feels technical until you actually walk through it and realize it’s mostly about patience, towels, and a little common sense.
Imagine a pretty typical scenario. You notice your showers aren’t as hot as they used to be, and your utility bill has crept up over the last year. The heater occasionally makes a low rumble, almost like it’s boiling rocks instead of water. One weekend you decide to investigate, watch a couple of tutorials, and commit to doing a full drain and flush.
You turn off the breaker, shut the water, hook up the hose, and crack open the drain valve. At first, nothing happens, then suddenly a rush of dark, rusty water surges through the hose. It’s kind of grossbut also deeply satisfying. That “mysterious noise” you’ve been hearing has a visible culprit: a thick layer of sediment that’s been baking at the bottom of the tank.
As you pulse the cold-water supply on and off, the water gradually clears. The first few flushes might look like weak coffee; by the last round, it’s nearly as clear as tap water. You start to understand why plumbers and manufacturers keep insisting on annual maintenance. It’s not just a suggestionit genuinely changes how the heater performs.
Homeowners who do this regularly report several consistent benefits:
- Quieter operation: The rumbling and popping tend to disappear once the sediment is gone.
- More consistent hot water: The tank heats more evenly, so temperature swings are less dramatic.
- Better efficiency: The heater doesn’t have to fight through a layer of mineral sludge, so it uses less energy.
People also pick up practical tricks from experience. They learn to schedule the job later in the day so the tank can reheat overnight, minimizing disruption. They keep a dedicated “water heater hose” in the garage that they don’t mind staining. They toss a couple of old towels on the floor near the drain valve just in case of drips. They label the breaker clearly so no one accidentally flips it on before the tank is full.
Some homeowners who live in hard-water areas become almost religious about their maintenance routine. They might drain a few gallons every couple of months rather than doing one big annual flush. That light-touch approach keeps the sediment layer from ever getting thick enough to cause trouble. Others put the task on a shared household calendarright next to changing HVAC filters and testing smoke alarmsso it doesn’t get forgotten.
There are also lessons about limits. If your heater is 12–15 years old, heavily rusted, or has a history of leaks, sometimes draining it reveals problems that were developing quietly in the background. When homeowners do a first-time flush on a very old tank, they’re sometimes greeted with persistent leaks afterward. That can be disappointing, but it’s valuable information: the tank was already near the end of its life, and catching that before a catastrophic failure is actually a win.
Ultimately, the big takeaway from people who’ve drained their electric water heaters a few times is that this isn’t a mystical plumbing ritual. It’s a manageable, repeatable task that most DIY-inclined homeowners can handle with some care and patience. And if at any point you’re not comfortableor you run into stubborn valves, heavy corrosion, or confusing wiringcalling in a pro is part of being a smart homeowner, not a failure.
Once you’ve done it once, though, you’ll likely find that the next drain-and-flush session feels routine. You’ll know exactly where the valves are, how long it takes, and what “normal” looks and sounds like for your specific heater. That familiarity makes it much easier to spot early warning signs in the futureand to keep hot water flowing smoothly, quietly, and efficiently for years.
Conclusion: A Simple Habit That Pays Off
Draining an electric water heater isn’t complicated, but it is powerful. With a hose, a bucket, and a bit of time, you can clear out sediment, help your heater run more efficiently, reduce noise, and potentially stretch its lifespan by several years. The key is to respect safetyalways cut the power at the breaker and never turn it back on until the tank is full.
Make draining your electric water heater part of your routine home maintenance, just like changing filters or cleaning gutters. Your future self (and your future energy bills) will thank you every time you step into a reliably hot shower.














