
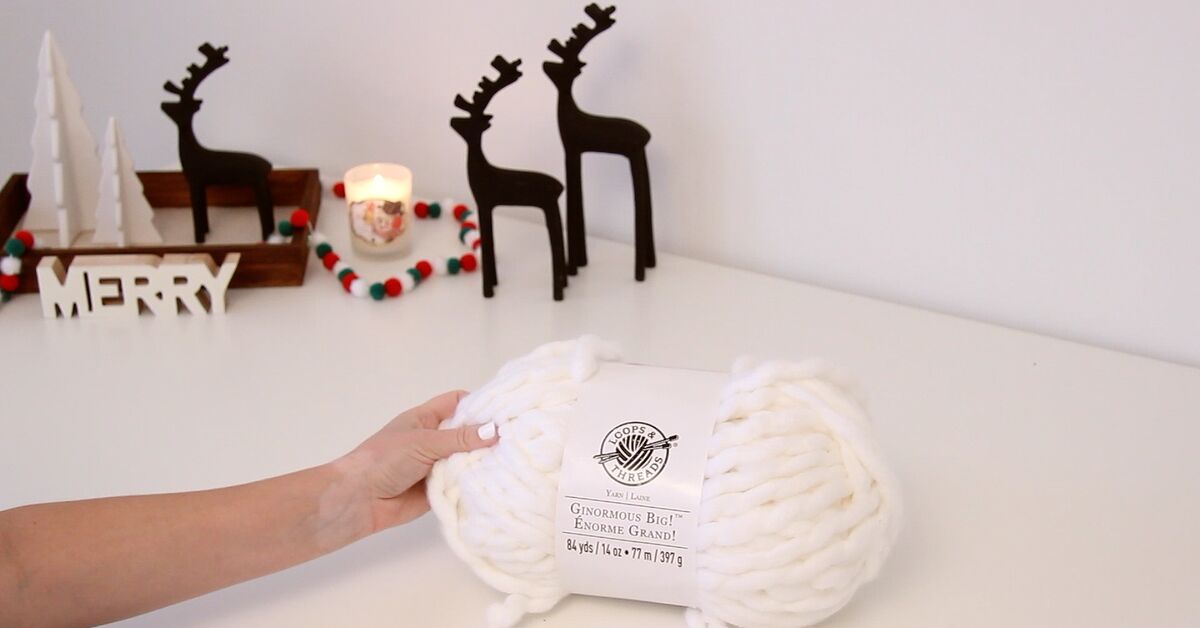
If your front door has been looking a little too “I just live here” and not enough “welcome to my cozy craft kingdom,” this DIY chunky yarn arm knit wreath is about to fix that. It is soft, plush, modern, and delightfully dramatic in the best possible way. Think of it as a sweater for your door, except your door will not complain that the sleeves are itchy.
The best part? You do not need knitting needles, advanced crafting skills, or the emotional stamina required to untangle a full basket of mystery yarn. This project uses chunky yarn, your hands or arms, and a wreath form to create a thick braided texture that looks expensive but is wonderfully beginner-friendly. Whether you want a winter wreath, a fall farmhouse wreath, a cozy Christmas wreath, or a neutral year-round door decoration, this tutorial will walk you through every step.
In this guide, you will learn how to choose the right yarn, make a chunky arm-knit chain, attach it neatly to a wreath frame, decorate it without turning it into a craft-store explosion, and troubleshoot common mistakes. By the end, you will have a handmade wreath that says, “Yes, I made this,” with the confidence of someone who owns a glue gun and knows where the scissors are.
What Is a Chunky Yarn Arm Knit Wreath?
A chunky yarn arm knit wreath is a decorative wreath made by creating a thick chain or braid from oversized yarn and wrapping it around a wreath form. Unlike traditional knitting, arm knitting and finger knitting use your hands instead of needles. The result is a soft, oversized texture that looks cozy, sculptural, and high-end.
This type of DIY yarn wreath works especially well for seasonal decor because the base is easy to customize. Use cream yarn and eucalyptus for a clean winter look, burnt orange yarn and wool felt balls for fall, red ribbon and bells for Christmas, or pale pink yarn and faux flowers for spring. Once you understand the basic method, you can change the mood faster than a toddler changes opinions about snacks.
Why This DIY Wreath Is Worth Making
There are plenty of wreaths you can buy, but making your own chunky yarn wreath gives you control over color, size, texture, and style. Store-bought wreaths can be beautiful, but they often come with one of two problems: they are either too plain or they cost as much as a small appliance. This project lands happily in the middle. It looks boutique, but the supplies are simple.
A DIY chunky yarn arm knit wreath is also forgiving. If one section looks uneven, you can fluff it. If the chain twists, you can adjust it. If your first loop looks like a sleepy pretzel, congratulations, you are crafting. The texture of chunky yarn hides small imperfections, which makes this wreath a great project for beginners.
Supplies You Will Need
Basic Materials
- 1 foam, wire, or grapevine wreath form, usually 12 to 16 inches
- 2 skeins or bundles of chunky yarn, jumbo yarn, or roving-style yarn
- Scissors
- Floral wire, pipe cleaners, or yarn scraps for tying
- Hot glue gun and glue sticks, optional but helpful
- Ribbon for hanging
- Decorative accents such as faux greenery, pom-poms, bells, pinecones, felt flowers, or ornaments
Best Yarn for an Arm Knit Wreath
For the plushest look, choose super bulky or jumbo yarn. Chenille yarn creates a soft, cozy finish. Wool roving gives a cloud-like modern texture, but it can pill or pull apart if handled roughly. Tube yarn is excellent for beginners because it keeps its shape and resists shedding. If you want a budget-friendly option, you can hold two strands of bulky yarn together to mimic the look of one thicker strand.
For a 12-inch wreath, you may need roughly 20 feet of chunky chain. For a 14- or 16-inch wreath, plan on making a longer chain, usually around 22 to 28 feet depending on the thickness of your yarn and how tightly you wrap it. Always buy a little more yarn than you think you need. Yarn has a magical ability to disappear at the exact moment you are feeling proud.
Choosing the Right Wreath Form
The wreath form controls the final shape and thickness of your project. A foam wreath form creates a smooth, full base and is easy to cover completely. A wire wreath frame is lightweight and easy to tie onto, though you may need to wrap it more carefully so the wire does not show. A grapevine wreath adds rustic charm and works especially well if you want a farmhouse-style chunky yarn wreath with visible natural texture.
If this is your first time making an arm knit wreath, a foam wreath form is the easiest choice. It gives you a sturdy surface, hides gaps well, and lets the yarn sit neatly. Choose a 14-inch form for a balanced front-door wreath. Choose a 12-inch form for a smaller indoor wreath, mantel accent, or apartment door.
Step-by-Step Guide: How to Make a DIY Chunky Yarn Arm Knit Wreath
Step 1: Prepare Your Work Area
Clear a table or floor space large enough to spread out your wreath form and yarn. Chunky yarn likes room to roam. If you work in a tiny corner, it will somehow wrap itself around a chair leg, your coffee mug, and possibly your ankle. Keep scissors, wire, and glue nearby so you do not have to hunt for them with yarn loops dangling from your wrists.
If you are using wool roving or delicate jumbo yarn, wash and dry your hands before starting. Oils, lotion, and rough jewelry can snag the fibers. Remove rings or bracelets that might catch on the yarn.
Step 2: Make a Slip Knot
Start by making a loose slip knot at the end of your yarn. Leave a tail of about 8 to 10 inches so you can secure it later. Do not pull the knot too tight. The goal is soft and chunky, not “yarn in a headlock.”
Place the loop over your hand or wrist. If you are using very large yarn, your forearm can act like a giant knitting needle. If the yarn is slightly smaller, finger knitting may feel easier. Both methods work for this project because you are creating a chain, not a complicated sweater pattern with sleeves, shaping, and existential dread.
Step 3: Create the Chunky Chain
Reach through the loop, grab the working yarn, and pull a new loop through. Gently tighten the previous loop around the new one. Repeat this motion to form a long chain. Keep the loops fairly even, but do not worry about perfection. A slightly relaxed chain looks softer and more expensive than one that is pulled too tight.
Continue until your chain is long enough to wrap around the wreath form. For a 12-inch wreath, start with about 20 feet. For a 14-inch wreath, aim for 22 to 25 feet. For a 16-inch wreath, you may need closer to 28 feet. The exact amount depends on yarn thickness, wreath depth, and how much overlap you want.
Lay the chain around the wreath form before cutting the yarn. This quick test saves you from the deeply annoying experience of being six inches short at the finish line. If your chain is too short, keep going. If it is too long, you can remove a few loops or tuck the extra at the back.
Step 4: Secure the First End to the Wreath
Place one end of the chain on the back of the wreath form. Use floral wire, a pipe cleaner, or a yarn tail to tie it firmly in place. If you are using a foam form, a dab of hot glue can help, but do not rely only on glue if the wreath will hang on a door that moves often. A tie is stronger and less dramatic when the weather changes.
Keep the knot or wire on the back side so the front stays clean. The front of your wreath should look plush and seamless, while the back can look like the craft project had a small administrative department. Nobody will see it.
Step 5: Wrap the Chain Around the Wreath Form
Begin wrapping the chunky chain around the wreath form, keeping each section snug against the previous one. The goal is to cover the form completely without squishing the texture. Let the chain sit naturally on the front. If it twists, pause and rotate it back into place.
Secure the chain every few inches on the back with floral wire or yarn scraps. This keeps the wreath stable and prevents sagging. If you are wrapping a foam wreath, you can add tiny dots of hot glue on the back as extra insurance. Avoid gluing the front unless absolutely necessary, because glue can flatten or stiffen the yarn.
Step 6: Finish the End Neatly
When you return to the starting point, tuck the final end under the first few loops. Tie it to the wreath form on the back. Trim any excess yarn, but leave enough tail to knot securely. Fluff the front with your fingers to hide the join.
Step back and look at the wreath from a few feet away. This is the official crafter’s inspection position. If one area looks thin, gently shift the loops closer together. If one section looks bulky, spread it out. Chunky yarn is flexible, so small adjustments can make a big difference.
How to Decorate a Chunky Yarn Wreath
Minimalist Style
For a clean modern look, keep the wreath simple. Use ivory, oatmeal, gray, or soft taupe yarn and add a single velvet ribbon. This style works beautifully for winter, Scandinavian-inspired decor, or homes where “neutral” is a personality trait and a lifestyle.
Farmhouse Fall Style
For a fall chunky yarn wreath, choose cream, rust, mustard, sage, or warm brown yarn. Add mini pumpkins, dried-look leaves, wool felt balls, and a plaid ribbon. Keep decorations grouped on one lower side for a natural, asymmetrical design. The wreath will feel cozy without looking like a pumpkin patch sneezed on it.
Christmas Style
For a Christmas chunky yarn wreath, use white or cream yarn and decorate with red berries, pine sprigs, tiny ornaments, bells, or a satin bow. You can also use deep green yarn for a bold holiday look. Add metallic accents sparingly. A little gold says festive; too much gold says the wreath joined a marching band.
Spring and Summer Style
For spring, try blush pink, lavender, pale yellow, or mint yarn. Add faux flowers, eucalyptus, or small butterflies. For summer, use white yarn with coastal accents such as rope, shells, or blue ribbon. Since yarn can absorb moisture, indoor or covered-door placement is best, especially in humid climates.
Tips for Making Your Wreath Look Expensive
First, choose one main texture and let it shine. Chunky yarn already has visual weight, so you do not need to cover every inch with decorations. Second, use odd numbers when adding accents. Three pinecones, five felt balls, or seven small ornaments usually look more natural than perfectly even pairs.
Third, hide your mechanics. Wires, glue blobs, and pipe cleaners should stay on the back or under greenery. Fourth, use ribbon with body, such as velvet, wired linen, grosgrain, or thick cotton. Thin shiny ribbon can look flimsy next to jumbo yarn.
Finally, edit before you finish. Add your decorations, then remove one thing. This tiny design trick often makes the wreath look more intentional. Crafting is fun, but restraint is what keeps a wreath from becoming a small circular garage sale.
Common Mistakes and How to Fix Them
The Chain Looks Uneven
Uneven loops are common, especially if this is your first arm knitting project. To fix them, gently tug the larger loops and redistribute the slack along the chain. Once the chain is wrapped around the wreath, minor unevenness usually disappears into the texture.
The Wreath Form Shows Through
If you can see the wreath form, push the chain sections closer together. If gaps remain, make a short extra chain and attach it over the thin area. You can also hide small spaces with ribbon, greenery, or felt flowers.
The Yarn Is Shedding
Roving-style yarn is beautiful but delicate. Handle it gently and avoid pulling the fibers apart. If shedding bothers you, choose tube yarn or chenille-style chunky yarn instead. These options hold their shape better and are easier to store.
The Wreath Sags on the Door
Sagging usually means the yarn chain is not secured often enough. Add more ties on the back, especially near the top. If the wreath is heavy, use a sturdy ribbon loop or wreath hanger. A small piece of removable mounting tape on the back can also help keep the wreath from swinging every time someone closes the door with enthusiasm.
How to Hang Your DIY Chunky Yarn Wreath
The easiest way to hang a chunky yarn wreath is with a ribbon loop. Thread the ribbon through the wreath form, knot it securely, and hang it from a wreath hook or adhesive hook. For a clean look, choose ribbon that matches the yarn or complements your seasonal decorations.
If you are hanging the wreath on an interior wall, a small nail or removable hook may be enough. For a front door, make sure the wreath does not get crushed between the door and storm door. Chunky yarn needs breathing room. It is not emotionally prepared to be flattened like a pancake.
How to Store and Clean the Wreath
When the season ends, store your wreath in a breathable bag or a sturdy wreath box. Avoid smashing it under heavier decorations. To clean it, use a lint roller, a soft brush, or a cool hair dryer on a low setting to remove dust. Do not soak the wreath, especially if you used wool roving, cardboard accents, or hot glue.
If the wreath gets slightly misshapen, fluff it with your fingers and reshape the chain. Most chunky yarn wreaths bounce back well if they are stored properly. If you used removable accents, you can refresh the wreath for a new season by swapping decorations instead of remaking the whole base.
Creative Variations to Try
Two-Tone Chunky Yarn Wreath
Use two colors of chunky yarn and alternate chains around the wreath. Cream and gray look modern, while red and white feel festive. For fall, try rust and oatmeal. For spring, try blush and ivory.
Extra-Fluffy Winter Wreath
Use white chenille or jumbo loop yarn and add tiny pinecones, frosted greenery, and silver bells. This creates a snowy look without bringing actual snow indoors, which is thoughtful because melted snow has terrible manners.
Kids’ Craft Version
For a kid-friendly version, skip hot glue and use pipe cleaners to attach decorations. Let children choose pom-poms, felt shapes, or foam ornaments. The finished wreath may not be minimalist, but it will have personality, which is usually better.
Real-Life Experience: What I Learned Making a DIY Chunky Yarn Arm Knit Wreath
The first time I made a chunky yarn arm knit wreath, I was fully convinced it would take ten minutes. This was optimistic in the same way people are optimistic when they say they are going to organize one drawer and then find receipts from 2014. The project was easy, but the learning curve was in the details.
My first lesson was that yarn thickness matters more than color. I originally picked a beautiful ivory yarn that looked dreamy in the store, but it was thinner than expected. Once wrapped around the wreath form, it looked less like a cozy designer wreath and more like a nervous scarf trying to cover a hula hoop. Doubling the yarn solved the problem, but next time I chose true jumbo yarn from the beginning. The result looked fuller, softer, and far more polished.
The second lesson was to make more chain than I thought I needed. Measuring chunky yarn is tricky because the chain shortens slightly as it wraps around the curved form. A chain that looks enormous on the table can suddenly become suspiciously short on the wreath. Now I wrap-test before cutting. I lay the chain around the wreath form, check the coverage, and only then trim the yarn. This one habit saves time, yarn, and the small sigh of defeat that happens when you run out three inches before the end.
The third lesson was not to overdecorate. Chunky yarn already brings texture and volume, so the wreath does not need twenty ornaments, six ribbons, three pinecones, and a decorative bird who looks like he manages the place. My best version used a simple cream yarn base, a few faux eucalyptus stems, three wool felt balls, and one soft velvet ribbon. It looked intentional, calm, and expensive. In other words, it looked like I had made design choices instead of being attacked by the seasonal aisle.
I also learned that the back of the wreath matters. Nobody sees it, but the back determines whether the wreath hangs neatly or slowly collapses like it has given up on December. Securing the yarn chain every few inches made the front look smoother and helped the wreath stay round. Floral wire worked better than glue for long-term hold, especially on a door that opened and closed often.
Finally, I discovered that this project is excellent for gifting. A chunky yarn wreath feels handmade without looking homemade in the unfortunate sense. You can personalize it with favorite colors, initials, tiny ornaments, or seasonal accents. It is also lightweight enough to wrap, store, and ship carefully. If you want a DIY project that is relaxing, stylish, and forgiving, this wreath is a winner. It gives your home instant warmth, and it gives you the very satisfying right to say, “Thanks, I made it,” every time someone compliments your door.
Conclusion
Making a DIY chunky yarn arm knit wreath is one of those rare craft projects that feels relaxing while still producing a genuinely beautiful result. With a wreath form, chunky yarn, and a simple hand-knit chain, you can create a soft, stylish decoration for almost any season. The technique is beginner-friendly, the materials are easy to find, and the finished wreath looks far more complicated than it really is, which is the secret sauce of great DIY.
Keep the design simple, choose yarn with enough thickness, secure the back carefully, and decorate with intention. Whether you hang it on a front door, above a mantel, in an entryway, or on a bedroom wall, this cozy wreath adds texture and charm without requiring advanced knitting skills. It is handmade, practical, customizable, and just fancy enough to make guests ask where you bought it. That is your moment. Enjoy it.













