
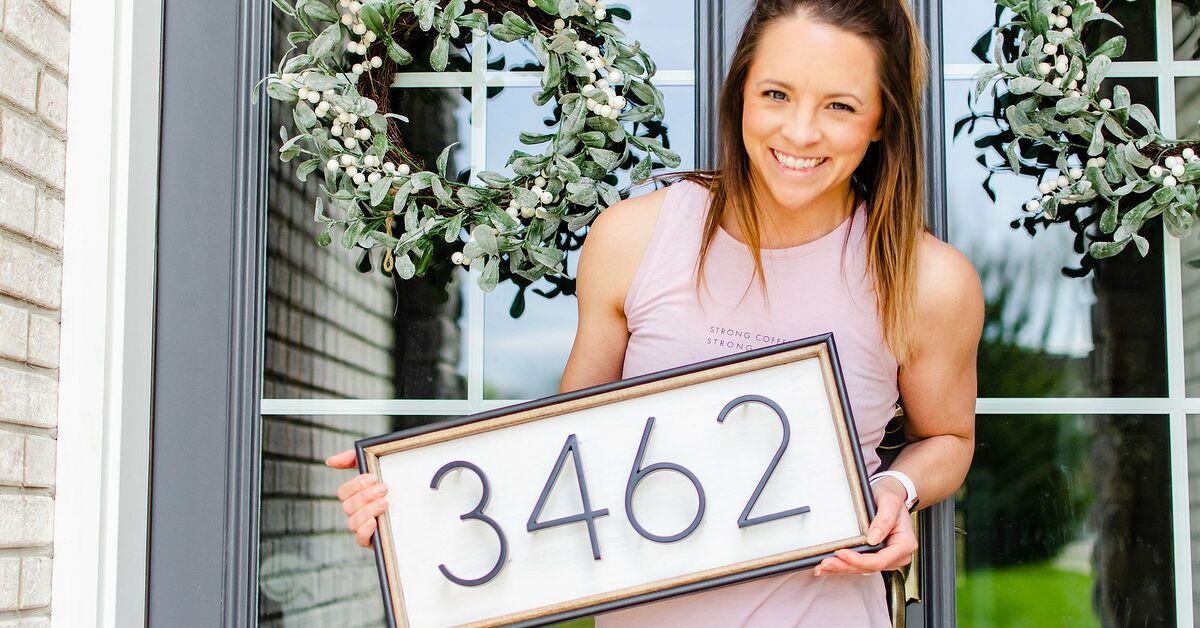
A DIY house number sign is one of those small weekend projects that delivers a suspiciously large amount of curb appeal. It is useful, affordable, beginner-friendly, and, unlike assembling flat-pack furniture, it probably will not make you question every life decision that led you to own a screwdriver.
Your house numbers do more than decorate the front porch. They help guests find your home, delivery drivers avoid awkward “I think I’m at your neighbor’s house” moments, and emergency responders locate your address quickly when every second matters. The best house number signs are easy to read from the street, weather-resistant, securely mounted, and designed to match your home’s style.
The good news: you do not need a professional sign shop to make one. With a wood board, exterior finish, modern address numbers, basic tools, and a little patience, you can create a custom address plaque that looks polished without emptying your wallet.
Why Make a DIY House Number Sign?
A store-bought address plaque is convenient, but a handmade house number sign gives you control over size, color, materials, and style. You can build something rustic, modern, farmhouse-inspired, coastal, industrial, or minimalist. You can also customize the sign to fit tricky spaces, such as a narrow porch column, brick wall, mailbox post, garden bed, or entry gate.
Another reason to make your own sign is visibility. Many homes have house numbers that are too small, hidden behind shrubs, painted in a low-contrast color, or placed somewhere only a very determined pizza delivery driver could find. A DIY project lets you fix those problems while improving your home’s exterior at the same time.
Before You Start: Make It Visible, Not Just Pretty
It is tempting to begin by choosing the cutest font or the most dramatic stain color. Resist the urge for one tiny minute. A house number sign should look good, but it also needs to work.
Choose Numbers That Are Easy to Read
For most homes, address numbers should be at least 4 inches tall. If your house sits far from the road, consider 5-inch, 6-inch, or even larger numbers. The farther the viewing distance, the bigger and bolder your numbers should be.
Choose simple, readable numerals instead of overly decorative fonts. Thin script numbers may look charming in a close-up photo, but from the street they can turn “1486” into “I4B?” faster than you can say, “Where is the delivery guy?” Block-style, sans serif, modern metal, or clean serif numbers usually offer better readability.
Use Strong Contrast
Contrast is the secret sauce. Black numbers on a white sign, white numbers on a dark-stained board, brass numbers on charcoal, or matte black numbers on pale cedar are all strong options. If the number color blends into the background, the sign may look artistic but fail at its main job.
Pick the Right Location
Place your house number sign where it is visible from the road or main approach. Common locations include beside the front door, above the porch light, on a porch column, near the garage, on a mailbox post, or in a front landscaping bed. If trees, shrubs, parked cars, or porch shadows block the view, choose another spot.
If your home is set back from the street, a freestanding yard sign, mailbox sign, or address post may be easier to see than numbers mounted near the front door. At night, consider lighting the sign with a porch light, landscape spotlight, or solar light.
Best Materials for a DIY House Number Sign
The best material depends on your home’s style, climate, budget, and available tools. Here are reliable options for outdoor use.
Cedar
Cedar is a favorite for outdoor DIY projects because it naturally resists moisture and insects better than many common softwoods. It is lightweight, easy to cut, and attractive with stain or clear exterior finish. Cedar fence pickets can also be budget-friendly, making them a smart choice for a rustic or modern address plaque.
Pressure-Treated Wood
Pressure-treated lumber works well for posts or signs placed in the ground. It is durable and widely available, though it may need time to dry before staining or painting. For a polished look, sand it thoroughly and seal it properly.
Exterior-Grade Plywood
Exterior plywood can work for painted signs, especially if you seal all edges carefully. The edges are vulnerable to moisture, so do not skip primer, paint, and a protective topcoat.
Metal or Acrylic Backers
For a sleek modern house number sign, you can use aluminum, steel, acrylic, or composite panels as the backing. These materials can look very clean and professional, especially with floating numbers. They may require different drill bits and mounting hardware, so check the product instructions before you start.
Tools and Supplies You Will Need
You can customize this list, but for a simple wood house number sign, gather the following:
- One cedar, pine, or exterior-grade wood board
- House numbers, preferably 4 inches or taller
- Measuring tape
- Pencil
- Painter’s tape
- Level
- Drill and drill bits
- Screws, anchors, or mounting hardware
- Sandpaper in medium and fine grits
- Exterior stain, exterior paint, or outdoor-rated finish
- Exterior clear coat, spar urethane, or weatherproof sealer
- Paintbrush, foam brush, or rag
- Safety glasses
Optional upgrades include a planter box, solar light, decorative trim, metal frame, stencils, vinyl lettering, French cleat, brick clips, masonry screws, or landscape stake.
Step-by-Step: How to Make a DIY House Number Sign
Step 1: Decide on the Size and Layout
Start by measuring the area where the sign will go. A narrow porch column may need a vertical sign, while a wall beside the door may suit a horizontal plaque. For a front garden bed, a taller post sign or stake-mounted plaque may work best.
Lay your house numbers on the board before cutting anything. Give each number enough breathing room so the address is easy to read. A common mistake is crowding the numbers together because the board looks empty. Space is not wasted; it is what makes the design look intentional.
For a modern look, align the numbers vertically down one side. For a classic plaque, center the numbers horizontally. For a farmhouse style, use a stained wood board with black metal numbers. For a coastal look, try white paint, navy numbers, and simple trim.
Step 2: Cut the Board
Cut your board to the desired size. If you do not own a saw, many home improvement stores can cut lumber for you. For a standard wall-mounted sign, a board around 8 to 12 inches wide and 16 to 24 inches tall often works well, depending on the number of digits in your address.
After cutting, check that the board fits the space. Hold it in place and step back toward the street. If it looks too small from a distance, it is too small. The sign should be visible without requiring visitors to perform a detective-level squint.
Step 3: Sand the Surface
Sand the front, back, sides, and edges of the wood. Start with medium-grit sandpaper to smooth rough areas, then finish with fine-grit sandpaper for a cleaner surface. Slightly round the sharp edges so the finish adheres better and the sign feels more professional.
Wipe away dust with a tack cloth or slightly damp rag. Dust left on the board can create bumps under paint or stain, and nobody wants a house number sign with the texture of a stale biscuit.
Step 4: Stain or Paint the Board
Choose a finish that complements your home’s exterior. Stain highlights the grain and works beautifully with cedar or pine. Paint offers bolder contrast and better coverage, especially if the wood has imperfections.
If painting, use exterior primer first, especially on raw wood. Primer helps paint adhere and improves durability. Apply two coats of exterior paint, allowing each coat to dry fully. If staining, apply the stain evenly with a rag or brush, then wipe off excess according to the product directions.
Step 5: Seal for Weather Protection
Outdoor signs face sun, rain, wind, humidity, dust, and the occasional bird with questionable aim. Protect your work with an exterior-rated clear coat or spar urethane. Spar urethane is popular for exterior wood because it is designed to handle moisture, sunlight, and seasonal expansion and contraction.
Apply thin coats rather than one heavy coat. Seal the front, back, edges, and any drilled holes. The edges are especially important because exposed wood can absorb moisture and swell. Let the finish cure fully before mounting the numbers.
Step 6: Mark the Number Placement
Once the board is dry, arrange the numbers exactly where you want them. Use a measuring tape and level to keep everything straight. Painter’s tape can help create a temporary guide line.
If your numbers come with a paper mounting template, use it. Templates are extremely helpful for floating house numbers because the posts must line up accurately. Tape the template to the board, check it with a level, and mark the drill points.
If you do not have a template, mark the center line of the board and measure each number carefully. Stand back before drilling. This is the moment to catch spacing issues, not after the number “7” has permanently committed to being crooked.
Step 7: Drill Pilot Holes
Drill pilot holes where marked. Pilot holes reduce the risk of splitting wood and make screws easier to install. Use a drill bit slightly smaller than the screw shaft. If you are using floating numbers with threaded posts, follow the manufacturer’s recommended drill size.
For metal, acrylic, brick, stucco, or masonry surfaces, use the correct bit and anchors. A wood drill bit is not the hero you want against brick. It will lose, loudly.
Step 8: Attach the House Numbers
Attach the numbers according to the hardware style. Some numbers screw directly into the sign from the front. Others use hidden studs or spacers to create a floating effect. Floating numbers add dimension and cast subtle shadows, which can make a simple DIY address sign look custom-made.
Do not overtighten screws. Tightening too aggressively can strip holes, bend thinner numbers, or damage the finish. Once installed, check that all numbers are secure and aligned.
Step 9: Add Optional Features
This is where you can give your house number sign personality. Add a small planter box below the numbers for seasonal flowers or faux succulents. Attach solar lighting for nighttime visibility. Add trim around the board for a framed look. Mount the board on a post if your front door is far from the road.
For a planter-style house number sign, avoid planting directly into an unlined wood box unless it has drainage and waterproofing. A safer option is to place small nursery pots inside the planter. This keeps water away from the sign and makes seasonal swaps easier.
Step 10: Mount the Sign Securely
Choose mounting hardware based on the surface. For wood siding, exterior screws usually work well. For brick or concrete, use masonry screws or anchors. For rental-friendly options, consider a freestanding post, planter sign, or brick clips where appropriate.
Before final mounting, hold the sign in place and view it from the street. Check visibility in daylight and, if possible, after dark. Make sure landscaping, railings, parked vehicles, and porch decor do not block the numbers.
DIY House Number Sign Ideas by Style
Modern Minimalist
Use a smooth stained board, matte black floating numbers, and clean spacing. Keep decoration minimal. This style works well with contemporary homes, midcentury exteriors, and simple front porches.
Rustic Farmhouse
Choose distressed wood, black metal numbers, and perhaps a small planter box. Whitewashed paint or warm brown stain gives the sign a cozy look. Just be careful not to distress the numbers so much that they become hard to read.
Industrial
Pair dark wood with brushed metal numbers or mount numbers on a metal backing plate. Exposed screws can look intentional in this style, especially when they match the number finish.
Garden Address Sign
Mount the plaque on a wooden stake or post and place it in a front flower bed. This is a great option for homes with long walkways or numbers that are difficult to see near the door.
Coastal or Cottage
Use a painted white or pale blue board with navy, black, or brass numbers. Keep the design fresh and simple. A small lantern nearby can complete the look without turning the porch into a nautical gift shop.
Common Mistakes to Avoid
Using Numbers That Are Too Small
Tiny numbers may look refined up close, but they disappear from the road. When in doubt, size up. Readability should win over delicate design.
Choosing Low-Contrast Colors
Dark bronze numbers on dark walnut stain may look elegant in your hand, but they can vanish on the wall. Test color combinations outside before committing.
Skipping Weather Protection
Raw wood will not stay pretty outdoors for long. Seal all sides and edges, even the back. Moisture can sneak in from any exposed surface.
Mounting the Sign in a Hidden Spot
A beautiful sign behind a shrub is basically a secret. Trim landscaping regularly and choose a location visible from both directions of travel when possible.
Ignoring Local Rules
Some cities, counties, homeowners associations, or fire departments have rules about address number size, placement, contrast, illumination, or mailbox numbering. Check local guidance before building, especially if your home is rural, set far back, part of an HOA, or located in a wildfire-prone area.
Maintenance Tips for Outdoor House Number Signs
A DIY house number sign does not need constant attention, but a little maintenance will help it last longer. Clean it a few times a year with mild soap and water. Avoid harsh chemicals that may damage the finish. Inspect screws, anchors, and mounting hardware after storms or seasonal temperature changes.
If the wood looks dry, faded, or rough, lightly sand and reapply an exterior topcoat. Painted signs may need touch-ups every few years, especially in direct sun. Keep plants trimmed around the sign so the numbers remain visible.
Budget-Friendly Tips
You can make a good-looking DIY house number sign without spending much. Use leftover fence boards, scrap wood, or a small piece of cedar. Look for house numbers on sale or reuse existing numbers if they are large enough and still readable. A simple painted board with crisp black numbers can look just as stylish as an expensive custom plaque.
The biggest investment should be durability. Outdoor-rated paint, exterior screws, and proper sealer are worth the money. Saving a few dollars on indoor craft paint may feel clever today, but after one rainy season, your sign may look like it has been through a dramatic movie montage.
Personal Experience: What You Learn When Making a DIY House Number Sign
Making a DIY house number sign sounds simple because, technically, it is. But like many small home projects, it teaches you a surprising amount about planning, patience, and the strange emotional journey of trying to make four numbers sit in a straight line.
One of the biggest lessons is that visibility matters more than you think. When you lay the numbers on the board at your worktable, almost everything looks readable. The real test happens outside. Place the sign where you plan to mount it, then walk to the sidewalk or street. Suddenly, the elegant little numbers you loved may look like mysterious punctuation marks. Testing from a distance helps you avoid building a sign that only works for people already standing on your porch.
Another experience many DIYers share is underestimating how much the background color affects the final look. A stain that appears medium brown indoors can look much darker in shade. Black numbers on that stain may not pop enough. White or brushed nickel numbers might work better. Before attaching anything permanently, it helps to place the numbers on the finished board and check them outside in morning light, afternoon light, and evening shade.
Drilling is another moment that rewards patience. If your numbers come with a template, use it carefully. Tape it down, level it, and double-check every mark. A tiny measuring mistake can make one digit sit slightly higher than the others. Will guests notice? Maybe not. Will you notice every single time you unlock the front door for the next five years? Absolutely.
Sealing the sign is also more important than it feels in the moment. It is easy to focus on the front because that is the part everyone sees. But the back and edges are the places where moisture often sneaks in. A sign that is sealed on all sides holds up better and is less likely to warp. Think of it as sunscreen for wood. The sign may not thank you, but it will age much more gracefully.
A planter-style address sign brings its own lessons. It looks charming, but water management matters. If you add real plants, use pots inside the planter rather than filling the wood box directly with soil. Soil holds moisture against the wood, and even sealed wood can struggle with constant dampness. Faux greenery is a low-maintenance option, especially for porches that get harsh sun or very little light.
Mounting location can also surprise you. The most attractive spot near the door is not always the most practical. Porch columns, garage trim, mailbox posts, or landscape stakes may provide better visibility. In some homes, the best solution is actually two signs: one decorative sign near the entrance and one highly visible number display closer to the street.
The most satisfying part of this project is how finished the entryway feels afterward. A house number sign is small, but it frames the home’s first impression. It tells visitors they are in the right place. It gives delivery drivers a fighting chance. It makes the front of the house feel cared for. And best of all, every time someone compliments it, you get to say, “Thanks, I made it,” which is one of the finest sentences in the DIY language.
Conclusion
Learning how to make a DIY house number sign is a practical and creative way to upgrade your home’s curb appeal. The project is simple enough for beginners, but it still offers plenty of room for customization. Choose durable outdoor materials, use large readable numbers, create strong contrast, seal the sign properly, and mount it where it can be seen clearly from the street.
Whether you build a modern floating-number plaque, a rustic wood sign, a planter-style address display, or a freestanding yard sign, the goal is the same: make your home easier to find and better looking at the same time. That is a pretty good return for one weekend, a few tools, and a board that finally got its big break.
Note: This article is written in standard American English for web publishing and is based on practical DIY methods, outdoor-material best practices, and commonly recommended address-visibility guidance.










