
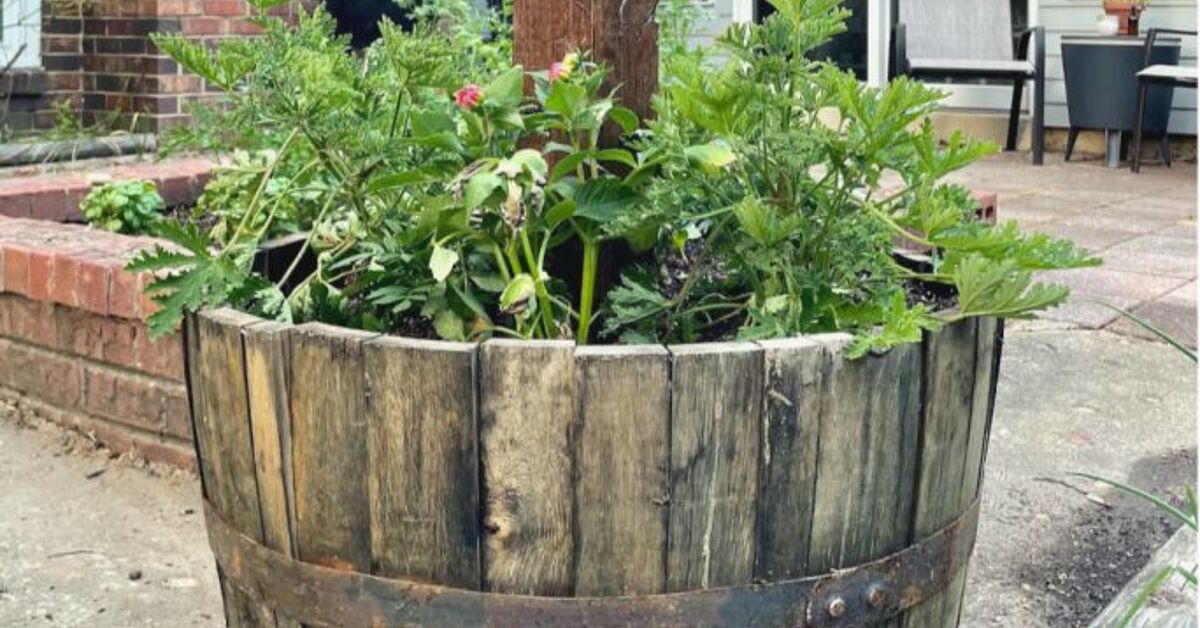
Outdoor string lights can make an ordinary patio feel like a neighborhood café where the drinks are affordable and nobody asks you to leave at closing time. The trouble is that many patios, decks, and rental-friendly backyards have no trees, pergola beams, or convenient walls for supporting them. A potted post solves that problem without drilling permanent holes in concrete or starting a tense conversation with your landlord.
This DIY string light post combines a large planter, a tall wood or metal post, and a concrete anchor. Once finished, it provides a freestanding support for café lights while leaving room for flowers, herbs, or decorative gravel. The project is beginner-friendly, but stability, drainage, and electrical safety all matter. The following steps explain how to build a potted post that looks intentional and remains useful long after the first backyard dinner.
Why Use Potted Posts for Outdoor String Lights?
Potted posts work well on concrete patios, apartment terraces, pool decks, and paved entertaining areas where permanent posts are impractical. Because the containers are movable before filling, you can test a square, rectangle, zigzag, or V-shaped lighting layout before committing.
The planter also hides the heavy base. Instead of seeing a bucket of concrete, guests see flowers, foliage, herbs, or decorative stone. The result is part lighting support, part container garden, and part excuse to stay outside after sunset.
Materials and Tools
Materials
- One large outdoor planter per post, preferably 18 to 24 inches wide
- One 8- to 10-foot pressure-treated wood post, cedar post, or outdoor-rated metal pole per planter
- Bagged concrete mix suitable for setting posts
- Scrap lumber for temporary braces
- Exterior-rated screw eyes, cup hooks, or eye bolts
- Exterior stain, paint, or sealer for wood
- Landscape fabric, rigid divider, or removable inner pot
- Potting mix, plants, or decorative gravel
- Outdoor-rated string lights and, if needed, an outdoor-rated extension cord
- Optional outdoor support cable for long or heavy spans
Tools
- Tape measure, pencil, drill, and bits
- Level
- Mixing tub or wheelbarrow
- Shovel or trowel
- Gloves, eye protection, and dust mask
- Stable ladder
Choose a broad, weather-resistant planter made from thick resin, heavy plastic, wood, metal, fiberstone, or another material able to tolerate concrete. A tall, narrow decorative pot may look elegant but can become top-heavy when wind pulls on the lights.
Plan the Layout Before Mixing Concrete
Set the empty planters where you think the posts should go, then run rope or twine between them to preview the light path. For many patios, posts spaced about 8 to 10 feet apart create manageable spans, although the correct distance depends on the light set, post height, base weight, and wind exposure.
Allow a gentle curve between supports rather than pulling the strand tight. Sag creates the familiar café-light look and reduces sideways force on the posts. Also identify the power source before finalizing the layout so the plug end does not finish several feet from the outlet with no graceful solution.
How to Make a Potted Post to Hang String Lights
Step 1: Prepare the Post
Cut the post to the desired length if necessary. An 8-foot post suits smaller spaces, while a 10-foot post provides greater overhead clearance. Remember that part of the post will sit inside the planter.
If using wood, sand rough edges and apply an exterior finish before embedding it. Coat all sides and cut ends according to the product instructions. Use corrosion-resistant, outdoor-rated metal if choosing a pole instead.
Step 2: Install the Hanging Hardware
Predrill a pilot hole a few inches below the top and install an exterior-rated screw eye, cup hook, or eye bolt. An eye bolt offers a closed connection; a cup hook makes seasonal removal easier. Place the hardware at the same height on every post.
For long or heavy light strands, use a properly sized support cable so the electrical cord is not carrying the full mechanical load.
Step 3: Prepare the Planter
Inspect the planter for strength and drainage. Concrete will occupy the lower portion, while the upper portion can hold a removable pot or a shallow planting area separated by a rigid insert or securely supported landscape fabric.
Do not assume a layer of rocks automatically improves drainage. Water needs a clear route out of the root zone. If the upper section would trap water, add an appropriate side drainage opening or use a removable nursery pot that can be taken out for watering.
Step 4: Center and Brace the Post
Move the planter to its final location before filling it. Center the post and check it with a level on two adjacent sides. Attach temporary braces so it cannot rotate or lean during the pour. Look at the post from across the patio as well; a small error at the base becomes much more obvious at the top.
Step 5: Mix and Add Concrete
Wear gloves, eye protection, and a dust mask. Mix the concrete with the amount of water specified on the bag. Adding too much water may weaken the mix and create a slow-setting mess.
Fill enough of the planter to form a stable base while leaving room for the decorative top. Many projects use concrete in roughly the lower half, but the correct amount depends on planter size, post height, span length, and wind. Work the mixture around the post with a trowel, then recheck the level before it firms.
If the location is very exposed, increase the base mass, shorten the spans, or add more posts. These freestanding supports are for string lights, not shade sails, swings, hammocks, or anything people may pull on.
Step 6: Let the Concrete Cure
Leave the braces in place and follow the concrete manufacturer’s curing instructions. Concrete may look dry before it has developed enough strength for sideways loading. Protect it from heavy rain, freezing temperatures, and rapid moisture loss while it cures.
Step 7: Finish the Planting Zone
Add a removable inner pot or a separated layer of quality potting mix. Avoid dense garden soil, which can drain poorly in containers. Select plants with similar light and watering needs.
A “thriller, filler, spiller” combination creates a polished look: use one upright accent, several mounded plants, and trailing plants around the edge. Full-sun options include compact ornamental grass, lantana, and trailing petunias. Partial-shade choices include caladium, begonias, and trailing dichondra.
Step 8: Position the Posts
Place every completed planter on a flat, solid surface. Do not balance a heavy post on loose pavers or sloped ground. Concrete-filled planters can weigh a great deal, so confirm that balconies, rooftops, and elevated decks can carry the concentrated load.
Step 9: Hang the Lights
Inspect the light strand for cracked sockets, damaged insulation, and loose connections. Use only products labeled for outdoor use. Drape the cord through the hooks or attach it with UV-resistant ties that do not crush the insulation.
Leave a relaxed curve between posts. Never staple, nail, or screw through an electrical cord. Keep bulbs away from dry leaves, fabric, and other combustible material.
Step 10: Connect Power Safely
Plug outdoor lights into a GFCI-protected receptacle. Use an outdoor-rated extension cord only when necessary and keep plug connections off wet ground in a weather-resistant connection cover.
Do not route extension cords through doors or windows, hide them under rugs, or use them as permanent wiring. Unplug the lights before changing bulbs or adjusting hardware. An outdoor timer can turn them off automatically and prevent the patio from glowing bravely until lunchtime.
How to Improve Stability
Stability depends on post height, planter width, base weight, span length, and wind. A broad container lowers the chance of tipping, while shorter spans reduce lateral pull. Adding a third or fourth support is often safer and more attractive than forcing two tall posts to carry a wide canopy.
Place planters where guests will not bump them and chair legs will not catch cords. Take the light strands down before severe weather. If a post wobbles, leans, or lifts at the planter edge, stop using it until the cause is corrected. Decorative flowers cannot negotiate with physics.
Design Ideas for a Finished Look
Coordinate the Posts
Stain wood to match a deck or fence, paint it matte black for a modern look, or keep a warm cedar tone for a relaxed garden style. Add post caps to protect the end grain and create a finished silhouette.
Repeat Plants and Colors
Use the same plant recipe in every pot for a formal appearance, or repeat one flower color while varying foliage textures. White blooms and silver foliage remain visible after sunset. Herbs such as thyme, oregano, and compact rosemary can make the planters useful as well as attractive.
Hide Practical Components Carefully
Route the power lead down the least-visible post with loose exterior-rated clips that do not pierce or pinch it. Keep all electrical connections accessible for inspection and away from soil or standing water.
Common Mistakes to Avoid
- Choosing a planter that is too small: A narrow base and tall post create a tipping risk.
- Skipping the level: Eyeballing works until the concrete cures and the post resembles a tired sunflower.
- Overwatering the concrete mix: Follow the bag instructions rather than mixing by mood.
- Hanging lights too soon: Early tension can pull a curing post out of alignment.
- Overtightening the strand: Gentle sag reduces stress and looks better.
- Ignoring drainage: The planting layer still needs a route for excess water.
- Using indoor electrical products outside: Lights, cords, timers, and connection covers must be outdoor-rated.
- Using extension cords permanently: Ask a licensed electrician about a code-compliant long-term power solution.
Experience Notes: What I Learned From Building and Using Potted String Light Posts
The first lesson is that layout matters more than people expect. It is tempting to buy two attractive planters, add posts, and assume the lights will sort themselves out. They will not. Measuring the entire strandincluding the unlighted lead cordprevents awkward gaps and plugs suspended several feet from the outlet. Laying rope across the proposed route is the cheapest design tool in the project.
The second lesson is that empty planters are deceptive. A tall resin pot can feel substantial in the garden center, yet its narrow footprint may be unsuitable for an exposed 10-foot post. On a calm evening, almost anything appears stable. The real test arrives when wind catches the strand and transfers force to the hook. A broader container, shorter spans, and more support points create a calmer installation. I would rather add a third post than ask two posts to impersonate bridge towers.
Bracing is another area where patience pays. Holding a post by hand while someone pours concrete sounds efficient until the post rotates, the planter shifts, and everyone begins offering different level readings. Two simple braces keep the post still and free both hands for mixing and checking alignment. I also learned to view the post from across the patio, not only from six inches away. A level confirms vertical alignment, while distance reveals whether several posts visually line up.
Concrete work rewards preparation. Open bags, measured water, tools, gloves, braces, and cleanup supplies should be ready before mixing begins. Concrete does not pause politely while you search the garage for a trowel. Adding water gradually provides better control, and cleaning tools immediately is much easier than chiseling off a permanent souvenir the next morning.
The planting layer deserves its own plan. Simply pouring soil over concrete can create a shallow, wet root zone. A removable nursery pot or fitted inner container is more practical because plants can be replaced seasonally and watered away from the post base. It also simplifies winter storage: the structure stays put while the flowers retire with dignity.
Light installation is where restraint improves both appearance and performance. Pulling the strand tight may look neat in daylight, but a little sag looks warmer at night and reduces stress on the supports. I prefer to hang the lights loosely, step back after dark, and adjust the curves by eye. Bulb spacing becomes easier to judge when the lights are on. For longer runs, a support cable keeps the electrical strand from carrying the full mechanical load.
Finally, maintenance is part of the project. I inspect hooks, posts, cords, drainage, and planter surfaces at the beginning of each outdoor season and after strong storms. Wood may need fresh sealer, metal may need touch-up paint, and plants can hide cracks or loose fittings. The best potted string light posts are not merely attractive on installation day; they remain plumb, dry, electrically safe, and pleasantly boring for years. In DIY, “nothing dramatic happened” is often the finest review available.
Conclusion
A potted post is one of the most adaptable ways to hang outdoor string lights when a patio lacks permanent supports. Choose a wide weather-resistant planter, install the post perfectly plumb, use properly mixed and fully cured concrete, preserve drainage for plants, and hang outdoor-rated lights with gentle sag rather than excessive tension.
Once the supports are built, the design can change with the seasons. Swap summer flowers for fall foliage, use evergreens in winter, or install removable pots for easy updates. The patio gains a soft overhead glow and suddenly develops the confidence of a place that charges twelve dollars for sparkling water.













