
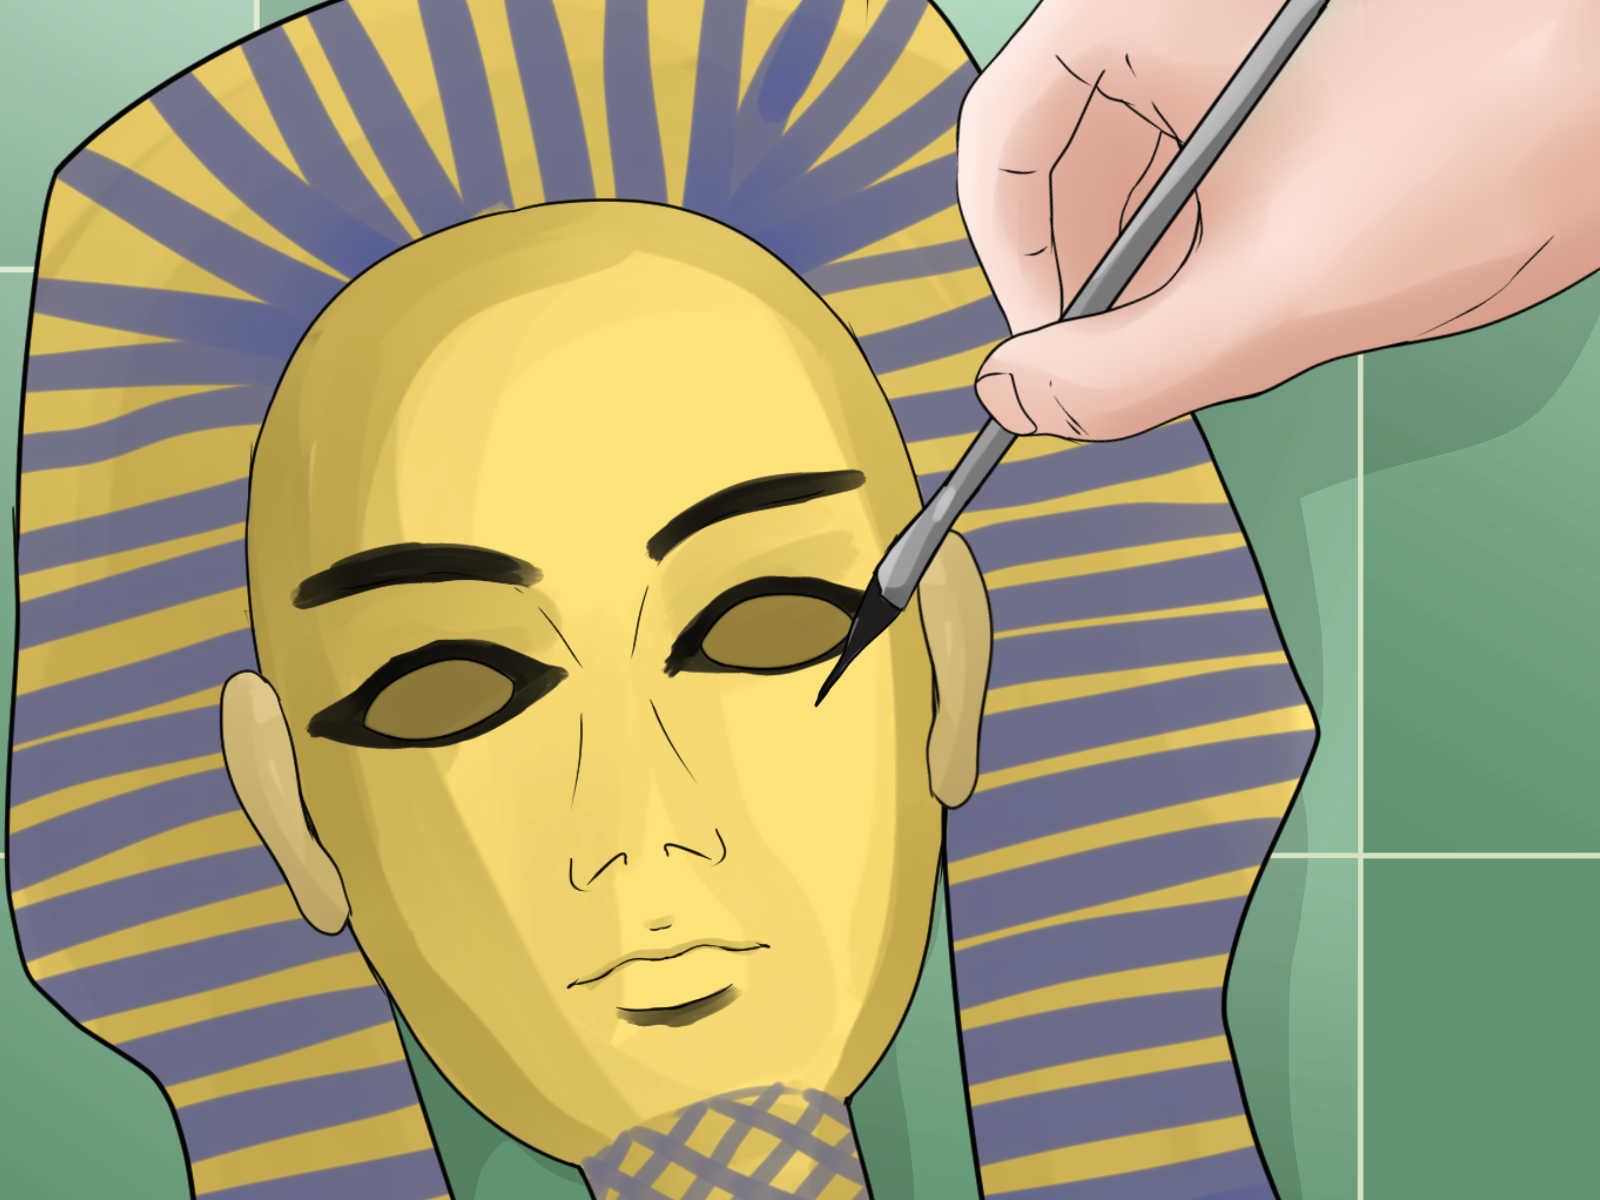
Few craft projects can walk into a room with the same golden confidence as a Tutankhamun mask. It has drama. It has history. It has blue-and-gold stripes that say, “Yes, I brought my own royal lighting.” Whether you are creating a school project, a classroom display, a history fair centerpiece, or a weekend art activity, making a Tutankhamun-inspired mask is a fun way to explore ancient Egyptian art without needing a tomb, a chariot, or 3,000 years of archaeological suspense.
This Egyptian craft tutorial shows you how to make a Tutankhamun mask using safe, easy-to-find materials such as cardboard, paper plates, craft foam, acrylic paint, aluminum foil, glue, and markers. The goal is not to create a museum replica. The real golden burial mask of Tutankhamun was made with precious materials and extraordinary ancient craftsmanship. Our version is a creative tribute: lightweight, affordable, and much less likely to require a team of conservators.
In this step-by-step guide, you will learn how to shape the face, build the famous striped nemes headdress, add the royal cobra and vulture details, paint the broad collar, and finish the mask so it looks polished enough for display. Along the way, you will also understand why the mask’s colors and symbols matter.
Why the Tutankhamun Mask Is So Iconic
Tutankhamun, often called King Tut, was an Egyptian pharaoh of the 18th Dynasty. His tomb in the Valley of the Kings became world-famous after its discovery in the early 20th century because it contained an extraordinary collection of funerary objects. The golden burial mask placed over the king’s mummy is one of the most recognizable artworks from ancient Egypt.
The original mask is famous for its smooth golden face, deep blue striped headdress, almond-shaped eyes, false beard, broad collar, and protective symbols on the brow. These elements were not random decorations. In ancient Egyptian belief, gold was associated with divinity and eternity, while blue materials such as lapis lazuli or blue glass suggested the heavens, rebirth, and royal power. The mask represented the king in an idealized, eternal form.
For a craft project, the most important design features to capture are the gold face, blue-and-gold headdress, strong black eye lines, braided false beard, collar pattern, and the small cobra and vulture symbols above the forehead. Get those right, and your mask will instantly say “Tutankhamun,” even if your glue stick has other opinions.
Materials You Will Need
This project can be made with basic craft supplies. Choose the simple cardboard version for younger students or the layered version for a more realistic display piece.
Basic Supplies
- Large piece of cardboard or poster board
- Paper plate or printable face template
- Pencil and eraser
- Scissors
- Glue stick or craft glue
- Masking tape
- Gold acrylic paint or gold metallic paper
- Blue construction paper, craft foam, or paint
- Black marker or black acrylic paint
- White paper for the eyes
- Red, turquoise, green, and orange markers or paint for collar details
- Optional: aluminum foil, stick-on gems, glitter glue, craft jewels, elastic cord, or ribbon
Helpful Tools
- Ruler for clean headdress stripes
- Paintbrushes in small and medium sizes
- Hot glue gun for older crafters with adult supervision
- Craft knife for adults only, if cutting thick cardboard
- Newspaper or scrap paper to protect the table
Safety note: If children are making this Egyptian mask craft, use safety scissors and non-toxic school glue. A craft knife or hot glue gun should be handled only by an adult. The pharaoh look is powerful; burned fingers are not part of the aesthetic.
Step 1: Sketch the Mask Shape
Start with a large piece of cardboard or poster board. Draw a long oval face shape in the center. Tutankhamun’s mask has a calm, symmetrical face, so keep the chin rounded and the cheeks smooth. Above the face, sketch the outline of the nemes headdress. This famous royal headcloth flares outward at the sides and falls down toward the shoulders.
A good beginner shape looks like a large upside-down shield with a face in the middle. The top should be wide and rounded, the sides should angle outward, and the lower edges should reach below the chin. Do not worry if the first sketch looks more like a fancy toaster than a pharaoh. Light pencil lines are easy to adjust.
Step 2: Cut Out the Base
Cut around the outside of the mask shape. If the cardboard is thick, ask an adult to help. For a wearable mask, carefully mark and cut eye holes. For a wall display, you can simply draw or paint the eyes instead of cutting them out.
If you want a stronger mask, cut a second identical base and glue the two layers together. This gives the project more structure, especially if you plan to add raised decorations, foil, beads, or a cardboard beard.
Step 3: Build the Face
Paint the face area gold or cover it with gold paper. Metallic gold acrylic paint gives a nice shine, but gold wrapping paper, gold cardstock, or aluminum foil brushed with yellow-gold paint can also work. Smooth the surface as much as possible so the face looks polished.
Next, draw the facial features. Tutankhamun’s mask is known for its steady, almond-shaped eyes. Cut two almond shapes from white paper, glue them in place, and outline them heavily with black marker. Add black pupils, dark brows, and the long cosmetic lines that extend outward from the eyes. These bold lines are one of the easiest ways to make the mask look Egyptian-inspired.
Draw a slim nose and a small, calm mouth. Keep the expression peaceful. Ancient Egyptian royal art often showed rulers in an idealized, composed way. In other words, this is not the moment for a giant cartoon grin, unless your pharaoh has just discovered pizza.
Step 4: Create the Blue-and-Gold Nemes Headdress
The striped headdress is the star of the craft. Paint or cover the entire headdress area in gold first. Once dry, use a ruler to draw curved blue stripes that follow the shape of the headcloth. The stripes should start near the top center and curve down along the sides.
You can make the blue stripes with paint, construction paper, craft foam, or marker. Blue paper strips are excellent for younger crafters because they create clean lines without waiting for paint to dry. For a more dimensional look, use foam strips and glue them over the gold background.
Try to keep the stripes evenly spaced, but do not panic over small imperfections. Handmade crafts should look handmade. Ancient artisans were masters of precision; we are people trying not to glue our sleeve to the table. Both journeys have dignity.
Step 5: Add the Royal Cobra and Vulture
At the top of the forehead, the original mask includes protective royal symbols: a cobra and a vulture. These represented powerful goddesses and royal authority over Egypt. For a classroom craft, simplify these symbols into small paper shapes.
To make the cobra, draw a small snake with a raised hood on gold or yellow paper. Add black eyes and a few blue or red lines. For the vulture, cut a small bird head and wing shape from gold or white paper. Glue both symbols above the brow area. If the pieces are too tiny, make one larger central cobra instead. The point is to suggest royal protection, not pass an Egyptology exam with tweezers.
Step 6: Make the False Beard
The false beard is another signature detail. Cut a narrow, slightly curved rectangle from cardboard. Round the bottom edge, then paint it blue and gold. You can add diagonal stripes to imitate a braided look. Glue or tape the beard under the chin.
For extra dimension, fold the top of the beard slightly before attaching it. This allows it to sit forward from the face rather than lying completely flat. If you are making a wearable mask, keep the beard lightweight so it does not pull the mask down.
Step 7: Design the Broad Collar
Below the face, add a broad collar. Ancient Egyptian collars often used rows of colorful shapes inspired by beads, petals, and protective patterns. Draw a semicircle or wide necklace shape across the lower part of the mask. Paint rows of red, turquoise, blue, green, orange, and gold rectangles or teardrops.
Stick-on gems, sequins, or small paper squares can make the collar look more elaborate. If you are working with a group of students, this is a great place for creativity. One student might make a neat geometric collar, while another creates something that looks like a treasure chest exploded. Both can look fantastic.
Step 8: Add Details and Highlights
Once the main parts are finished, add final details. Use a black marker to sharpen the eye outlines, brows, nose, mouth, beard lines, and collar borders. Use white paint or a white gel pen to add tiny highlights to the eyes and gems. Add dots, lines, and small patterns to the headdress and collar.
If your mask looks flat, add contrast. Dark outlines make gold areas stand out. Blue stripes look stronger when their edges are clean. A few carefully placed highlights can make paper jewels appear shiny. The best craft projects often improve dramatically in the last ten minutes, when the small details finally pull everything together.
Step 9: Make It Wearable or Display-Ready
To make a wearable mask, punch one hole on each side and tie elastic cord or ribbon through the holes. Reinforce the holes with tape first so the cardboard does not tear. Make sure the eye holes are large enough for safe visibility.
For a display mask, glue a cardboard strip or craft stick to the back as a hanger support. You can also mount the finished mask on black poster board with a title such as “Tutankhamun-Inspired Egyptian Mask.” Add a few short facts about ancient Egyptian funerary art to turn the craft into an educational presentation.
Creative Variations
Easy Paper Plate Version
Use a paper plate for the face and attach a cardboard headdress behind it. This version is ideal for younger kids because the round face is already formed. Paint the plate gold, add paper eyes, attach blue-and-gold stripes, and finish with a collar cut from construction paper.
Cardboard Relief Version
For a more advanced Tutankhamun mask project, layer cardboard pieces to create raised eyebrows, lips, beard, and collar bands. Paint the entire surface after assembly. This creates a sculptural effect without needing clay or plaster.
Foil Shine Version
Cover the gold areas with smooth aluminum foil, then lightly brush with gold paint or yellow marker. The foil gives the mask a metallic glow. Use this method carefully, because foil wrinkles easily. Small wrinkles can actually look like hammered metal, so consider them “ancient texture” and move forward proudly.
Classroom Group Version
For a classroom, assign each student a section: face, headdress, collar, symbols, or background facts. This turns the project into a collaborative ancient Egypt display. Students can also compare how modern craft materials imitate ancient materials such as gold, colored glass, and stone inlays.
Common Mistakes and How to Fix Them
The Headdress Looks Too Flat
Add more stripes and outline them in black or dark blue. The stripes create movement and make the mask instantly recognizable.
The Face Looks Too Cartoonish
Make the eyes longer and more almond-shaped. Keep the mouth small and calm. Strong brows and extended eye lines will make the design look more historical and less like a cereal mascot.
The Gold Paint Looks Dull
Add a second coat after the first layer dries. Metallic paints often need two coats. You can also add gold paper or foil accents to brighten key areas.
The Mask Bends
Glue a second cardboard layer to the back or attach vertical support strips. Lightweight cardboard is easier to cut, but it may need reinforcement.
What This Craft Teaches About Ancient Egypt
A Tutankhamun mask craft is more than a pretty art project. It introduces students to ancient Egyptian beliefs about the afterlife, royal symbolism, idealized portraiture, and the role of materials in visual storytelling. Gold was not just beautiful; it carried religious meaning. Blue was not just decorative; it suggested eternity, sky, and divine association. The cobra and vulture were not random animals; they were symbols of protection and kingship.
By recreating these elements with simple supplies, crafters can better understand how design communicates power. The mask teaches symmetry, pattern, color contrast, and cultural context. It also encourages careful observation. When students study the original mask before crafting, they notice details they might otherwise miss: the shape of the eyes, the curve of the headdress, the collar rows, and the calm expression.
Experience Notes: What It Is Really Like to Make a Tutankhamun Mask
The first time you make a Tutankhamun mask, the project may look simple on paper. Gold face, blue stripes, dramatic eyesdone, right? Then you sit down with cardboard, and suddenly the headdress seems to have more geometry than expected. The secret is to build the mask in layers instead of trying to perfect everything at once.
One of the best experiences comes from sketching the mask lightly before cutting anything. A rough draft gives you freedom. You can widen the headdress, adjust the jawline, or move the eyes before the scissors make decisions that cannot be politely undone. Many crafters find that the mask looks strange during the early stage. That is normal. Before the stripes, eyeliner, beard, and collar appear, the project may resemble a golden potato with ambition. Keep going.
The painting stage is usually the most satisfying. Gold paint changes the entire mood of the project. Even basic cardboard starts to look ceremonial. However, patience matters. If you add blue stripes before the gold layer dries, the colors may smear. Waiting a few extra minutes can save the design from becoming “ancient Egyptian rainstorm.”
Another helpful experience is using paper strips for the headdress instead of painting every stripe by hand. Cut blue strips, curve them slightly, and glue them over the gold base. This method gives cleaner edges and works especially well for kids or group projects. If a strip lands crooked, lift it quickly and try again before the glue sets.
The eyes are the emotional center of the mask. Spend extra time there. Long black outlines, bold brows, and steady pupils can transform the entire piece. Even if the collar is imperfect or the cobra looks more like a confused noodle, strong eyes will make the mask feel intentional.
For display projects, mounting the finished mask on black poster board makes the colors pop. Add a small title card and a short explanation of the symbols. This turns a craft into a mini museum exhibit. For wearable masks, comfort matters. Keep the cardboard light, reinforce the side holes, and test visibility before using it in a presentation or costume activity.
The biggest lesson from making a Tutankhamun-inspired mask is that historical crafts work best when they balance accuracy and creativity. You are not copying the original object exactly, and you should not try to pretend your cardboard version belongs in a museum case. Instead, you are using art to understand history. That is the real treasureplus, unlike ancient gold, this one can be made at the kitchen table.
Conclusion
Learning how to make a Tutankhamun mask is a golden opportunity to combine art, history, and hands-on creativity. With cardboard, paint, paper, and a little patience, you can recreate the most recognizable features of King Tut’s famous burial mask: the shining gold face, blue striped headdress, royal symbols, false beard, and colorful collar.
This Egyptian craft tutorial works for school projects, homeschool lessons, museum-inspired activities, party decorations, and history displays. The finished mask can be simple or elaborate depending on your materials and time. Most importantly, the project helps crafters see ancient Egyptian art as a language of symbols, colors, and beliefsnot just something shiny in a textbook.
So clear the table, protect the floor, and prepare for a little royal sparkle. Your Tutankhamun-inspired mask may not be made of solid gold, but with the right details, it can still look like it was designed for a pharaoh with excellent taste and a very patient craft assistant.













