
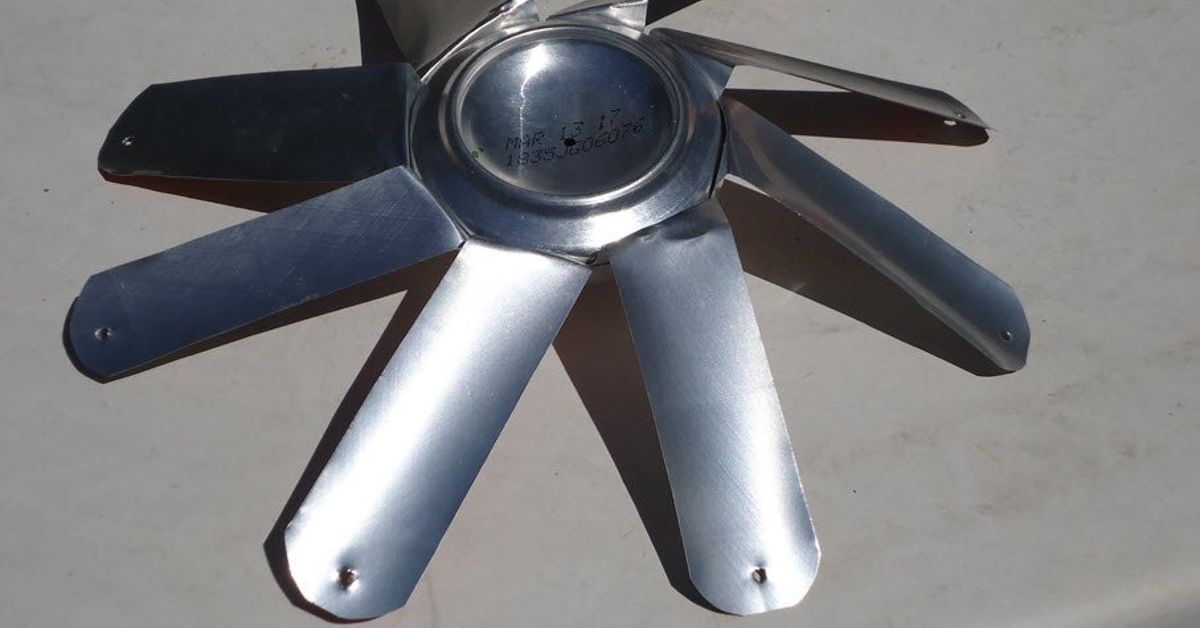
Before tossing an empty soda can into the recycling bin, take another look. Beneath the bright logo and faint smell of cola is a lightweight piece of aluminum that can become a flower, lantern, planter, garden marker, pinwheel, or hanging mobile.
Making colorful garden decor using empty soda cans is inexpensive, beginner-friendly, and flexible enough for almost any outdoor style. You can create cheerful cottage flowers, modern geometric ornaments, whimsical insects, or shimmering decorations that dance in the breeze.
This guide explains how to clean, cut, paint, assemble, display, and maintain soda-can garden art safely. It also includes practical lessons for helping your creations survive sunshine, rain, wind, and the occasional overly curious squirrel.
Why Soda Cans Are Great for Recycled Garden Art
Aluminum beverage cans are light, easy to shape, widely available, and less prone to heavy rust than ordinary steel. Their thin walls can be cut, punched, embossed, curled, folded, and layered into surprisingly detailed decorations.
Reusing cans for crafts can extend the life of the material before it enters the waste stream. The U.S. Environmental Protection Agency identifies aluminum cans as recyclable and notes that recycling conserves resources while providing environmental and economic benefits. Any unused cans and clean scraps should still be placed in the appropriate local recycling program.
Materials and Tools
You will not need every item for every project. Choose one design first, then gather the necessary supplies before your worktable mysteriously disappears beneath a mountain of craft materials.
- Clean, empty aluminum soda cans
- Warm water, dish soap, and a bottle brush
- Cut-resistant work gloves
- Safety glasses
- Metal snips or sturdy utility scissors
- An awl, nail, pushpin, or small drill
- Needle-nose pliers
- Fine-grit sandpaper or a sanding sponge
- Outdoor metal primer, when required
- Outdoor-rated spray paint or brush-on enamel
- Compatible exterior clear sealer
- Painter’s tape, stencils, and paint markers
- Galvanized wire, floral wire, or UV-resistant cord
- Wooden stakes, screws, washers, beads, or bottle caps
- A drop cloth or flattened cardboard box
Safety First: Handle Cut Aluminum Carefully
An intact soda can feels harmless, but cut aluminum can develop edges sharp enough to cause serious cuts. Wear gloves while cutting and shaping, and use safety glasses when drilling or punching holes. NIOSH identifies flying particles and metal slivers as eye hazards, while the Consumer Product Safety Commission recommends considering the hazards of tools and materials used in craft projects. Adults should handle cutting, drilling, and edge finishing when children participate.
Use spray paint outdoors or in a well-ventilated area away from flames, heaters, and sparks. Follow the manufacturer’s instructions for temperature, humidity, protective equipment, drying time, and recoat intervals. Good ventilation helps control exposure to paint fumes and spray mist.
How to Prepare Empty Soda Cans
1. Wash and Dry Them
Rinse each can soon after use so sugary residue does not become a sticky science project. Wash the inside and outside with warm, soapy water, rinse thoroughly, and let the can dry completely. Paint adheres more reliably to clean, dry metal.
2. Make the First Cut
For flat aluminum sheets, carefully pierce the can near the top with an awl. Insert metal snips and cut around the upper rim. Repeat near the bottom, cut vertically through the remaining cylinder, and gently flatten the sheet.
For planters and lanterns, keep the lower portion intact and remove only the top. Work slowly because cutting too quickly can create jagged points.
3. Finish Every Edge
Trim sharp corners, lightly sand rough areas, and fold exposed edges inward with needle-nose pliers whenever possible. Run a gloved finger around the piece before painting. If the edge snags the glove, it needs more work.
4. Scuff, Prime, and Paint
Lightly scuff glossy areas if recommended by the paint manufacturer. Wipe away dust and allow the surface to dry. Apply a metal primer when required.
Several thin coats usually produce a smoother finish than one heavy coat. Paint manufacturers commonly recommend clean surfaces, sweeping passes, slight overlap, and light applications. Always follow the distance and drying instructions printed on your specific product.
Project 1: Bright Soda-Can Flowers
Soda-can flowers are ideal for beginners because slightly uneven petals still look charming. Gardens are wonderfully forgiving critics.
- Remove the top and bottom of a clean can.
- Flatten the remaining aluminum sheet.
- Cut a circle about three or four inches wide.
- Mark six or eight petals around the circle.
- Cut inward, stopping before reaching the center.
- Round the petals and bend them slightly for dimension.
- Punch a hole through the center.
- Prime and paint the flower.
- Attach a bead, bottle cap, or painted washer as the center.
- Secure the flower to a stake, fence, wreath, or trellis.
For a fuller flower, layer two circles of different sizes. Rotate the top layer so its petals sit between those below. Try turquoise petals with a yellow center, or combine copper, plum, and deep red for a richer look.
Project 2: Punched-Pattern Garden Lanterns
Punched-can lanterns cast tiny points of light across a patio or garden table. Use battery-operated LED tea lights rather than open flames. Thin metal transfers heat quickly, and painted surfaces may not be designed for flame exposure.
- Fill a clean can with water and freeze it. The ice supports the walls during punching.
- Draw stars, leaves, dots, spirals, or geometric shapes on the outside.
- Place the frozen can on a folded towel.
- Punch holes with a nail and gentle hammer taps.
- Allow the ice to melt, then drain and dry the can.
- Remove the top if a wider opening is needed.
- Finish the edge, prime the surface, and apply paint.
- Add a wire handle or leave the lantern freestanding.
- Insert a weather-resistant battery LED light.
Group three lanterns in coordinated colors for a stronger display. Different hole sizes add texture, while repeating the same motif helps the set look intentional instead of like a collection of cans that lost an argument with a woodpecker.
Project 3: Mini Soda-Can Planters
Remove the top of the can, carefully finish the rim, and punch several drainage holes through the bottom. Proper drainage is important because waterlogged potting mix leaves too little air around plant roots.
University Extension resources also note that metal containers can experience larger temperature fluctuations and absorb considerable heat. Small soda-can planters therefore work best as temporary displays, in sheltered locations, or with plants that can be monitored closely.
Fill the can with lightweight potting mix rather than dense garden soil. Suitable choices include tiny succulents, compact annuals, or small herbs. Because a standard soda can offers very little root space, it should not be considered permanent housing for a tomato plant with major real-estate ambitions.
Inspect the planters after rain. The CDC recommends eliminating standing water in outdoor containers because planters, cups, buckets, and similar items can become mosquito-breeding sites. Drainage holes and regular maintenance help prevent this problem.
Project 4: Pinwheels and Hanging Mobiles
Make a Simple Pinwheel
Cut a flat aluminum square. Draw a diagonal line from each corner toward the center, then cut along each line while stopping about half an inch before the middle.
Bring every other corner inward and secure the points with a brad, screw, or loose wire loop. Mount the pinwheel on a garden stake with enough space for it to rotate freely.
Create a Hanging Mobile
Cut leaves, butterflies, fish, circles, or abstract shapes from flattened cans. Punch one hanging hole in each piece, paint both sides, and suspend the shapes from a branch, metal ring, or piece of driftwood.
Fishing swivels help pieces rotate smoothly. Choose UV-resistant cord and keep the mobile away from windows, gutters, bird feeders, and busy flight paths.
Project 5: Ladybugs, Bees, and Plant Markers
The rounded bottom of a soda can makes a convincing insect body. Cut off the bottom inch or two, smooth the edge, and paint it red with black dots for a ladybug or yellow with black stripes for a bee.
Wire antennae can be added, but curl the ends inward so they are not sharp. Attach the finished insects to rocks, fences, stakes, or wooden garden signs.
For plant markers, cut long rectangles from flattened aluminum. Round the corners, fold all edges inward, and write plant names with an outdoor paint marker. Punch a hole and attach each label to wire or a wooden stake.
Choosing a Garden-Friendly Color Scheme
A coordinated palette helps multiple soda-can decorations look like a collection rather than evidence of an explosion in the craft aisle.
- Analogous colors: Blue, teal, and green create a calm display.
- Complementary colors: Purple and yellow or blue and orange provide bold contrast.
- Cottage colors: Soft pink, pale blue, yellow, and white feel cheerful.
- Modern colors: Black, white, silver, and one bright accent look clean and graphic.
- Sunset colors: Coral, orange, red, and plum add warmth.
Repeat at least one color throughout the display. Metallic paint works well on flower centers, embossed veins, raised dots, and decorative edges.
How to Make Soda-Can Decor Last Outdoors
Allow the Paint to Cure
Paint that feels dry may not be fully cured. Follow the longest curing time listed for your primer, paint, or clear coat before assembling and displaying the pieces.
Prevent Trapped Rainwater
Angle ornaments so water can drain. Add discreet holes to horizontal or enclosed shapes and inspect them after storms. Trapped water can stain paint, loosen adhesives, and attract insects.
Use Strong Fasteners
Wire, screws, washers, folded tabs, and outdoor-rated hardware often survive changing weather better than ordinary craft glue. When using adhesive, select one rated for both metal and outdoor exposure.
Inspect the Decor Each Season
Wash the pieces gently and check for peeling paint, loose wires, sharp bends, faded details, or cracked attachments. Touch up minor damage and retire anything that can no longer be handled safely.
Common Mistakes to Avoid
- Skipping edge finishing: Paint does not turn sharp metal into a marshmallow.
- Painting dirty or wet cans: Residue and moisture weaken adhesion.
- Applying one thick coat: Heavy paint can run, wrinkle, or remain sticky.
- Mixing incompatible coatings: Some primers, paints, and sealers may react poorly.
- Ignoring drainage: Trapped rainwater creates plant and mosquito problems.
- Using open flames: Use battery-operated lights in homemade can lanterns.
- Ignoring wind: Lightweight pieces should be secured or placed in protected areas.
Experiences and Lessons From Making Soda-Can Garden Decor
The first lesson this project teaches is that preparation takes longer than the glamorous part. It is tempting to start painting as soon as the cans are dry, but the best-looking pieces usually come from careful cutting, edge folding, cleaning, and planning. A rushed flower may still be colorful, but it can also have crooked petals, visible glue blobs, and one sharp corner waiting to introduce itself.
Working in batches makes the process easier. Clean six or eight cans at once, cut the basic shapes during one session, finish the edges during another, and paint everything together. Batch work reduces setup time and helps the colors remain consistent. It also prevents the familiar DIY situation in which the gloves are on, the lawn is covered, and the one tool you need is inside the house beneath a pile of unopened mail.
Thin coats of paint are another important lesson. The first coat may look disappointing, especially when printed graphics remain visible underneath. That is normal. A light base coat creates a better surface for the next application, while a heavy coat can drip into punched holes, pool around folded edges, and remain tacky. Patience generally produces a cleaner finish and sharper details.
Turning each piece between coats helps cover curled petals, deep folds, rims, and backs that are easy to miss. Painting both sides is particularly important for mobiles because every surface becomes visible as the ornament moves.
Outdoor placement can dramatically change the appearance of a project. A pale flower may disappear against light siding but look striking against a dark fence. Reflective silver pieces may flash intensely in afternoon sun, while dark metal planters can become hot. Before permanently attaching anything, test the arrangement from several viewing distances and observe it in both morning and afternoon light.
Wind also deserves respect. Lightweight aluminum moves beautifully in a gentle breeze, but an unbalanced mobile can twist its strings into a knot that resembles modern art created during a disagreement. Pinwheels need enough clearance to rotate, and hanging pieces should not strike windows, siding, or gutters.
Fishing swivels, small washers, and slightly heavier bottom ornaments can improve movement. In exposed areas, compact designs tend to perform better than broad shapes that act like tiny sails.
Mini planters are adorable but demanding. Their small amount of soil can dry out quickly, yet poor drainage can drown roots after a storm. Place them where they receive suitable light without baking throughout the hottest part of the day. In very hot climates, using a removable nursery pot or artificial greenery may be more practical than planting directly inside the metal can.
The strongest displays usually include repetition. One can flower is cute; nine flowers in three coordinated colors become a garden feature. Repeating the same leaf shape in a mobile or using matching dots across several insects creates visual rhythm. Small variations preserve the handmade charm, while a shared palette prevents the arrangement from looking like the recycling bin exploded during art class.
Finally, accept weathering as part of the experience. Outdoor crafts will fade, scratch, collect dust, and occasionally bend. That does not mean the project failed. A worn finish can add character, while repainting gives you an excuse to try a new color palette next season.
The goal is not museum-level permanence. It is to transform an ordinary disposable object into something colorful, personal, and useful for as long as it remains attractive and safe.
Conclusion
Learning how to make colorful garden decor using empty soda cans opens the door to dozens of affordable outdoor projects. With careful cleaning, safe cutting, smooth edges, suitable paint, effective drainage, and weather-conscious assembly, ordinary beverage cans can become flowers, lanterns, planters, insects, markers, pinwheels, and mobiles.
Start with one simple design and gradually build a coordinated collection. The finished pieces will add color and movement to your garden while proving that creativity can begin with something as ordinary as a can that once held twelve ounces of root beer.
Research basis: This article synthesizes practical information from the U.S. EPA, CDC, CPSC, NIOSH, university Extension programs, and major coating manufacturers regarding aluminum recycling, craft safety, eye protection, ventilation, metal painting, container drainage, heat exposure, and standing-water prevention.














