
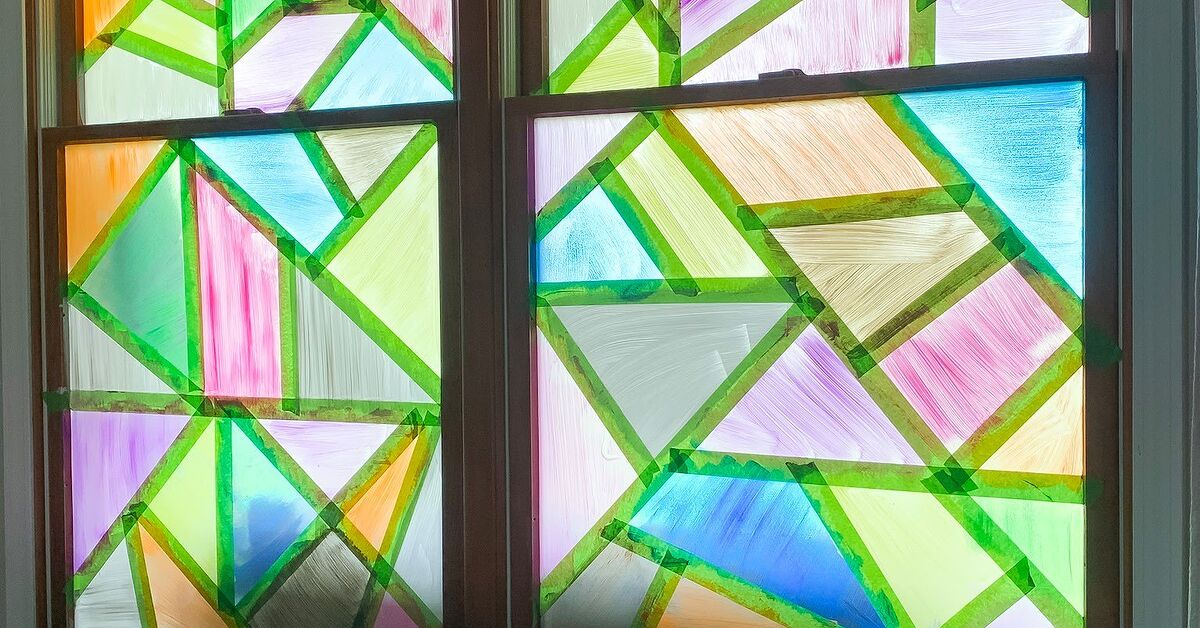
If your windows are feeling a little too plain and your walls are giving off “I have strong opinions about beige” energy, faux stained glass window art is one of the easiest ways to add color, personality, and a little sunshine drama without buying an actual antique church window. The beauty of this DIY is that it can look surprisingly polished while staying beginner-friendly, budget-friendly, and refreshingly solder-free.
Real stained glass is gorgeous, but it also asks for specialty tools, patience, and a willingness to work with glass like you are starring in a very niche craft documentary. Faux stained glass, on the other hand, gives you the same luminous look with craft paint, clear glue, liquid leading, or even tissue paper and window film. In other words, you can get the charm without turning your dining table into a medieval workshop.
This guide walks you through exactly how to make faux stained glass window art DIY style, from choosing supplies and patterns to avoiding muddy colors and annoying air bubbles. You’ll also learn a few smart shortcuts, some design ideas that actually look good in a real home, and the common mistakes that make a project go from “handmade beauty” to “why does this flower look like a melted jellybean?”
Why Faux Stained Glass Window Art Is Such a Smart DIY
There is a reason faux stained glass keeps showing up in craft rooms, apartments, sunrooms, and thrift-flip videos. It solves several decorating problems at once. First, it adds color without requiring you to paint an entire wall. Second, it works beautifully with natural light, which means the artwork changes throughout the day. Morning light gives it a soft glow, afternoon light makes it bold, and sunset can make even a simple leaf pattern look unexpectedly expensive.
It also offers flexibility. You can create a removable panel for a picture frame, decorate a cabinet door, make a suncatcher for a kitchen window, or use stained-glass-style window film when you want privacy without sacrificing brightness. That makes it ideal for renters, budget decorators, and anyone who likes a project that feels high-impact without becoming a three-week lifestyle commitment.
From an SEO-friendly practical standpoint, this is also a great beginner craft because the barrier to entry is low. You do not need to cut real glass. You do not need to solder. You do not need a workshop. You mostly need a smooth surface, a design, a steady-ish hand, and the courage to trust the process when it looks weird halfway through. Which it will. That is part of the fun.
Choose the Right Faux Stained Glass Method
There is more than one way to make DIY faux stained glass, and choosing the right method depends on your budget, skill level, and patience.
1. Classic Paint-and-Leading Method
This is the closest look to traditional stained glass. You use a clear glass or acrylic surface, trace a pattern, create black or metallic “leading” lines, then fill the spaces with translucent faux stained-glass paint. This method creates the boldest stained-glass effect and is perfect for framed art, window panels, and decorative inserts.
2. Budget Glue-and-Acrylic Method
This version is wildly popular because it is affordable and easy to customize. Clear glue mixed with a few drops of acrylic paint creates a translucent color wash, while black glue or a paint marker forms the faux leading. It is a fantastic option for crafters who want the look without specialty supplies.
3. Mod Podge or Tissue Paper Method
If you want a softer, collage-inspired result, tissue paper on glass gives you a stained-glass vibe with less precision. It works especially well for kid-friendly projects, mason jars, and decorative accents where you want color and glow more than fine detail.
4. Decorative Window Film Method
If your goal is privacy with style, stained-glass-look window film is the fastest route. It is less of an art project and more of a decorating shortcut, but it absolutely belongs in the faux stained glass family. It is especially useful on bathroom windows, sidelight panels, glass cabinets, and doors.
Supplies You’ll Need for the Most Popular Method
For the classic faux stained glass window art DIY method, gather these supplies:
- A glass pane, thrifted picture frame glass, or clear acrylic sheet
- Rubbing alcohol or mild soap and water
- Lint-free cloth or paper towels
- A printed pattern or hand-drawn template
- Painter’s tape
- Liquid leading, dimensional black liner, or faux leading product
- Translucent glass-effect paint or a DIY glue-and-paint color mix
- Toothpicks or a pin for popping bubbles
- A craft knife for cleaning dry edges
- A protected flat work surface
If you are using the budget method, add clear school glue and acrylic craft paint. If you want the tissue-paper route, swap the paint for cut tissue shapes and a gloss decoupage medium.
Step-by-Step: How to Make Faux Stained Glass Window Art DIY
Step 1: Start With Truly Clean Glass
This is the least glamorous step and one of the most important. Any dust, oil, or fingerprints can interfere with how the paint or glue adheres. Clean the surface thoroughly, then wipe it down with rubbing alcohol and let it dry completely. Once it is clean, try not to touch the area you plan to decorate. Yes, this feels dramatic. Yes, it matters.
Step 2: Secure Your Pattern Behind the Glass
Choose a design with clear sections. Florals, leaves, geometric shapes, birds, moons, suns, and simple Art Deco patterns all work beautifully. Tape the pattern to the back of the glass so you can trace it from the front. If your design is very detailed, simplify it a little. Faux stained glass tends to look better when the sections are distinct and not the size of a grain of rice.
Step 3: Apply the Faux Leading
Now you are creating the outlines that mimic the metal came used in real stained glass. Slowly trace the pattern with your liquid leading or black liner. Try to keep your pressure steady so the lines stay consistent. If the line blobs in one spot, resist the urge to panic-poke it immediately. Let it dry first. You can trim clumps later with a craft knife once the leading hardens.
This step sets the tone for the whole piece. Crisp, slightly raised lines make the finished art look intentional and polished. Uneven lines can still be charming, though. Faux stained glass has a handmade personality, and perfection is not the goal. “Looks great when the sun hits it” is the goal.
Step 4: Let the Outline Dry Fully
Do not rush this. If the leading is even a little wet, your color will smear, your sections will merge, and your flower petals may become one giant abstract blob. Dry time varies by product and thickness, but giving the outline a full dry period is one of the smartest things you can do.
Step 5: Fill the Sections With Color
Once the outline is dry, fill each area with translucent color. If you are using faux stained-glass paint, squeeze or brush it into each section and use a toothpick to pull the color gently toward the edges. This matters because translucent formulas can shrink slightly as they dry, and you do not want little clear gaps hugging your outline like awkward halos.
If you are making your own color, mix clear glue with a few drops of acrylic paint until the blend looks glossy and translucent rather than chalky and opaque. You want jewel-tone color, not kindergarten poster paint vibes. Apply the mixture generously enough to self-level, but not so much that it spills over the leading.
Step 6: Pop Bubbles and Fix Trouble Spots
Air bubbles happen. They are not a moral failure. Use a toothpick or pin to pop them while the color is still wet. If one section looks thin, add a little more. If color sneaks over the line, let it dry before cleaning it up. Working in smaller sections gives you better control and keeps the whole project from turning into a slippery race against time.
Step 7: Let It Dry, Then Cure
Drying is when patience earns its paycheck. Set the panel flat in a dust-free area and let it dry thoroughly before moving it. Some formulas dry within several hours, while others need a full day before they are stable enough to handle. If you used a removable or semi-permanent glass-effect paint, give it even more time to cure fully before hanging it in a sunny window.
Step 8: Frame, Hang, or Display
Once dry, place the glass back into its frame or display the panel on its own. A faux stained glass piece looks fantastic in a black frame, brass frame, or thrifted wood frame with a fresh coat of paint. Hang it in a sunny spot where light can pass through. This is not the time to tuck it into a dim hallway beside the vacuum closet. Let it shine.
The Budget-Friendly Glue-and-Paint Version
If you want faux stained glass window art DIY results on a very small budget, the glue-and-paint approach is your best friend. The basic idea is simple: mix black paint into glue for your leading, then create translucent fills using clear glue and a small amount of acrylic paint. It is inexpensive, beginner-friendly, and surprisingly effective.
The secret is restraint. Too much acrylic paint will turn the mixture cloudy and opaque. Too little will make the color disappear once dry. Test one small section first. Look for a syrupy consistency and a candy-like color when held against the light. This method is especially great for family crafts, seasonal window art, and thrifted frame makeovers.
Design Ideas That Work Beautifully
If you are not sure what to make, start with designs that flatter light rather than fight it.
Botanical Patterns
Leaves, vines, wildflowers, lemons, mushrooms, and branches feel fresh and timeless. They also divide naturally into color sections, which makes them ideal for beginners.
Geometric Panels
Triangles, arches, sunbursts, diamonds, and grid-based motifs create a modern faux stained glass look. They are clean, stylish, and easier to trace than a full peacock with emotional depth.
Seasonal Motifs
Snowflakes, pumpkins, hearts, stars, and ornaments work well for temporary decor. If you love changing your home with the seasons, a removable faux stained glass panel gives you color without permanent commitment.
Privacy-First Designs
For entry doors, bathroom windows, or cabinet glass, choose patterns with more filled area and frosted or lightly textured effects. These give you the stained-glass mood while softening the view from outside.
Common Faux Stained Glass Mistakes to Avoid
Using dirty glass: paint hates grease, and fingerprints are tiny chaos agents.
Skipping the dry time: impatience is the fastest way to smear outlines and muddy colors.
Choosing a pattern with microscopic details: intricate does not always mean elegant. Sometimes it just means exhausting.
Making the color mix too opaque: the magic of faux stained glass comes from light passing through.
Moving the panel too early: even if it looks dry, the inside can still be soft.
Hanging it in the wrong place: if light never reaches it, your masterpiece will be robbed of its best feature.
Where to Use Faux Stained Glass in Your Home
This DIY is more versatile than people expect. Try it in these spots:
- Kitchen windows that need color but not heavy curtains
- Bathroom windows where you want privacy and brightness
- Cabinet doors for a vintage-inspired upgrade
- Sunrooms and enclosed porches
- Entryway sidelights
- Thrifted frames turned into hanging window art
- Seasonal suncatchers for kids’ rooms or craft corners
You can also lean finished faux stained glass panels on shelves, layer them over mirrors, or hang them in front of plain windows for a stained-glass look without replacing the actual glass. That is a big win if you want dramatic decor without dramatic renovation invoices.
What the Experience Really Feels Like When You Make It
The first time you make faux stained glass window art DIY style, the experience is usually a mix of confidence, confusion, and a weird amount of staring at glue. You begin with a clean sheet of glass and a strong sense that this will be easy. Then you start the outline and realize your hand has suddenly forgotten how lines work. The good news is that the project gets more satisfying with every section you fill.
One of the best parts of the experience is how quickly the design starts to look legitimate. Even a simple pattern can feel exciting once the black leading goes down. It gives the project structure right away. At that point, you stop feeling like someone doing random crafts at the kitchen table and start feeling like a person with an aesthetic plan. That emotional upgrade is worth a lot.
Then comes the color-filling stage, which is easily the most fun part. The paints or glue mixtures catch the light differently depending on how thickly they are applied, and the whole project begins to transform from outline to artwork. This is when most people get hooked. You fill one green leaf, then a golden petal, then a blue arc, and suddenly you are holding the panel up to the window every six minutes like a tiny stained-glass inspector.
There is also a surprising lesson in patience built into the craft. Faux stained glass looks like a fast project, but the drying time matters just as much as the painting. If you rush it, the result will tell on you. If you let it rest, cure, and settle, the finish becomes smoother, richer, and far more convincing. It is one of those crafts that rewards leaving it alone, which may be emotionally challenging for people who enjoy poking things to “see if they’re dry yet.”
Another common experience is realizing how different the piece looks at different times of day. Morning sun can make soft colors glow like pastel candy, while direct afternoon light turns the same panel bold and jewel-toned. That changing effect is what makes faux stained glass so enjoyable to live with. It is not just wall decor. It interacts with the room. It throws color. It creates mood. It has a little theatrical flair without demanding a spotlight.
Most beginners also discover that handmade imperfections often improve the final piece. A slightly uneven line, a little color variation, or a tiny ripple in the fill can make the artwork feel more charming, not less. Faux stained glass is one of those rare crafts where character can beat precision. That is comforting for anyone whose crafting style is best described as “enthusiastic with occasional surprises.”
By the end of the project, the experience usually shifts from “I hope this works” to “Wait, I want to make three more.” That is because the finished piece feels both decorative and personal. It can reflect your favorite colors, your favorite motifs, or even the mood of a specific room. A geometric panel looks modern. A floral panel feels romantic. A citrus-themed panel in the kitchen feels playful. You are not just making a craft. You are making a little light-catching personality piece for your home.
And that may be the most satisfying part of all. Faux stained glass window art feels special when it is finished, but it is also genuinely enjoyable while you are making it. It asks you to slow down, notice color, and pay attention to light. In a world full of rushed projects and disposable decor, that is a pretty lovely experience for a sheet of glass and a few bottles of paint.
Note: This web-ready article intentionally omits source links and removes editor artifacts for clean publication.














