
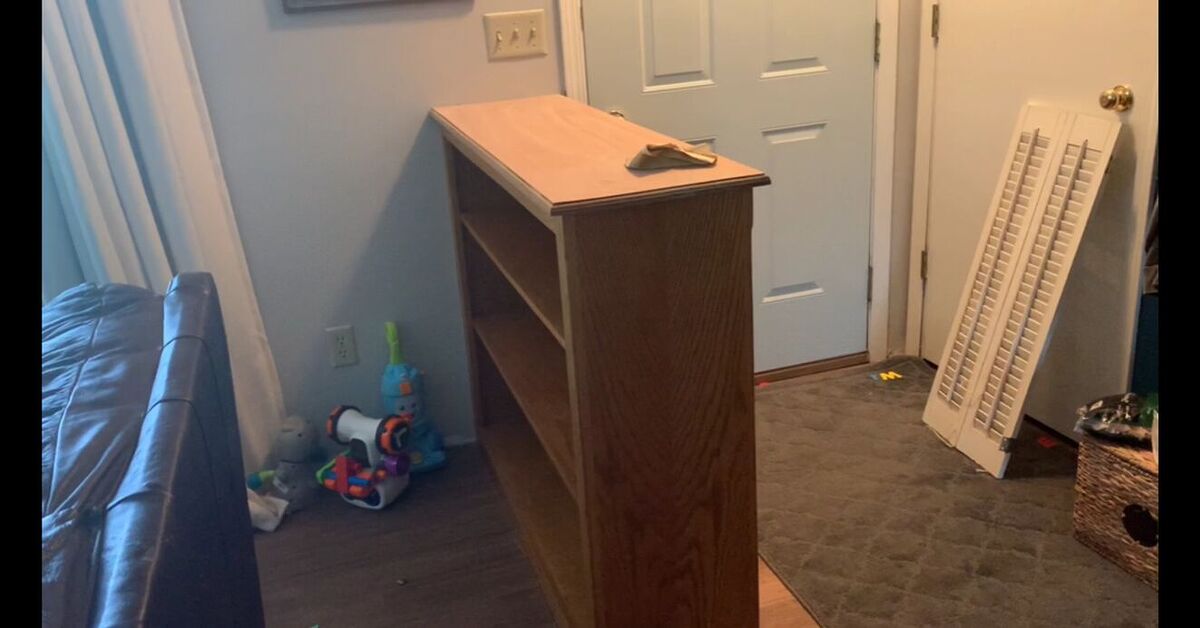
Note: This DIY guide is written for homeowners who want a built-in bookcase, cabinet, mudroom bench, media wall, window seat, or shelving unit to look like it was born with the housenot like it arrived last Saturday in a flat-pack box with one mysterious extra screw.
Introduction: The Magic Trick of Matching Built-ins to Trim
A built-in can make a room look custom, polished, and quietly expensive. But if the paint color, sheen, or finish does not match the existing trim, the whole thing can look a little “almost there.” Matching your built-in to your trim is one of the smartest DIY painting upgrades because it visually connects new woodwork to the architecture of the room. Suddenly, a basic bookcase can look like original millwork. A stock cabinet can feel custom. A mudroom bench can stop shouting, “I was assembled during a three-coffee weekend.”
The good news? You do not need to be a professional painter to get a smooth, durable, trim-matching finish. You do need patience, good prep, the right primer, the right paint, and a willingness to sand more than your optimistic inner voice originally planned. This guide walks you through how to paint a built-in to match your trim DIY-style, from color matching and surface prep to priming, painting, caulking, and avoiding the tiny mistakes that become very noticeable once sunlight hits the wall at 4:17 p.m.
Whether your built-in is raw wood, MDF, plywood, laminate, or previously painted cabinetry, the same basic formula applies: clean it, sand it, fill it, prime it, paint it, and let it cure. That may not sound glamorous, but neither does “stir paint thoroughly,” and yet here we are, respecting the process like responsible adults.
Why Paint a Built-in to Match Your Trim?
Painting a built-in the same color as your trim creates a seamless, architectural look. Instead of treating the built-in like a separate furniture piece, matching it to baseboards, crown molding, door casings, and window trim makes it feel integrated into the room.
It Creates a Custom Look
When a built-in matches the trim, the eye reads it as part of the home’s original design. This is especially helpful if you are using affordable materials, ready-made cabinets, or DIY shelving. A consistent paint color can disguise material transitions and make simple construction look more refined.
It Reduces Visual Clutter
If your room already has baseboards, crown molding, doors, window casing, shelves, cabinet doors, and wall color competing for attention, matching the built-in to the trim simplifies the palette. The result feels calmer and more intentional.
It Highlights the Decor
A built-in painted in the same trim color becomes a quiet backdrop for books, baskets, pottery, framed art, plants, and decorative objects. In other words, your shelves stop stealing the show and let your styling do the talking. Very polite of them.
Before You Start: Identify Your Existing Trim Color and Sheen
The biggest mistake homeowners make is assuming “white trim” means “any white paint will do.” It will not. White paint is a sneaky little shapeshifter. Some whites are creamy, some are cool, some are gray, some are yellow, and some look perfect in the store but turn into office-printer paper under your living room lighting.
Find the Exact Paint Color If Possible
If you have leftover trim paint in the garage or basement, check the label for the color name, brand, base, and sheen. If the can is still usable, stir it well and test it on a scrap board or hidden area. If the paint is old, clumpy, rusty, or smells like a science experiment gone emotionally wrong, take the label or a dry paint chip to a paint store for matching.
Use a Physical Sample
If you do not know the trim color, remove a small piece of trim if practical, or carefully cut a paint chip from an inconspicuous spot. Many paint stores can scan a physical sample and create a close color match. For the best result, bring a sample at least about the size of a quarter, larger if possible.
Match the Sheen, Not Just the Color
Trim is commonly painted in satin, semi-gloss, or gloss because these finishes are more durable and easier to wipe clean than flat wall paint. Built-ins get touched, bumped, dusted, and occasionally attacked by rogue baskets, so matching the trim sheen is just as important as matching the color. If your trim is satin, use satin. If it is semi-gloss, use semi-gloss. Mixing sheens can make the same color look slightly different.
Choose the Best Paint for Built-ins and Trim
Built-ins need a tougher finish than regular walls. Shelves, cabinet doors, drawers, benches, and ledges experience more wear, so choose a durable cabinet, door, and trim enamel or a high-quality interior trim paint. These paints are designed to level well, resist sticking, and hold up better to frequent handling.
Water-Based Acrylic-Alkyd or Urethane Enamel
Acrylic-alkyd and urethane trim enamels are popular for built-ins because they offer a smoother, harder finish than basic wall paint while cleaning up with soap and water. They are often used on cabinets, doors, trim, and furniture. They also tend to level better, which means fewer visible brush marks when applied carefully.
Cabinet, Door, and Trim Paint
Cabinet and trim paints are a strong choice for built-ins because they are made for high-touch surfaces. If your built-in has doors, drawers, shelves, or a bench seat, this type of paint is usually worth the extra cost. Saving a few dollars on paint only to watch baskets scrape it off later is not the money-saving victory we hoped for.
Avoid Flat Paint on Built-ins
Flat paint can look beautiful on walls, but it is not ideal for built-ins that need cleaning or durability. It can scuff more easily and may not wipe down as well. For most DIY built-in painting projects, satin or semi-gloss is the safer choice.
Tools and Supplies You Will Need
Gather your supplies before you start so you do not end up wandering through the house with wet primer on your hands, looking for painter’s tape like a very specific ghost.
- Painter’s tape
- Drop cloths or rosin paper
- Degreasing cleaner or mild detergent
- Microfiber cloths
- Vacuum with brush attachment
- Wood filler or spackling compound
- Paintable caulk
- Putty knife
- 120-, 180-, and 220-grit sandpaper or sanding sponges
- Tack cloth or damp lint-free cloth
- High-adhesion primer
- Cabinet, door, and trim enamel
- Angled sash brush
- High-density foam roller or fine-finish microfiber roller
- Paint tray and liners
- Small artist brush for tight corners
- Optional: paint sprayer for a factory-like finish
Safety First: Check for Lead Paint in Older Homes
If your home was built before 1978, take lead paint seriously before sanding, scraping, or disturbing old painted surfaces. Lead-based paint was banned for residential use in the United States in 1978, but older homes may still contain it beneath newer layers of paint. Built-ins, trim, doors, windows, cabinets, and stair parts are all areas where lead paint may be present.
Before sanding old trim or tying a new built-in into existing painted woodwork, test for lead or consult a certified professional. If lead is present, do not dry sand, scrape, or create dust casually. Use lead-safe work practices or hire a qualified contractor. This is one area where “I saw a video online” is not a sufficient safety plan.
Step-by-Step: How to Paint a Built-in to Match Your Trim DIY
Step 1: Remove Doors, Drawers, Hardware, and Shelves
If your built-in has removable shelves, cabinet doors, drawer fronts, knobs, hinges, or pulls, take them off before painting. Label everything as you go. A small piece of painter’s tape marked “left upper door” can save you from the future puzzle game nobody asked to play.
Place hardware in labeled bags. If you are painting adjustable shelves, remove the shelf pins and keep them together. Painting around hardware almost always looks messy, and paint buildup around hinges can stop doors from closing properly.
Step 2: Protect the Room
Cover the floor with drop cloths, rosin paper, or heavy kraft paper. Tape off adjacent walls, flooring, outlets, countertops, and any surfaces you do not want painted. If the built-in meets existing trim, tape carefully or plan to paint the built-in and trim edge together for a continuous finish.
If you are painting a built-in that reaches the ceiling, protect the ceiling line as well. Gravity is not your friend when paint is involved. Gravity is a drama queen.
Step 3: Clean Every Surface
Clean before sanding. This is important because sanding dirty surfaces can grind grease, dust, wax, and grime into the finish. Use a degreasing cleaner or mild detergent solution, especially if the built-in is in a kitchen, mudroom, family room, or anywhere hands frequently touch it.
After cleaning, wipe the surface with a damp cloth and let it dry completely. Paint does not bond well to dust, grease, or mystery residue. If the built-in has been around kids, pets, candles, cooking oil, or enthusiastic holiday decorating, assume it needs a serious cleaning.
Step 4: Fill Nail Holes, Seams, and Imperfections
Use wood filler for nail holes, dents, gaps in wood, and uneven joints. Apply it with a putty knife, slightly overfilling the hole so you can sand it flush after it dries. For MDF edges that look fuzzy or porous, filler can help create a smoother edge before priming.
Use paintable caulk for small gaps where the built-in meets walls, trim, crown molding, baseboards, or face frames. Caulk helps the project look built-in rather than “placed near the wall with confidence.” Smooth the caulk with a damp finger or caulk tool, then let it dry according to the manufacturer’s instructions.
Step 5: Sand for Adhesion and Smoothness
Sanding gives primer and paint something to grip. You do not need to remove every bit of existing finish unless it is peeling or failing. For most painted or sealed surfaces, scuff sanding is enough. Use 180- to 220-grit sandpaper for previously painted or primed surfaces. For rough wood or MDF edges, start with a slightly coarser grit, then finish with 220-grit for smoothness.
Sand with the grain when working with wood. For detailed trim, use sanding sponges because they conform to curves and profiles better than flat paper. After sanding, vacuum thoroughly and wipe the surface with a tack cloth or damp lint-free cloth. Dust left behind can create gritty paint, and nobody wants a built-in that feels like it spent spring break at the beach.
Step 6: Prime the Built-in
Primer is the handshake between the surface and the paint. Use a bonding primer for slick, glossy, previously painted, laminate, or factory-finished surfaces. Use an appropriate primer for raw wood, MDF, or stained wood. MDF is especially thirsty, and its edges can swell or turn rough if handled poorly, so sealing those edges well is key.
Apply primer in a thin, even coat. Use an angled brush for corners, seams, and trim details, then roll flat areas with a fine-finish roller. Avoid heavy primer buildup in corners. Drips love corners. They gather there like tiny paint goblins.
Let primer dry fully. Then lightly sand with 220-grit sandpaper or a fine sanding sponge. This knocks down raised grain, dust nibs, and brush texture. Vacuum and wipe clean before painting.
Step 7: Paint the First Coat
Stir your trim paint thoroughly. Start with the detailed areas using a high-quality angled brush. Paint inside corners, molding, edges, face frames, shelf supports, and any grooves first. Then roll larger flat areas with a high-density foam roller or fine-finish microfiber roller.
Work in manageable sections and maintain a wet edge. Do not overwork the paint once it starts to set. Many trim enamels are designed to level as they dry, so brushing back and forth forever can actually make the finish worse. Apply the paint, smooth it, and then leave it alone. This is difficult for perfectionists. Be brave.
Step 8: Sand Lightly Between Coats
Once the first coat is dry, inspect the surface under good light. Lightly sand with 220-grit or finer sandpaper to smooth imperfections. You are not trying to remove the coat; you are simply refining it. Pay attention to drips, dust nibs, and raised edges around filled holes.
Vacuum and wipe clean again. This small step makes a big difference in the final finish. Skipping it is like dressing nicely and then putting on muddy shoes.
Step 9: Apply the Second Coat
Apply a second thin, even coat of paint. Most built-ins need at least two coats for full coverage, durability, and consistent sheen. Dark colors, bright whites, and high-contrast changes may require a third coat. Let each coat dry according to the paint label.
For shelves, paint the underside first, then the top. For cabinet doors, paint the backs first if possible, let them dry, then paint the fronts. Use painter’s pyramids or small supports to keep freshly painted pieces elevated while drying.
Step 10: Let the Paint Cure Before Heavy Use
Dry paint is not the same as cured paint. A surface may feel dry in a few hours but still be soft underneath. Built-ins need cure time before you reload shelves, slide baskets around, close doors firmly, or place decor that could stick to the finish. Follow the paint manufacturer’s cure-time guidance.
If you are painting bookshelves, wait before loading heavy books. If you must style the shelves sooner, place lightweight items gently and avoid dragging objects across the surface. Paint needs time to toughen up, much like anyone assembling furniture with unclear instructions.
How to Make the Built-in Match Existing Trim Perfectly
Paint Connected Trim at the Same Time
If the built-in touches baseboards, crown molding, or casing, consider painting those connected trim pieces at the same time. Even if you have the same color, older trim may have faded, yellowed, or collected years of household life. Fresh paint on the built-in next to slightly aged trim can reveal a difference.
Use the Same Paint Brand and Product When Possible
Color formulas can vary slightly by brand and paint line. If your trim was painted with a specific product, use that same product for the built-in when possible. If not, have the paint matched and test it in the actual room before committing.
Test in Natural and Artificial Light
Paint a sample board and hold it against the trim in morning light, afternoon light, and evening lamp light. Built-ins often sit in shadow, so the same color can look darker on recessed shelves than on trim facing the room. Testing helps you avoid surprises.
Brush, Roller, or Sprayer: Which Is Best?
Brush and Roller
A brush and roller are practical for most DIYers. Use a high-quality angled brush for trim profiles and corners, then roll flat surfaces with a fine-finish roller. This method is affordable, controlled, and beginner-friendly.
Paint Sprayer
A sprayer can create a very smooth, professional-looking finish, especially on doors, drawers, and removable shelves. However, it requires more masking, ventilation, practice, and cleanup. Spraying inside a finished room can be risky if you are not comfortable controlling overspray.
Best DIY Compromise
For many homeowners, the best method is brushing details and rolling flat areas. If you remove doors and shelves, you can spray those separately in a garage or protected workspace while brushing and rolling the fixed frame.
Common Mistakes to Avoid
Skipping Primer
Primer improves adhesion, blocks stains, seals porous materials, and creates a consistent base. Skipping it can lead to peeling, uneven sheen, or poor durability. This is especially true for laminate, MDF, stained wood, or glossy surfaces.
Using Wall Paint Instead of Trim Paint
Wall paint is not designed for the same level of wear as trim and cabinets. Built-ins need a harder, more washable finish. Use a cabinet, door, and trim enamel for best results.
Painting Too Thick
Thick coats lead to drips, brush marks, slow drying, and sticky shelves. Thin, even coats are better. Two or three light coats will usually look more professional than one heroic glob of paint.
Reloading Shelves Too Soon
Even after paint dries, heavy items can leave marks if the finish has not cured. Give the built-in enough time before putting books, baskets, electronics, or decorative pieces back.
Specific Examples: Built-in Painting Scenarios
Painting a White Built-in to Match White Trim
White-on-white sounds simple until you discover there are approximately 9,000 whites and they all have opinions. Match the exact trim color and sheen. If the trim is older, clean it first and compare it to your sample. You may need to repaint nearby trim for the best blend.
Painting MDF Built-ins
MDF is popular for DIY built-ins because it is smooth and affordable, but the cut edges can absorb primer and paint unevenly. Sand the edges, seal them well with primer, and sand again before painting. Do not rush the edges; they are where amateur-looking finishes often reveal themselves.
Painting Laminate or Stock Cabinets
Laminate and factory-finished cabinets can be painted, but they require cleaning, scuff sanding, and a strong bonding primer. The surface must be dull and clean before paint goes on. Use a durable trim enamel and allow extra cure time before heavy use.
Painting a Mudroom Built-in
Mudroom benches, cubbies, and lockers take abuse from backpacks, shoes, sports gear, and people who swear they will “only sit for a second.” Use a durable enamel in satin or semi-gloss. Consider adding hooks and baskets only after the paint has cured.
Maintenance Tips for Painted Built-ins
Once your built-in is painted, maintain it like trim or cabinetry. Dust regularly with a soft cloth. Wipe smudges with a damp cloth and mild cleaner. Avoid harsh abrasives, especially during the first few weeks after painting.
Keep a small labeled container of leftover paint for touch-ups. Write the paint brand, color name, formula, sheen, room, and date on the container. Future you will be grateful. Future you may even forgive present you for not labeling the holiday extension cords.
Extra DIY Experience: What Painting a Built-in Really Teaches You
After painting a built-in to match trim, most DIYers learn that the actual painting is only about half the job. The other half is prep, lighting, patience, and accepting that your first sanding pass will somehow reveal three more nail holes you absolutely did not see before. This project rewards slow, careful work. It is not difficult in a dramatic, HGTV-finale kind of way, but it does require attention to detail.
One of the most useful experiences is learning how much sheen affects the final look. Many homeowners focus only on color, but sheen changes how light bounces off the surface. If your existing trim is semi-gloss and your built-in is satin, the color may technically match but still look different. The built-in may appear softer or darker, especially in corners and recessed shelves. Matching sheen helps create that seamless, custom millwork effect.
Another lesson is that caulk can make or break the project. Even a well-built unit can look unfinished if there are tiny shadow lines where the built-in meets the wall, baseboard, or crown molding. A clean bead of paintable caulk visually erases those gaps and makes the piece feel permanent. The trick is not to overdo it. Too much caulk creates lumpy edges that look worse after paint. A small, smooth bead is the goal.
Sanding between coats also feels optional until you compare the results. A lightly sanded coat feels smoother, reflects light more evenly, and helps the next coat sit beautifully. This is especially noticeable on shelves and cabinet doors. If you have ever run your hand across a painted shelf and felt tiny bumps, that is usually dust, raised grain, or skipped sanding. The fix is simple but not glamorous: sand lightly, clean thoroughly, and paint again.
Paint curing is another real-world lesson. It is tempting to reload shelves the minute they feel dry, especially when your books and decor are scattered around the room like a very literary obstacle course. But putting items back too soon can cause sticking, dents, or marks. If possible, wait several days before light use and longer before heavy use. For shelves that will hold books, baskets, or electronics, patience protects the finish.
Many DIYers also discover that painting a built-in changes how the whole room feels. When the built-in matches the trim, the walls may look cleaner, ceilings may feel taller, and the space may appear more intentional. The built-in stops looking like furniture and starts acting like architecture. That is the real payoff. You are not just painting shelves; you are visually upgrading the room.
Finally, this project teaches the value of labeling leftover paint. Touch-ups are almost guaranteed over time, especially on built-ins used by families, pets, guests, or anyone carrying a laundry basket with suspicious confidence. A labeled touch-up jar means you can fix scuffs quickly without playing detective later. Include the brand, color, sheen, and where it was used. That tiny note can save a future afternoon.
In short, painting a built-in to match your trim is one of those DIY projects where precision matters more than power tools. Clean well, sand lightly, prime properly, use durable trim paint, match the sheen, and give the finish time to cure. Do that, and your built-in will look like it has always belonged therecalm, custom, and far more expensive than it actually was. That is the kind of home improvement math everyone can enjoy.
Conclusion
Painting a built-in to match your trim is a high-impact DIY project that can make ordinary shelves, cabinets, benches, and bookcases look like custom architectural features. The secret is not some mysterious professional spell. It is careful prep, accurate color and sheen matching, the right primer, durable cabinet-and-trim paint, light sanding between coats, and enough cure time before everyday use.
If you want the most seamless result, treat the built-in and surrounding trim as one connected design element. Match the paint product when possible, test samples in your room’s lighting, caulk small gaps, and repaint adjacent trim if the old finish has aged. With patience and a steady hand, your DIY built-in can look polished, permanent, and perfectly matchedwithout requiring a contractor, a trust fund, or a reality TV reveal crew.














