
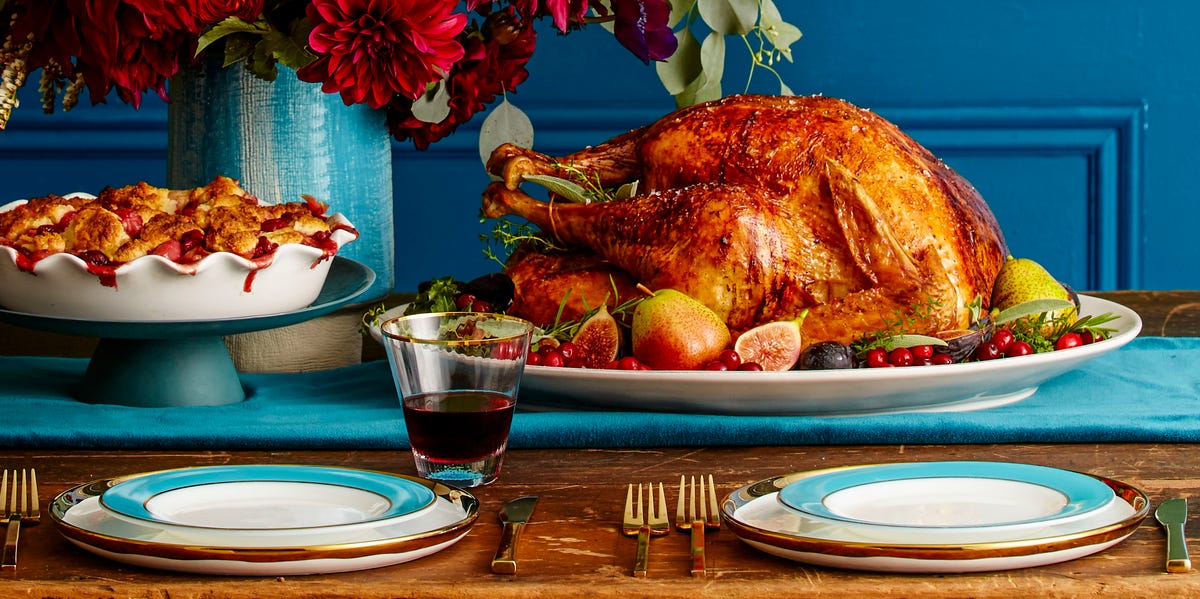
Roasting a Thanksgiving turkey can feel like hosting a tiny, buttery celebrity in your oven. Everyone has opinions. Someone will ask when it is going in, someone else will insist it needs more herbs, and at least one relative will stare at the bird as though they personally trained it for this moment.
The good news: a delicious Thanksgiving turkey does not require culinary wizardry, an industrial-sized injector, or a dramatic speech before opening the oven. It requires planning, safe thawing, steady seasoning, a reliable thermometer, and the bravery to ignore the urge to open the oven every seven minutes.
This guide explains how to prepare a turkey for Thanksgiving, from selecting the right size and thawing safely to dry-brining, roasting, resting, carving, and rescuing your sanity on a busy holiday morning. Whether this is your first turkey or your tenth, these turkey roasting tips will help you serve a golden, juicy centerpiece that earns compliments before anyone starts debating politics.
Start With the Right Turkey and a Realistic Plan
Before seasoning anything, choose a turkey that fits your crowd, refrigerator, roasting pan, and emotional bandwidth. A helpful planning rule is to buy about 1 to 1¼ pounds of whole turkey per guest. Choose closer to 1¼ pounds per person when you want generous leftovers for sandwiches, soup, tacos, and the annual “What exactly is in this casserole?” experiment.
A 12-pound turkey usually works well for eight to ten people, while a 16-pound bird may serve around twelve to fourteen. Larger is not always better. Very large turkeys take longer to thaw, can cook less evenly, and may turn your refrigerator into a poultry-themed obstacle course.
Fresh vs. Frozen Turkey
A fresh turkey can be convenient when purchased close to Thanksgiving, but frozen turkeys are often easier to buy ahead and store. Neither option automatically tastes better than the other. Proper thawing, seasoning, roasting, and resting matter far more than whether the turkey spent part of its life wearing a tiny sweater of ice crystals.
If you buy frozen, create a thawing schedule immediately. Thanksgiving turkey success starts days before the oven is turned on.
How to Thaw a Turkey Safely
The refrigerator is the easiest and safest place to thaw a turkey. Keep the bird in its original wrapper, place it breast-side up on a tray or rimmed pan to catch drips, and set it on the bottom shelf. Allow roughly 24 hours of refrigerator thawing time for every 4 to 5 pounds of turkey.
For example, a 16-pound turkey may need about four days to thaw completely. Add an extra day if your refrigerator is very full, runs cold, or contains three casseroles, two pies, and a mysterious container labeled only “gravy?”
Need a Faster Method?
Cold-water thawing can work when time is tight. Keep the turkey sealed in leak-proof packaging, submerge it in cold water, and change the water every 30 minutes. Plan for approximately 30 minutes of thawing per pound. A turkey thawed with cold water should be cooked immediately after thawing.
Never thaw a turkey on the kitchen counter, in a warm garage, or by placing it near a sunny window. Room-temperature thawing can allow bacteria to multiply on the outer portions while the center remains frozen. Your turkey deserves better than becoming a science project.
Do Not Wash the Turkey
One of the most useful turkey roasting tips is also one of the least glamorous: do not rinse or wash the raw turkey. Water does not remove harmful bacteria from poultry, and splashing can spread raw juices onto the sink, counters, utensils, towels, and nearby food.
Instead, unwrap the turkey carefully, remove the neck and giblets from the cavities, and pat the bird dry with paper towels. Then discard the towels and wash your hands, cutting board, sink, and work surfaces with hot soapy water.
Dry skin is a good thing. Moisture on the surface makes browning harder, while a dry exterior helps create crisp, deeply golden skin.
Dry-Brine for a Juicier Thanksgiving Turkey
Dry-brining is one of the simplest ways to improve turkey flavor without giving up half your refrigerator to a vat of salty water. A dry brine is simply salt applied to the turkey before roasting. As the turkey rests in the refrigerator, the salt seasons the meat more evenly and helps the skin dry out for better browning.
For a classic dry-brined turkey, season the bird one to three days before Thanksgiving. Use kosher salt, black pepper, and optional herbs such as rosemary, sage, thyme, garlic powder, or finely grated citrus zest. The exact amount of salt depends on the brand and crystal size, so use a trusted dry-brine formula rather than guessing aggressively with a giant soup spoon.
How to Dry-Brine a Turkey
- Pat the thawed turkey dry with paper towels.
- Season the cavity, the skin, and the meat beneath the breast skin with your salt-and-herb mixture.
- Place the turkey on a rack set inside a rimmed pan.
- Refrigerate it uncovered for at least 12 hours, preferably 24 to 48 hours.
- Do not rinse the turkey before roasting. Simply brush away any loose herbs or excess seasoning if needed.
Dry-brining is especially useful for home cooks who want flavorful meat and crisp skin without wrestling a huge container of liquid brine. It is less messy, easier to manage, and far less likely to leave your refrigerator smelling like a damp campsite.
Prepare the Turkey for the Roasting Pan
On Thanksgiving morning, remove the turkey from the refrigerator about 30 to 60 minutes before roasting. This takes the worst chill off the exterior and gives you time to organize the pan, chop aromatics, and remind everyone that the oven is temporarily a turkey-only zone.
What You Need
- A sturdy roasting pan or large rimmed baking pan
- A roasting rack, foil coil, or bed of vegetables to lift the turkey
- An instant-read thermometer or probe thermometer
- Paper towels, kitchen twine, and a carving board with grooves
- Butter, olive oil, or another cooking fat
- Aromatics such as onion, garlic, lemon, apple, celery, rosemary, thyme, and sage
Set the turkey breast-side up on a rack in a shallow roasting pan. Lifting it above the bottom of the pan allows heat to circulate and prevents the underside from sitting in liquid. If you do not own a roasting rack, use a tightly coiled strip of aluminum foil or create a sturdy bed of chunky onions, carrots, celery, and herbs.
Brush the skin lightly with melted butter, oil, or a butter-and-oil mixture. Butter brings flavor and encouraging browning, while oil can help the skin color evenly. Either one works. The key is a thin, even coating, not enough fat to make the turkey look like it joined a body-building competition.
Should You Stuff the Turkey?
For the easiest path to evenly cooked turkey, bake stuffing separately in a casserole dish. Stuffing inside the bird must reach 165°F in the center, which can extend cooking time and may leave the breast meat waiting around too long.
You can still add flavor to the turkey cavity without filling it tightly. Loosely place halved onions, lemon wedges, garlic, celery, apple pieces, and fresh herbs inside. These aromatics perfume the meat and drippings while leaving room for heat to circulate.
How to Roast a Turkey for Thanksgiving
For a dependable traditional roast, preheat the oven to 325°F. Place the turkey on a rack in a shallow pan and roast it uncovered. Avoid adding a large amount of water to the pan. Too much liquid creates steam, which can soften the skin and dilute the flavorful drippings you need for gravy.
Roasting time is useful for planning, but it is never the final authority. Turkey shape, oven accuracy, starting temperature, pan material, and whether the bird is stuffed can all affect timing. Use a thermometer, not wishful thinking, to decide when dinner is ready.
Approximate Turkey Roasting Times at 325°F
| Turkey Weight | Approximate Time, Unstuffed |
|---|---|
| 8 to 12 pounds | About 2¾ to 3 hours |
| 12 to 14 pounds | About 3 to 3¾ hours |
| 14 to 18 pounds | About 3¾ to 4¼ hours |
| 18 to 20 pounds | About 4¼ to 4½ hours |
| 20 to 24 pounds | About 4½ to 5 hours |
Begin checking the turkey around 30 to 45 minutes before the earliest estimated finish time. Insert the thermometer into the thickest part of the breast, the innermost thigh, and the innermost wing area without touching bone. The turkey is safely cooked when every tested area reaches 165°F.
Do You Need to Baste?
Not really. Basting can make the cook feel productive, which is emotionally valuable, but frequently opening the oven lowers the heat and can slow roasting. A well-seasoned, dry-brined turkey with a light coating of butter or oil does not need constant attention.
If the skin becomes darker than you like before the turkey reaches temperature, loosely tent the breast with foil. Do not wrap the whole bird tightly unless you want the skin to trade its crispness for a steam bath.
Rest the Turkey Before Carving
When the turkey reaches 165°F, remove it from the oven and let it rest for at least 30 minutes. Larger birds can rest 40 to 45 minutes. Resting allows juices to settle back into the meat, making carving easier and slices noticeably juicier.
This is also your window to finish gravy, warm side dishes, set out rolls, refill drinks, and pretend the meal was always this calm.
Simple Carving Order
- Remove the legs and thighs first.
- Separate the drumsticks from the thighs at the joint.
- Remove each breast half from the breastbone in one large piece.
- Slice the breast meat across the grain.
- Remove wings and arrange everything on a warm platter.
Carving the breast meat off the bone before slicing usually produces cleaner, juicier portions than trying to carve thin slices directly from the whole turkey.
Common Thanksgiving Turkey Mistakes to Avoid
Relying Only on the Pop-Up Timer
A pop-up timer can be a helpful backup, but an instant-read thermometer is more reliable. Check more than one location because dark meat and breast meat do not always finish at the same speed.
Opening the Oven Constantly
Every oven check releases heat. Resist the temptation to inspect the turkey every few minutes. Trust your thermometer and use the oven light when possible.
Skipping the Resting Period
Cutting immediately may seem efficient, but it often leads to dry-looking slices and a cutting board covered in escaped juices. Let the turkey rest. Your patience will be rewarded with better meat and fewer regrets.
Forgetting Leftover Safety
Refrigerate leftover turkey within two hours of serving. Divide it into shallow containers so it cools more quickly, and reheat leftovers to 165°F before serving. Turkey sandwiches are a holiday tradition; questionable leftovers do not need to become one.
Real-World Turkey Roasting Experiences and Lessons
Most people do not learn turkey roasting from one flawless Thanksgiving. They learn from small moments: the year the bird was still icy inside, the year the gravy became a personality test, or the year someone discovered that a “small turkey” is not actually small when it is occupying the entire refrigerator shelf.
One of the biggest lessons home cooks discover is that planning beats panic. The turkey itself may only need a few hours in the oven, but thawing can require several days. A cook who starts thawing early gets to focus on seasoning, side dishes, and family. A cook who forgets thawing may spend Thanksgiving morning researching emergency methods while staring at a frozen bird with the intensity of a detective in a crime drama.
Another common experience is learning that the thermometer becomes the most trusted guest at the table. Turkey timing charts are helpful, but ovens vary wildly. A turkey can finish early, run late, brown too quickly, or cook unevenly depending on its shape and the pan used. When cooks begin checking breast, thigh, and wing temperatures instead of relying only on the clock, their Thanksgiving turkey becomes far more consistent.
Many people also discover that simple seasoning often wins. It is easy to get swept up in elaborate recipes involving seventeen herbs, three kinds of butter, maple syrup, bourbon, pomegranate molasses, and a sauce that requires a tool normally used in chemistry labs. But a properly salted turkey with butter, pepper, garlic, rosemary, thyme, and a few aromatics can taste excellent. Thanksgiving dinner already has plenty of flavors competing for attention. The turkey does not need to perform a one-bird Broadway musical.
Dry-brining often becomes a turning point for repeat turkey cooks. People who once believed turkey breast was destined to be dry may notice a major difference after salting the bird ahead of time and leaving it uncovered in the refrigerator. The meat tastes seasoned throughout, the skin browns more effectively, and there is less need for frantic basting. It is a low-effort improvement that feels almost suspiciously helpful.
Another lesson is that the turkey does not need to be perfect to be memorable. A slightly unevenly browned wing, a missing decorative herb sprig, or a carving job that looks more “rustic” than “magazine cover” will not ruin Thanksgiving. Guests remember warm food, generous portions, laughter, and the moment someone sneaks a piece of crispy skin before dinner officially begins.
The best Thanksgiving turkey experience usually comes from giving yourself a little room for imperfection. Build extra thawing time into the schedule. Start roasting earlier than you think you need to. Let the bird rest while you finish the sides. Keep the thermometer nearby. And remember that even if something goes slightly sideways, gravy, cranberry sauce, and good company are remarkably talented at smoothing over culinary drama.
Note: Roasting times are planning estimates only. Always use a food thermometer and confirm that the thickest part of the breast, thigh, and wing area reaches 165°F before serving.













