
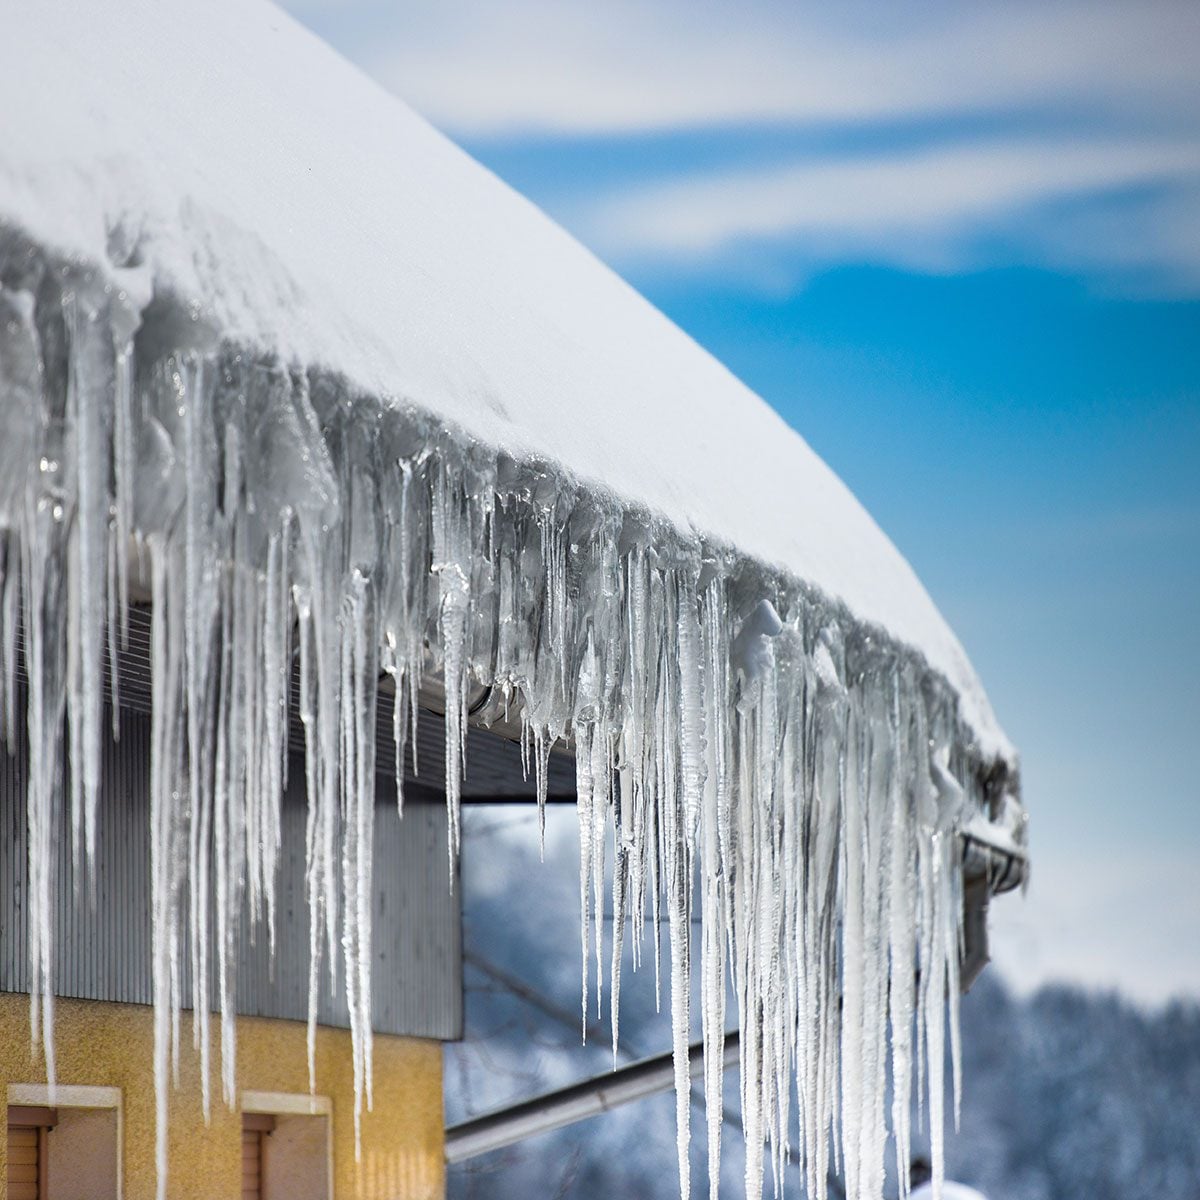
Ice dams are one of winter’s least charming magic tricks. One week your roof looks like a postcard. The next week, a frozen ridge along the eaves is quietly pushing meltwater under shingles, staining ceilings, soaking insulation, and turning your attic into a very expensive science experiment. The good news? Most ice dams are not random acts of weather. They are usually the result of heat escaping from the house, warming the roof unevenly, melting snow, and allowing that water to refreeze at the colder roof edge.
To prevent ice dams on your roof, the goal is simple: keep the roof surface cold and even, give meltwater a clean path to drain, and protect vulnerable roof edges before winter shows up wearing boots. That means air sealing, insulation, attic ventilation, gutter maintenance, snow management, and smart roofing details all work together. Think of it as a winter defense system, not one heroic gadget from the hardware aisle.
This guide explains how ice dams form, how to prevent them before the first storm, what quick actions help during snowy weather, and which “fixes” are more bandage than cure. Let’s climb into the topic without actually climbing onto an icy roof, because gravity has never been known for its sense of humor.
What Is an Ice Dam?
An ice dam is a ridge of ice that forms near the lower edge of a roof, usually along the eaves or above gutters. Snow on the upper roof melts when heat from the home warms the roof deck. The meltwater runs downward until it reaches the colder overhang, where it freezes again. As more water freezes, the ice ridge grows. Eventually, water can pool behind it and sneak under shingles, flashing, or roof edges.
Shingles are excellent at shedding water that flows downward. They are not designed to behave like tiny waterproof submarines while standing water backs up behind ice. Once water gets under the roofing materials, it can damage roof sheathing, insulation, drywall, paint, trim, and even electrical fixtures. In other words, that pretty row of icicles can be less “winter wonderland” and more “invoice with teeth.”
Why Ice Dams Form in the First Place
Ice dams need three main ingredients: snow on the roof, freezing temperatures at the eaves, and enough heat loss to melt snow higher up the roof. You cannot control the sky, but you can control a surprising amount of what happens inside the house and attic.
Warm Air Leaks Into the Attic
The biggest villain is often air leakage. Warm indoor air rises through ceiling cracks, recessed lights, plumbing chases, attic hatches, wiring holes, chimney gaps, and poorly sealed duct openings. Once that warm air reaches the attic, it heats the underside of the roof deck. Snow above that warmer area melts even when the outdoor air is below freezing.
Insulation Is Missing, Thin, or Uneven
Insulation slows heat movement from the living space into the attic. If insulation is too thin, compressed, missing near the eaves, or disturbed by storage boxes and old renovation work, warm spots appear on the roof. These warm spots create uneven melting, which is exactly what ice dams love.
Attic Ventilation Is Blocked or Unbalanced
Ventilation helps keep the underside of the roof closer to outdoor temperature. In many cold-climate homes, the ideal system uses intake vents near the soffits and exhaust vents near the ridge. But ventilation only works when air can actually move. Blocked soffits, insulation stuffed into eaves, undersized vents, or a mix of competing vent types can reduce airflow and allow hot spots to linger.
Gutters and Valleys Trap Water
Clogged gutters do not usually cause the heat-loss problem, but they can make ice buildup worse. Leaves, pine needles, grit, and frozen debris slow drainage. Roof valleys, low-slope areas, dormers, skylights, and complex rooflines can also collect snow and concentrate meltwater.
The Best Way To Prevent Ice Dams: Keep the Roof Cold
The most effective ice dam prevention strategy is not melting the ice after it forms. It is keeping the roof cold enough that snow does not melt unevenly in the first place. That starts inside the home, not outside with a ladder and a heroic playlist.
1. Air Seal the Attic Floor
Air sealing is the quiet champion of ice dam prevention. Before adding more insulation, seal the attic floor so warm indoor air cannot escape into the attic. Focus on the obvious leaks first: attic access panels, recessed can lights, plumbing vents, electrical penetrations, open wall tops, dropped ceilings, bath fan housings, and gaps around chimneys or flues.
Use caulk for small gaps, spray foam for larger cracks, weatherstripping around attic hatches, and sheet metal plus high-temperature sealant around heat-producing flues where required. Never bury old non-rated recessed lights under insulation, and never use standard foam against a hot chimney or vent pipe. When in doubt, bring in an insulation contractor or energy auditor. The attic is not the place to freestyle with materials that have “probably fine” energy.
2. Add the Right Amount of Insulation
Once air leaks are sealed, insulation can do its job. In cold climates, many homes benefit from a deep, continuous layer of attic insulation. The right R-value depends on your region, local code, roof design, and existing attic condition, but the basic principle is universal: insulation should be even, dry, fluffy, and continuous across the attic floor.
Pay special attention to the eaves. This is where insulation is often thinnest because roof framing leaves very little space. If the insulation is thin at the outside wall line, heat can warm the lower roof deck and trigger ice problems. Baffles or vent chutes can help maintain airflow from the soffits while allowing insulation to extend properly toward the exterior wall.
3. Balance Intake and Exhaust Ventilation
Attic ventilation is not a substitute for insulation and air sealing. It is the supporting actor, not the superhero. After heat loss is reduced, ventilation helps remove small amounts of remaining heat and moisture. A balanced system usually includes soffit intake vents and ridge or high-roof exhaust vents, allowing cold outdoor air to wash along the underside of the roof deck.
Do not assume more vents automatically mean better performance. Mixing ridge vents, gable vents, box vents, and powered vents without a plan can short-circuit airflow. For example, air may enter through a nearby roof vent and exit through a ridge vent without pulling fresh air from the soffits. The result is ventilation theater: it looks busy, but the roof still gets warm.
4. Keep Soffit Vents Open
Soffit vents often get blocked by insulation, paint, dust, bird nests, or enthusiastic storage decisions. If intake vents are blocked, ridge vents cannot do much. Air needs a path. Install baffles where insulation meets the eaves so air can travel from the soffits into the attic without being smothered by insulation.
During a fall roof check, look for dark, open soffit slots or perforated panels. Inside the attic, check whether daylight is visible near the eaves. If the soffits are hidden behind insulation, ventilation may be compromised. This is one of those small details that can make a big difference when January arrives with an attitude.
Roofing Details That Help Prevent Water Damage
Even a well-sealed, well-insulated home can experience ice dam conditions during severe winters. That is why smart roof assemblies include backup protection. These materials do not stop ice dams from forming, but they help prevent backed-up water from reaching the roof deck and entering the home.
Install Ice-and-Water Shield at the Eaves
Ice-and-water shield is a self-adhering waterproof membrane installed under shingles at vulnerable roof areas. In ice dam regions, it is commonly installed along eaves, valleys, around skylights, at roof-wall intersections, and around penetrations. Many building codes require ice barrier protection in areas with ice dam risk, typically extending from the roof edge to a point at least 24 inches inside the exterior wall line.
This membrane is most practical during roof replacement or major roof repair. If your roof is due for replacement, ask the contractor exactly how far the ice barrier will extend, whether local code requires more on steep roofs, and how valleys and penetrations will be protected. A single narrow strip at the edge may not be enough on every roof pitch.
Improve Flashing Around Trouble Spots
Skylights, chimneys, dormers, sidewalls, and valleys are common leak locations when ice dams occur. Proper flashing directs water out and over the roofing layers. Poor flashing can direct water sideways, backward, or into the house, which is rude behavior for metal.
If you have recurring leaks in the same location, do not assume the ice dam is the only problem. You may also have inadequate step flashing, missing kick-out flashing, aged sealant, or roof-wall details that need correction. A good roofing contractor should inspect these areas before recommending heat cables or other surface fixes.
Exterior Maintenance Before Winter
Interior improvements solve the root cause, but exterior maintenance reduces risk during storms. The best time to prepare is fall, before the roof turns into a slip-and-slide designed by a villain.
Clean Gutters and Downspouts
Clean gutters allow meltwater to drain away from the roof edge. Remove leaves, sticks, shingle grit, seed pods, and mud. Flush downspouts with water to confirm they are open. If downspouts discharge onto walkways, redirect them so winter runoff does not become a skating rink by the front door.
Gutter guards may help reduce debris, but they are not magic force fields. Some guards clog with fine debris or freeze over. Inspect them before winter and after major leaf drop.
Trim Overhanging Branches
Tree branches that hang over the roof drop leaves into gutters and shade roof areas, allowing snow and ice to linger. Trimming branches can improve drainage and reduce debris. It also lowers the chance of branches breaking under snow load and damaging the roof.
Inspect the Roof Surface
Loose shingles, cracked flashing, exposed nails, damaged pipe boots, and worn sealant all make winter leaks more likely. A pre-winter roof inspection is especially important if the home has had previous ice dams, ceiling stains, or attic moisture problems.
Snow Management During Winter
When heavy snow falls, removing some snow from the roof edge can reduce ice dam risk. The safest homeowner tool is a roof rake with an extension handle, used from the ground. Pull snow down gently from the lower portion of the roof after storms, especially when several inches accumulate and temperatures are expected to swing above and below freezing.
Do not scrape down to the shingles. Leave a thin layer of snow to avoid damaging the roof. Do not use metal shovels, axes, hammers, or dramatic medieval energy. Roof shingles are not built for battle reenactments.
For steep roofs, high roofs, heavy snow loads, or homes with limited ground access, hire a professional snow removal crew. Falling from a ladder in winter is a much bigger problem than an ugly icicle.
Are Heat Cables a Good Ice Dam Solution?
Heat cables can help create drainage channels through snow and ice at eaves, gutters, and downspouts. They may be useful for specific problem areas, especially on roof sections that cannot be redesigned easily. However, heat cables do not fix the underlying cause of ice dams. They use electricity to manage symptoms.
If you use them, choose listed products, follow manufacturer instructions, and consider professional installation. Poorly installed cables can damage roofing materials, create electrical hazards, or fail when needed most. Heat cables should be viewed as a targeted backup, not a permission slip to ignore attic air leaks.
What Not To Do With Ice Dams
Some ice dam “solutions” are popular because they sound quick. Unfortunately, quick and smart are not always roommates.
Do Not Hack at the Ice
Chopping ice with an axe, hammer, shovel, or crowbar can damage shingles, gutters, flashing, and your own balance. It can also send ice chunks flying into windows, siding, landscaping, or people. If an ice dam must be opened urgently, call a professional who uses steam or other roof-safe methods.
Do Not Use Rock Salt on the Roof
Rock salt can corrode metal gutters, damage shingles, stain siding, and harm plants below. Calcium chloride is sometimes used carefully for temporary drainage channels, but even that should be handled with caution and kept away from materials that may be damaged. Prevention is cleaner than chemistry.
Do Not Vent Bath Fans Into the Attic
Bathroom and kitchen exhaust fans must vent outdoors, not into the attic or soffit area. Dumping warm, moist air into an attic can increase condensation, frost, mold risk, and roof warming. If your bath fan disappears into the attic like a magician’s scarf, fix it before winter.
How To Diagnose Your Home’s Ice Dam Risk
You can often spot warning signs before a major leak happens. After a light snowfall, look at the roof from the ground. If snow melts quickly in patches while neighboring roofs stay white, heat may be escaping through the attic. Large icicles along one section of the roof may indicate uneven roof temperature or poor drainage. Ceiling stains near exterior walls are another red flag.
Inside the attic, look for damp insulation, frost on nail tips, dark staining on roof sheathing, moldy odors, blocked vents, and gaps around penetrations. If you are uncomfortable walking in an attic, do not force it. A home energy auditor, insulation contractor, or qualified roofer can inspect the attic and roof safely.
A Practical Ice Dam Prevention Checklist
Before Winter
- Seal attic air leaks around penetrations, hatches, and chases.
- Confirm attic insulation is deep, even, dry, and not compressed.
- Install baffles at eaves where needed to preserve soffit airflow.
- Check that soffit and ridge vents are open and balanced.
- Clean gutters and downspouts after leaves fall.
- Inspect roof flashing, shingles, valleys, skylights, and pipe boots.
- Trim branches that drop debris or shade problem roof areas.
During Winter
- Use a roof rake from the ground after heavy snow, if safe.
- Watch for uneven roof melting, large icicles, or recurring ice ridges.
- Keep downspouts clear where visible and reachable.
- Call a professional for dangerous ice buildup, steep roofs, or active leaks.
During Roof Replacement
- Install code-compliant ice-and-water shield at eaves and valleys.
- Upgrade flashing around chimneys, dormers, skylights, and walls.
- Review attic ventilation design before new roofing goes on.
- Ask whether roof geometry creates special ice dam risk areas.
Real-World Experiences: What Homeowners Learn the Hard Way
One of the most common ice dam stories starts with a homeowner blaming the gutters. It makes sense at first glance. The ice is hanging from the gutters, the icicles look guilty, and the gutters are right there at the scene of the crime. But after the gutters are cleaned, the ice returns. Why? Because the real issue is often upstairs: warm air leaking into the attic and heating the roof deck. The gutter is not the criminal mastermind. It is more like the getaway car.
Another frequent lesson is that adding insulation without air sealing can produce disappointing results. A homeowner may pay to blow in more insulation, only to see ice dams come back the next winter. The reason is simple: insulation slows heat movement, but it does not stop warm air from escaping through holes. If indoor air can rush through plumbing chases, attic hatches, recessed lights, and open wall cavities, it will carry heat and moisture straight into the attic. The better order is seal first, insulate second, ventilate correctly, and then celebrate with hot chocolate.
Homeowners with older houses often discover that the trickiest areas are not the wide-open attic floor but the edges. Cape-style homes, finished attics, knee walls, dormers, cathedral ceilings, and additions can create hidden bypasses where heat sneaks into roof cavities. A perfectly insulated flat attic area may still have ice dams if the knee wall doors leak air or the sloped ceiling bays are poorly vented. In these homes, a thermal camera scan during cold weather can be eye-opening. Warm roof areas often show up like a map of where money is escaping.
Some people also learn that roof raking is helpful but limited. Pulling snow from the lower roof edge after storms can reduce the fuel for ice dams, especially on simple one-story roofs. But roof raking every storm is not a lifestyle plan most people enjoy. It is a maintenance tactic, not a cure. If you find yourself racing outside after every snowfall like your roof is a needy pet, it is time to investigate attic heat loss.
Another experience worth noting: heat cables can be useful in the right place but frustrating when expectations are too high. They can create melt channels, especially near valleys or gutters that freeze repeatedly. But they will not make a poorly insulated roof behave like a properly built cold roof. They also require electricity, maintenance, and careful installation. For some homes, they are a reasonable backup. For others, they become decorative spaghetti with a power bill.
Finally, many homeowners only understand the value of ice-and-water shield after a leak. During a reroofing project, it may feel like one more line item. But when ice backs water up at the eaves, that self-adhering membrane can be the difference between “good thing we planned ahead” and “why is the ceiling making soup?” The best time to install it is when the roof is already open. Waiting until after winter damage appears is like buying an umbrella after the couch is wet.
Conclusion: Prevent Ice Dams by Fixing the Cause, Not Just the Ice
The smartest way to prevent ice dams on your roof is to manage heat, air, moisture, and drainage as one system. Start by sealing attic air leaks. Add enough insulation to keep heat inside the living space. Maintain balanced attic ventilation so the roof deck stays closer to outdoor temperature. Keep gutters clean, rake heavy snow safely when needed, and use ice-and-water shield during roof work to protect vulnerable edges.
Ice dams may look like an exterior problem, but the root cause often begins indoors. A cold, dry, well-sealed attic is your best defense. Your roof does not need winter heroics; it needs building science, a little maintenance, and fewer warm air leaks sneaking upstairs like they own the place.










