
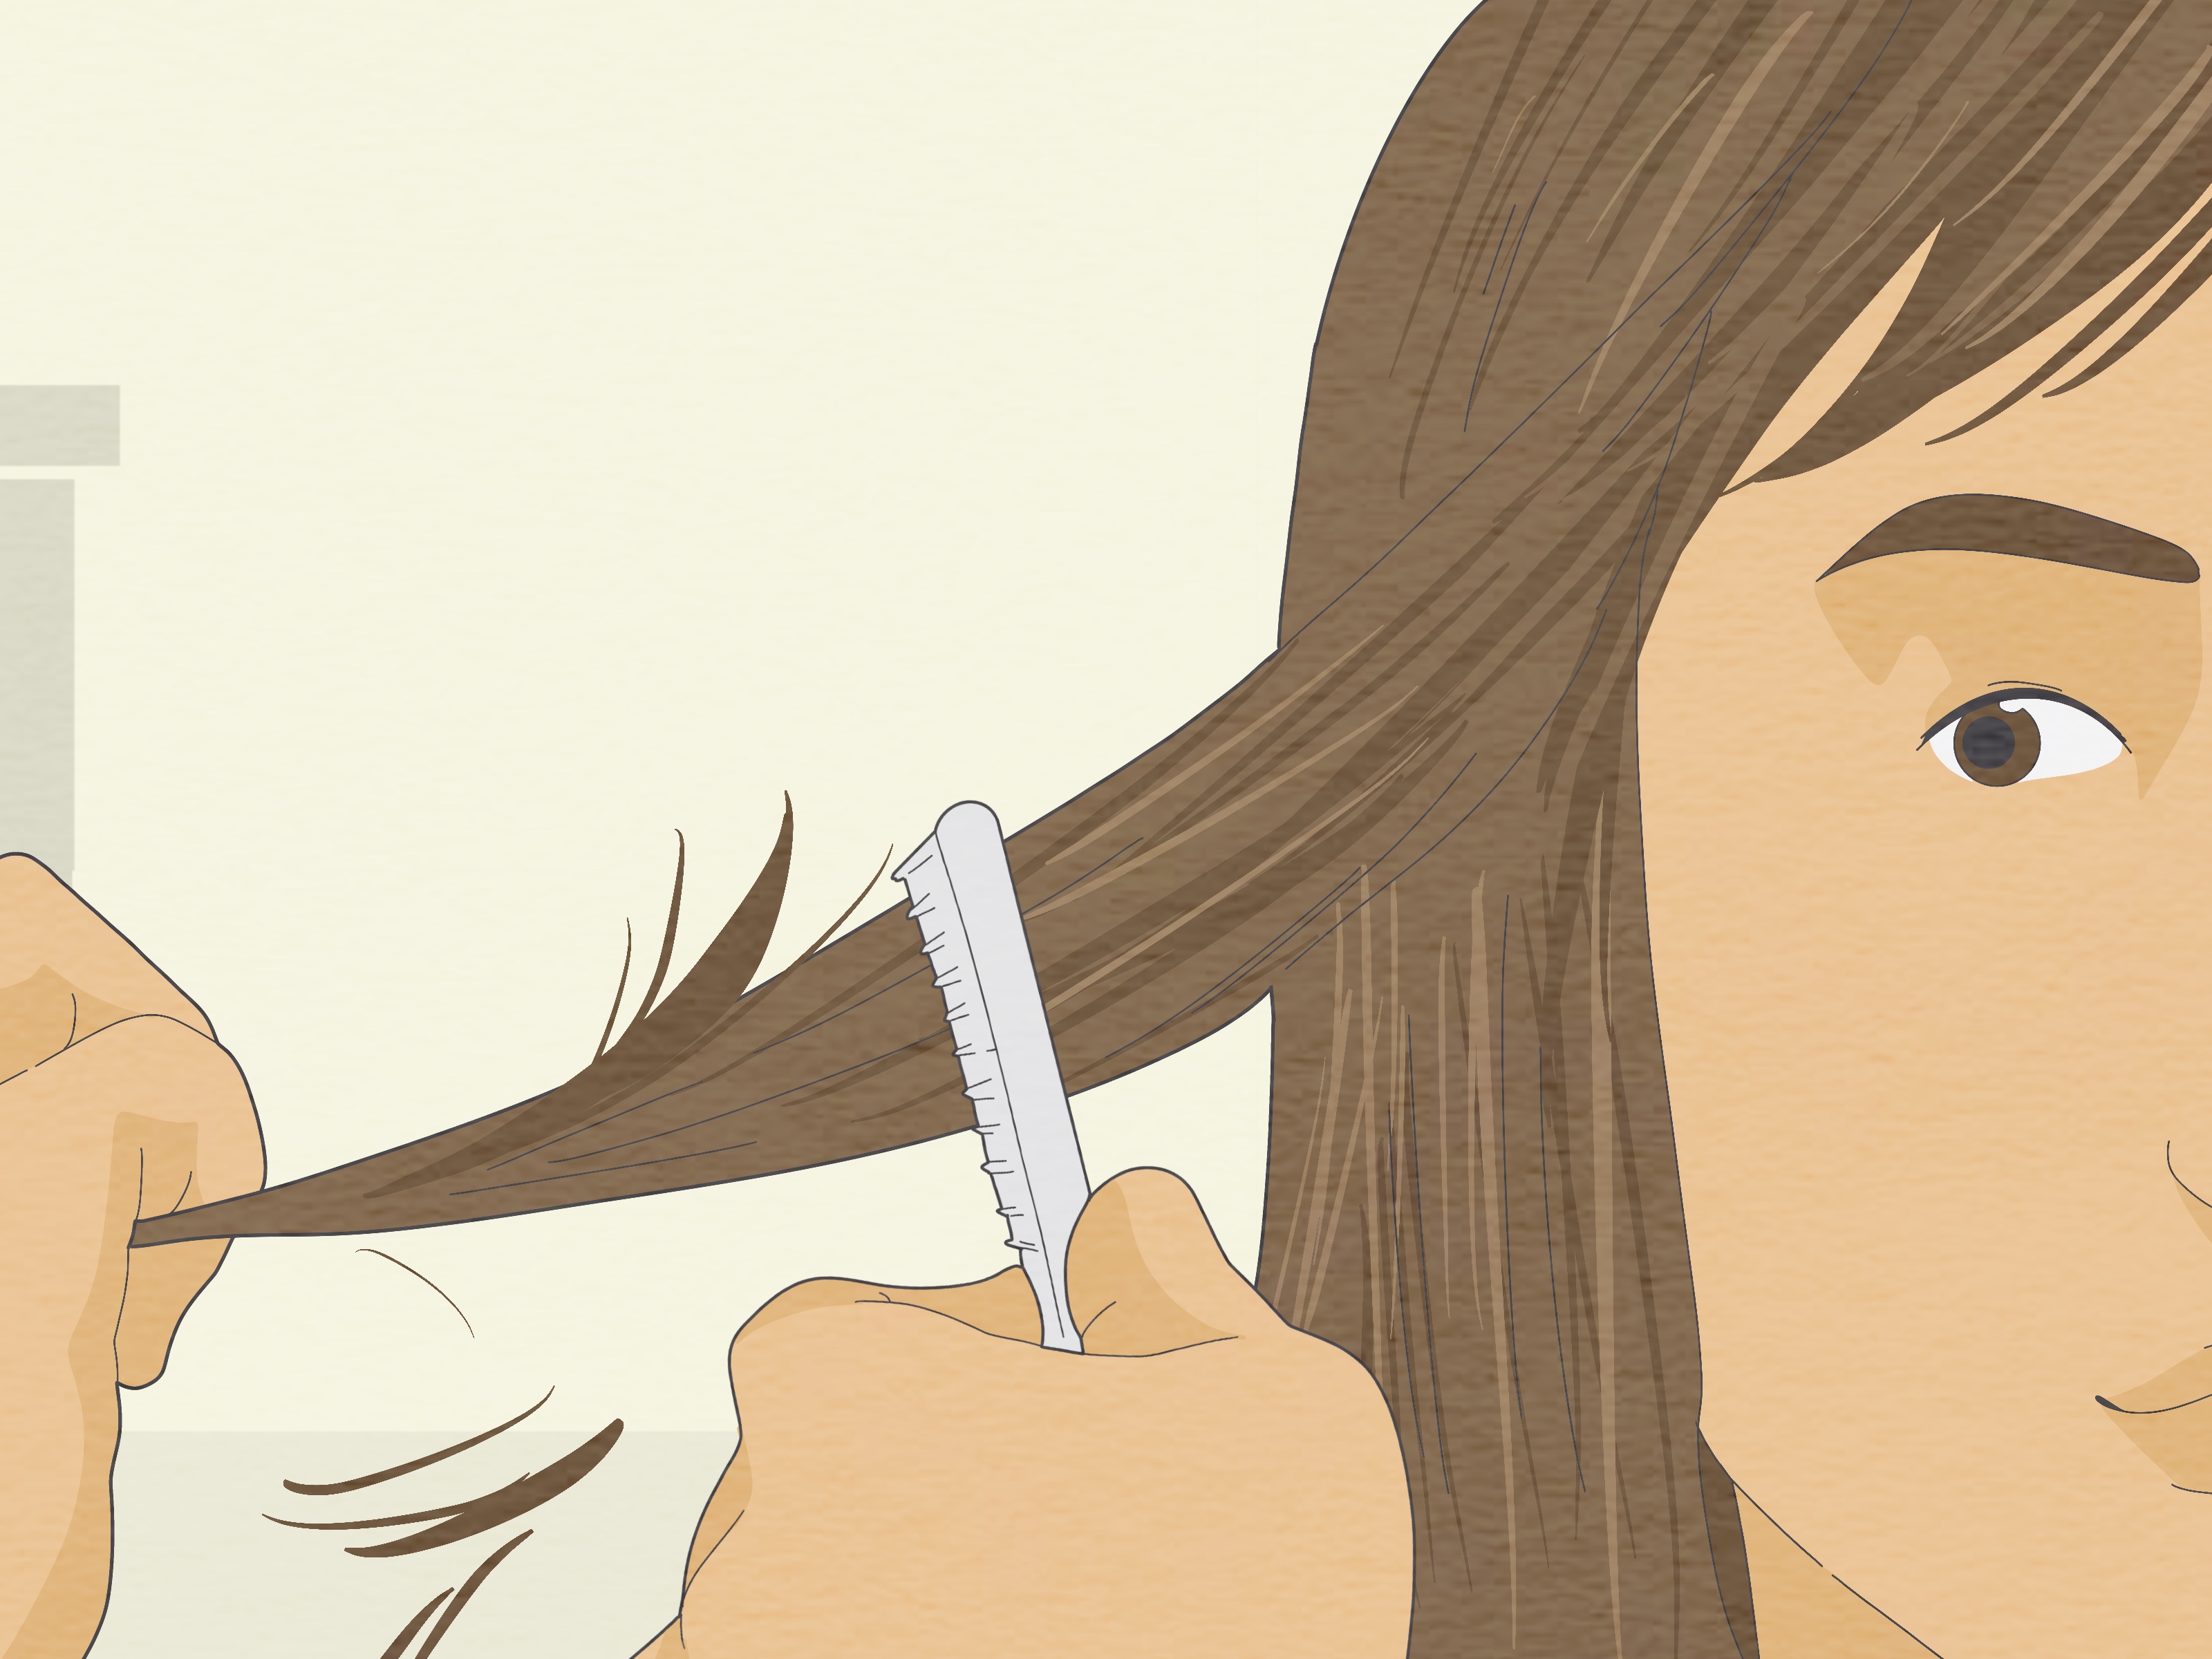
Note: This guide is best for light shaping, soft layers, face-framing pieces, and refreshing texturenot for dramatic makeovers, precision bobs, or “I saw one video and now I’m Edward Scissorhands” adventures. Use a clean, sharp hair-cutting razor, go slowly, and see a professional stylist if your hair is very damaged, heavily bleached, tightly coiled, or you want a major change.
What Is a Razor Cut?
A razor cut is a haircutting technique that uses a hair razor instead of regular scissors to remove length, reduce bulk, and create soft movement. Unlike a blunt scissor cut, which makes a crisp line, a razor glides through the hair and leaves the ends lighter, airier, and more feathered. That is why razor cutting is popular for shag haircuts, curtain bangs, textured bobs, face-framing layers, wispy ends, and styles that look casually cool without trying too hard.
But here is the tiny catch wearing a giant salon cape: razor cutting is powerful. A sharp razor can create beautiful texture, but a dull blade or heavy hand can shred ends, cause frizz, or make your layers look like they lost an argument with a lawn mower. The goal is not to hack your hair into submission. The goal is to slide, soften, and shape.
This step-by-step guide explains how to razor cut your own hair at home safely and thoughtfully. You will learn what tools to use, when to cut wet or dry, how to section your hair, how to use the correct razor angle, and how to avoid the most common DIY haircut mistakes.
Before You Start: Who Should and Should Not Try a DIY Razor Cut?
Good candidates for at-home razor cutting
Razor cutting at home works best if you want a small refresh, not a full reinvention. You may be a good candidate if you have straight, wavy, or medium-to-thick hair and want softer ends, light face-framing layers, airy bangs, or a more lived-in shape. If your hair already has layers, you can use a razor to blend them gently and remove a little weight.
When to skip the razor
Do not razor cut your own hair if it is severely damaged, very fragile, over-processed, breaking, or extremely dry. A razor can make weak ends look more frayed. If you have very curly or coily hair, proceed with extra caution because shrinkage can make layers jump much shorter than expected. A professional stylist who understands curl patterns can shape your hair more accurately. Also, avoid razor cutting if you want a blunt bob, sharp perimeter, major length change, or perfectly symmetrical bangs. Those styles need more precision than a bathroom mirror usually offers.
Tools You Need for a Razor Haircut at Home
Good tools are the difference between “fresh, textured haircut” and “why is one side doing jazz hands?” Gather everything before you begin so you are not searching for clips with half your hair sectioned like a confused pineapple.
- A professional hair-cutting razor or feather razor with a fresh blade
- Hair-cutting shears for tiny cleanup only
- Fine-tooth comb and wide-tooth comb
- Hair clips or sectioning clips
- Spray bottle with water
- Large mirror plus a handheld mirror
- Towel or cape
- Good lighting
- Leave-in conditioner or lightweight cutting lotion
- Small trash bag or towel for cleanup
Do not use a leg razor, face razor, kitchen scissors, craft scissors, or anything that came free in a hotel bathroom. A proper hair razor is designed for controlled cutting. A fresh blade matters because dull blades drag on the hair, rough up the cuticle, and increase the chance of split-looking ends.
How to Razor Cut Your Own Hair: 12 Steps
Step 1: Decide exactly what you want to change
Before touching the razor, decide your goal in one sentence. For example: “I want to soften the ends around my face,” or “I want to remove bulk from the bottom two inches,” or “I want light curtain bangs.” A clear goal keeps you from wandering into dangerous territory, also known as “just one more little piece.”
Study your current haircut. Notice where it feels heavy, flat, bulky, or uneven. Razor cutting works best when you target specific areas instead of attacking your whole head like it owes you money.
Step 2: Wash and lightly condition your hair
Start with clean hair so product buildup, oil, and styling cream do not interfere with the blade. Use a gentle shampoo and a light conditioner, especially if your ends are dry. Avoid heavy masks right before cutting because overly slippery hair can be harder to control.
For most beginner razor cuts, damp hair is easier and safer to work with than soaking wet hair. Wet hair stretches, which can trick you into cutting more than you intended. Damp hair gives the razor glide while still showing the natural direction of your strands.
Step 3: Detangle gently from ends to roots
Use a wide-tooth comb to remove tangles, starting at the ends and moving upward. Do not rip through knots. If the comb catches, pause and detangle with your fingers. Razor cutting tangled hair leads to uneven slices and surprise short bits, which are rarely the surprise anyone wants.
Once your hair is smooth, use a fine-tooth comb only for the section you are actively cutting. The comb should guide the hair; it should not stretch it aggressively.
Step 4: Create clean sections
Part your hair where you normally wear it. Then divide it into manageable sections: front left, front right, back left, and back right. Clip everything away except the section you want to cut first. If you are shaping bangs or face-framing layers, clip the back completely out of the way.
Clean sections are nonnegotiable. They help you cut less, compare both sides, and avoid grabbing mystery hair from somewhere near your ear. The smaller the section, the more control you have.
Step 5: Start with the front pieces
For beginners, the safest area to start is usually the front face-framing section because you can see what you are doing. Take a small piece of hair, about half an inch wide. Comb it smooth and hold it between your index and middle fingers.
Keep your tension light. Pulling too hard stretches the hair and may make the final result shorter when it dries. Bring the section slightly forward, not straight out to the side, so the hair falls softly around your face.
Step 6: Hold the razor at a 45-degree angle
The classic razor-cutting angle is about 45 degrees. This angle lets the blade slide down the hair instead of chopping straight across. Place the razor lightly on the section, then make short, gentle strokes toward the ends.
Think of it as shaving tiny ribbons from the hair, not sawing a branch. If you hear scraping or feel dragging, stop and change the blade. A sharp razor should glide smoothly with minimal pressure.
Step 7: Cut less than you think you need
Razor cutting removes both length and weight, so a little goes a long way. Begin at least one to two inches below where you think you want the shortest layer to start. Use tiny strokes. Check the result after each pass.
The golden rule of DIY haircuts is simple: you can always cut more, but you cannot glue hair back on with confidence and a motivational quote. Start conservatively.
Step 8: Match the opposite side slowly
After finishing one face-framing piece, move to the opposite side and repeat the same process. Use your first side as a guide. Pull matching sections forward and compare the length under your chin or at your cheekbone.
Do not chase perfection too aggressively. Human faces are not perfectly symmetrical, and hair often grows in different directions on each side. Aim for balanced, soft, and wearablenot ruler-level identical.
Step 9: Add soft texture to the ends
Once the front pieces are shaped, you can soften the ends of your hair. Take a small vertical section near the bottom. Hold the ends between your fingers and lightly skim the razor over the last inch or two. This removes bulk and gives the ends a feathered finish.
Avoid cutting too high into the hair shaft. If you start razor cutting near the roots, you can create frizz, short flyaways, and awkward volume. For at-home cutting, focus on the mid-lengths and ends only.
Step 10: Blend layers with vertical sections
If your hair already has layers, use vertical sections to blend them. Hold a small section out from the head, look for any heavy corners, and use short downward strokes to soften the transition. Keep the razor moving toward the ends.
This is where restraint becomes your best styling product. Over-texturizing can make hair look thin, stringy, or uneven. If the section already feels light, leave it alone. Not every strand needs a personal meeting with the razor.
Step 11: Dry and check the shape
Let your hair air-dry or blow-dry it the way you normally wear it. This step is important because damp hair does not always reveal the final shape. Once dry, check the balance in natural lighting if possible.
If you see a heavy spot, trim only that spot. If one side looks longer, make tiny adjustments. Do not re-cut the entire head just because one piece is being dramatic. Hair has moods. Give it a minute.
Step 12: Style and protect the ends
After razor cutting, use a lightweight leave-in conditioner, smoothing cream, or hair oil on the ends. This helps the fresh texture look intentional and polished. If you use hot tools, apply heat protectant first and avoid scorching the new ends.
Textured cuts usually look best with movement. Try air-drying with a curl cream for waves, blow-drying with a round brush for bounce, or using a small amount of texture spray for a shaggy finish. The right styling product makes a razor cut look salon-soft instead of accidentally storm-tossed.
Common DIY Razor Cutting Mistakes to Avoid
Using a dull blade
A dull blade is the fastest route to rough, frizzy ends. Always use a fresh razor blade. If the razor pulls, skips, or makes a scratchy sound, stop immediately.
Cutting too much at once
Large sections reduce control. Work in small pieces and make short strokes. Big dramatic slices belong in movie trailers, not your bangs.
Starting too close to the roots
Razor cutting near the scalp can create short, fuzzy layers that stick out. Unless you are trained, keep your razor work on the mid-lengths and ends.
Trying to create a brand-new haircut
At-home razor cutting is best for maintenance and soft shaping. If you want a wolf cut, pixie, French bob, or major transformation, book a stylist. Your future mirror self will send a thank-you card.
Best Hair Types for Razor Cutting
Razor cutting can work beautifully on straight, wavy, and medium-to-thick hair because it removes weight and encourages movement. It can make heavy hair swing more naturally and help layered styles look less blocky. Fine hair can also benefit from very light razor work, but too much texturizing may make the ends look thin.
Curly hair is more complicated. Some stylists use razors on curls successfully, but the technique requires an understanding of curl pattern, density, spring factor, and shrinkage. If you have curls and want to try a DIY razor cut, limit the work to tiny face-framing adjustments or skip the razor and use professional shears for small trims.
Aftercare: How to Keep a Razor Cut Looking Good
A razor cut looks best when the ends are hydrated and smooth. Use a moisturizing conditioner, avoid rough towel drying, and sleep on a soft pillowcase if your hair tangles easily. If your hair is color-treated or heat-styled often, add a weekly deep-conditioning treatment.
Trim lightly every eight to twelve weeks, depending on your hair type and style. If your ends start looking frayed, do not keep slicing them with a razor. Sometimes the hair needs a clean scissor trim to reset the perimeter.
To style a razor cut, choose products that enhance texture without making hair sticky. Wavy hair usually likes mousse, curl cream, or sea-salt spray. Straight hair may benefit from a light texture spray or smoothing cream. Thick hair often needs a small amount of oil or leave-in conditioner on the ends. The goal is touchable movement, not crunchy ramen-noodle architecture.
Experience-Based Tips for Razor Cutting Your Own Hair
The first thing most people learn when razor cutting their own hair is that confidence arrives before skill, which is rude but very human. You may look in the mirror, hold the razor, and think, “This seems easy.” Then one piece falls slightly shorter than expected, and suddenly you are negotiating with your reflection like it is a tiny courtroom. The best experience-based advice is to slow everything down. Put on good lighting, stand comfortably, and cut only when you are calm. Never start a DIY razor cut when you are late, tired, emotional, or fueled entirely by iced coffee and revenge.
Another helpful lesson is to style your hair normally before deciding what to cut. Many people make the mistake of cutting hair when it is brushed into a position they never actually wear. If you part your hair on the side, cut it that way. If your waves shrink after drying, respect that. If your bangs always separate in the middle, do not force them into a perfect curtain of obedience before trimming. Your haircut has to live in real life, not in a temporary combed fantasy.
Small adjustments are usually more successful than full transformations. For example, if your long hair feels heavy around your face, razor cutting two or three delicate face-framing pieces can make the entire style feel fresher. If your ends look bulky, lightly texturizing the bottom inch can create movement. But if you try to carve five new layers into the back of your head using two mirrors and hope, the results can become unpredictable. The back of the head is where DIY ambition goes to learn humility.
It also helps to take photos during the process. Snap a quick picture before you start, after sectioning, and after each round of cutting. Photos reveal balance better than a mirror sometimes does. They also stop you from thinking nothing has changed when, in fact, plenty has changed and your hair is quietly begging for a snack break.
One of the most useful tricks is to stop before you feel finished. That sounds strange, but it works. When the haircut looks about 80 percent done, dry it, style it, and live with it for a few hours or overnight. Hair settles. Waves bounce up. Ends separate. What looked slightly heavy while damp may look perfect once dry. If you still want to refine it later, you can. This approach prevents the classic DIY spiral: trim, check, trim again, panic, trim more, search “how fast does hair grow” at midnight.
Finally, remember that a razor cut should make your hair easier to wear, not harder. If your new texture air-dries nicely, moves better, and feels lighter, you did well. If the shape is not perfect, styling can help while it grows. Soft waves, clips, headbands, texture spray, and strategic tucking behind the ears are all part of the home-haircut survival kit. Hair grows, style evolves, and every DIY trim teaches you something. Ideally, it teaches patiencenot that hats are suddenly your entire personality.
Conclusion
Learning how to razor cut your own hair can be empowering, practical, and even fun when you approach it with patience and the right tools. The secret is not bravery; it is control. Use a fresh hair razor, work on clean damp hair, section carefully, hold the blade at a gentle angle, and remove less than you think you need. Razor cutting is best for soft layers, wispy ends, face-framing pieces, and adding movementnot for dramatic changes or precision shapes.
If you treat the razor like a blending tool instead of a magic wand, you can refresh your haircut at home without causing chaos. And if something feels too advanced, there is no shame in calling a stylist. Professionals exist for a reason, and that reason is often the back of your head.














