
A drywall crack has a special talent: it can be only two feet long and still become the first thing you notice every time you enter the room. Fortunately, many small, stable cracks are cosmetic problems that a careful homeowner can repair with basic tools, a little patience, and fewer dramatic speeches than the wall seems to demand.
The key is not simply smearing filler over the line. A lasting drywall crack repair begins with finding out why the crack appeared, removing weak material, stabilizing any loose panel, reinforcing the damaged area when necessary, and applying several thin coats of joint compound. Do that properly, and the repair can disappear into the wall instead of returning three weeks later like an unwanted sequel.
Note: This DIY guide is intended for small, stable cracks in interior drywall. Cracks that are widening, repeatedly returning, accompanied by water damage, or associated with structural movement should be evaluated before cosmetic repairs begin.
Why Drywall Cracks in the First Place
Drywall is rigid, but the structure around it is not perfectly still. Lumber can shrink as it dries, framing can expand and contract with humidity, roof trusses can move seasonally, and a house may settle slightly after construction. Because taped seams and corners are natural weak points, movement often reveals itself there first.
Other common causes include loose drywall fasteners, poorly embedded joint tape, thick joint compound that shrank while drying, temperature swings, vibration, and moisture from plumbing or roof leaks. A crack above a door or window may be caused by routine movement, but a growing diagonal crack, multiple cracks appearing together, or a crack paired with sticking doors deserves closer attention.
Cosmetic Crack or Warning Sign?
A thin, stable crack along a drywall seam is usually a reasonable DIY project. Pause and consider professional help when the crack is wider at one end, grows over time, crosses several surfaces, returns soon after repair, or appears with bulging walls, sagging ceilings, uneven floors, visible foundation movement, or doors that suddenly refuse to behave.
Moisture changes the assignment completely. Brown stains, soft drywall, peeling paint, musty odors, or damp insulation suggest an active leak. Fix the water source and let the area dry before patching. Joint compound is useful, but it is not a tiny bucket of plumbing.
Tools and Materials You Will Need
- Drop cloth or plastic sheeting
- Safety glasses and a dust mask or respirator
- Utility knife with a sharp blade
- Putty knife or 4-inch drywall knife
- 6-inch and 10-inch drywall knives
- Joint compound or setting-type compound
- Paper drywall tape or fiberglass mesh tape
- Drywall screws, if the panel is loose
- Sanding sponge or fine-grit sandpaper
- Clean cloth or vacuum with a brush attachment
- Drywall primer and matching interior paint
- Texture product or texture tools, if needed
Spackle or Joint Compound?
For a very short, hairline crack that is completely stable, quality spackling compound may be sufficient. For a longer crack, a seam crack, or anything likely to experience minor movement, joint compound plus drywall tape creates a stronger repair. Premixed all-purpose compound is convenient for beginners. Setting-type compound hardens through a chemical reaction, shrinks less, and is useful when strength or faster recoating matters, although it requires quicker, more confident tool work.
Paper Tape or Mesh Tape?
Paper tape creates strong joints when properly embedded in joint compound. Self-adhesive fiberglass mesh is easier to center over an irregular crack and convenient for many repairs, but it should be paired with a compatible compoundoften a setting-type product for maximum crack resistance. Check the compound and tape labels rather than assuming every white bucket and every roll of tape are soulmates.
How to Repair a Drywall Crack Step by Step
Step 1: Inspect and Mark the Crack
Look closely at the full length of the crack. Identify whether it follows a seam, starts at a corner, sits above an opening, or has stained or softened edges. Lightly mark both ends with a pencil so you do not lose track of the damage after scraping. Press gently beside the crack. If the drywall flexes, securing the panel is more important than adding filler.
Step 2: Protect the Room
Move furniture away from the wall and cover the floor. Wear eye protection while scraping and a properly fitted dust mask or respirator while sanding. Turn off nearby fans and HVAC registers if practical; otherwise, drywall dust will tour the house and settle on objects you did not know you owned.
Step 3: Remove Loose Paint, Tape, and Compound
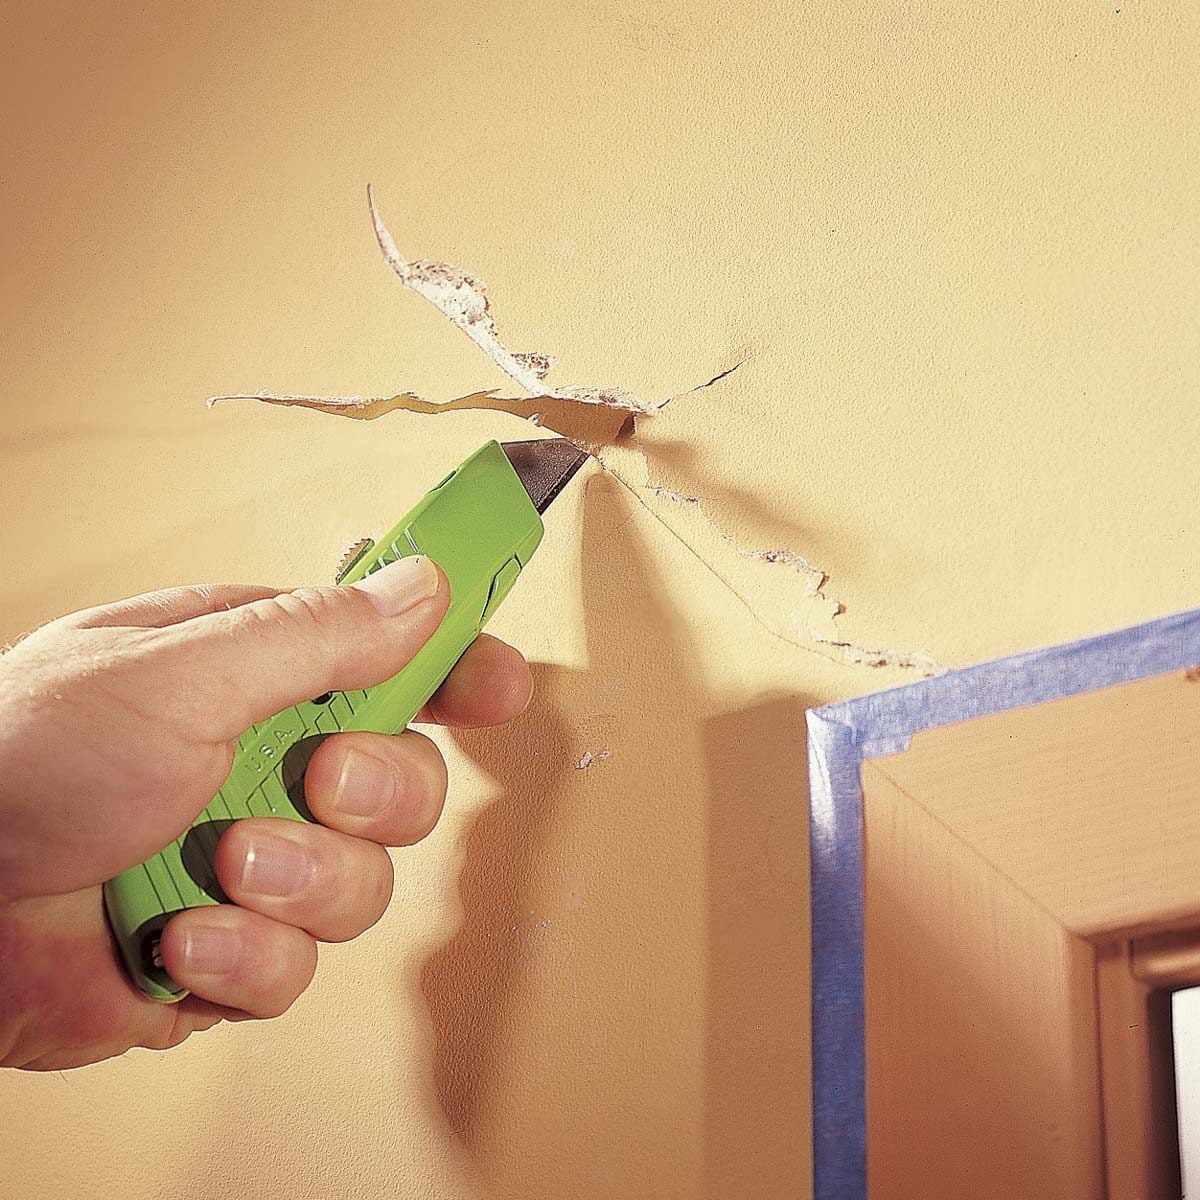
Use a utility knife or the corner of a drywall knife to remove flaking paint, loose joint compound, and detached tape. Do not stop at material that merely looks acceptable. If it lifts, crumbles, or sounds hollow, remove it until the remaining surface is firm.
For a simple crack, cut a shallow V-shaped groove along the line. This opens the surface enough for compound to bond inside the crack instead of resting on top like frosting. Keep the groove controlled; the goal is clean, solid edges, not an archaeological excavation.
Step 4: Secure Loose Drywall
If the panel moves when pressed, locate the nearby framing and install drywall screws on both sides of the crack where appropriate. Drive each screw slightly below the paper surface without tearing through it. A fastener that breaks the face paper loses much of its holding power, so gentle control beats cordless-drill enthusiasm.
If the crack follows a failed seam and the old tape is loose, cut away the detached section. Do not leave bubbles or poorly bonded tape beneath the new repair. The finished patch is only as reliable as the material supporting it.
Step 5: Fill the Groove
Apply a thin layer of joint compound into the prepared crack with a 4-inch or 6-inch knife. Press firmly enough to fill the groove and scrape away excess. Deep cracks may need an initial fill coat that dries before tape is applied. Avoid filling a deep void with one thick layer because thick drying-type compound can shrink, crack, and extend the project.
Step 6: Reinforce the Crack With Tape
For paper tape, spread a thin bed of joint compound over the crack, center the tape, and press it into the wet compound with the knife. Hold one end while drawing the blade along the tape to remove trapped air and excess mud. Leave enough compound underneath to bond the tape; squeezing out every molecule is not a victory.
For self-adhesive mesh, center the tape over the crack and press it flat. Cover it with the compound recommended by the tape manufacturer. Keep the tape smooth, with no wrinkles or lifted edges.
Step 7: Apply the First Cover Coat
Spread compound over the tape with a 6-inch knife. The coat should hide the tape while remaining thin and even. Feather the outer edges by applying slightly more pressure to the outside of the knife. Remove ridges while the compound is wet; sanding a mountain is less fun than flattening a hill.
Step 8: Let the Compound Dry Completely
Follow the product label for drying or setting time. Premixed drying-type compound may need many hours or overnight, especially in cool or humid rooms. Setting-type compound may harden sooner, but a hardened surface is not always ready for aggressive sanding or paint. Rushing the next coat can trap moisture and create shrinkage lines.
Step 9: Apply Wider Finish Coats
Lightly scrape off high spots. Apply a second coat with an 8-inch or 10-inch knife, extending several inches beyond the first coat. After it dries, add a final thin coat that widens the repair again. The center should cover the tape, while the edges should taper almost invisibly into the wall.
This gradual feathering matters because paint cannot hide a raised patch. It usually highlights it, especially under side lighting. A broad, shallow repair looks flatter than a narrow, thick stripe even though it covers more wall area.
Step 10: Sand Without Damaging the Paper
When the final coat is fully dry, sand lightly with a fine-grit sanding sponge or sandpaper. Use a work light held nearly parallel to the wall to reveal ridges and low spots. Stop when the transition feels smooth under your fingertips.
Avoid sanding into the drywall face paper or exposing the tape. If you uncover tape, apply another skim coat rather than attempting to polish the tape into submission. Vacuum the dust and wipe the area with a clean, barely damp cloth.
Step 11: Match the Wall Texture
Smooth walls can move directly to primer. Textured walls require an extra step. Orange-peel texture may be recreated with an aerosol texture product or a small texture roller. Knockdown finishes require the sprayed texture to set briefly before being flattened with a wide knife. Practice on scrap cardboard first because texture nozzles occasionally begin their careers as enthusiastic fire hoses.
Step 12: Prime and Paint
Prime the repaired area before applying finish paint. Bare joint compound absorbs paint differently from the surrounding painted wall, which can create a dull or shiny patch known as flashing. Extend primer slightly beyond the repair, let it dry, and apply matching paint.
For the best blend, repaint from one natural stopping point to another, such as corner to corner, rather than touching up only the patch. Paint color, sheen, age, application method, and lighting all affect whether a small touch-up disappears.
How to Repair Special Types of Drywall Cracks
Cracks at Inside Corners
Remove loose corner tape and compound. Re-embed pre-creased paper tape in fresh compound, keeping the fold tight in the corner. Finish one side at a time if necessary so the knife does not gouge the opposite surface. Repeated ceiling-to-wall corner cracks may be related to seasonal truss movement, which may require a building professional or a repair detail that allows movement rather than repeatedly locking the joint rigidly.
Cracks Above Doors and Windows
Openings concentrate stress in the wall, so cracks often begin at their corners. Check for loose drywall, missing fasteners, and movement before taping. If the crack is diagonal, widening, or paired with a sticking frame, investigate structural causes rather than repeatedly applying compound.
Ceiling Cracks
A small, stable ceiling seam crack can be repaired with the same tape-and-compound method, but overhead work is messier and more physically demanding. A sagging ceiling, damp area, bowed panel, or long crack near a roof framing transition should be inspected before repair. Gravity is not a design feature to negotiate with.
Common Drywall Crack Repair Mistakes
- Covering a moving crack without tape: Filler alone may split again.
- Patching before fixing a leak: Moisture will damage the repair and may support mold growth.
- Leaving loose tape underneath: New compound cannot stabilize a weak base.
- Applying one thick coat: Thick compound dries slowly, shrinks more, and is harder to blend.
- Sanding too aggressively: Exposed tape and torn drywall paper require additional repair.
- Skipping primer: The patch may flash through the finish paint.
- Ignoring repeated cracks: A recurring line may signal continuing movement.
When to Call a Professional
Contact a qualified drywall contractor, home inspector, structural engineer, roofer, or plumber when the crack is rapidly changing, repeatedly returning, unusually wide, associated with water, or accompanied by broader signs of movement. The right professional depends on the cause. A drywall finisher can make a surface beautiful, but cannot stop a leaking pipe or correct foundation movement with a wider knife.
DIY Experience: What Makes a Drywall Crack Repair Actually Last
The most important practical lesson is that preparation usually takes longer than applying the compound. Beginners often expect the repair to begin when the bucket opens. In reality, the repair begins while inspecting the crack, pressing on the panel, scraping weak edges, and deciding whether the old tape can stay. Ten careful minutes at this stage can save an hour of sanding and a second repair later.
Another useful experience is learning that drywall knives work best when they are not overloaded. A small ribbon of compound near the center of the blade is easier to control than a wobbling scoop. Hold the knife at a lower angle to leave more compound and a steeper angle to remove more. That simple change in angle is the difference between spreading mud and chasing it around the wall.
Thin coats feel slow, but they usually make the job faster. A heavy coat may look impressively productive until it develops ridges, takes forever to dry, and turns sanding into an upper-body workout. Three controlled coats can require less total labor than one ambitious coat followed by dust, regret, and emergency vocabulary.
Lighting is another quiet game changer. A repair that looks perfect under a ceiling fixture may reveal a visible hump when daylight travels across the wall. Holding a portable light close to the surface exposes shadows before primer and paint make them permanent guests. Running clean fingertips across the feathered edges also catches transitions that eyes miss.
DIYers also learn that matching texture is often harder than filling the crack. The texture should be tested away from the wall first, and the surrounding area should be masked generously. Aerosol texture changes with can temperature, nozzle setting, distance, and spraying speed. A few practice passes on cardboard make the final result far more predictable.
Paint touch-up can be equally deceptive. Even when the original paint is available, stored paint may have changed slightly, and the wall finish may have faded or accumulated years of cleaning. Stir paint thoroughly and test a small area. If the patch remains visible after drying, painting the full wall from corner to corner often produces a cleaner result than adding more and more touch-up layers.
Finally, a repaired crack should be monitored rather than forgotten. Take a dated photo before and after the work. If the line returns, compare its length and width instead of relying on memory. A tiny seasonal hairline may be manageable, while progressive movement calls for diagnosis. The smartest DIY repair is not the one that uses the most compound; it is the one that recognizes when compound is no longer the solution.
Conclusion
Repairing a drywall crack is a manageable DIY project when the damage is small, dry, and stable. The reliable process is simple: diagnose the cause, remove loose material, secure movement, reinforce the crack, apply thin feathered coats, sand gently, restore the texture, prime, and paint. Patience does most of the heavy lifting. Your wall merely gets the credit.













