
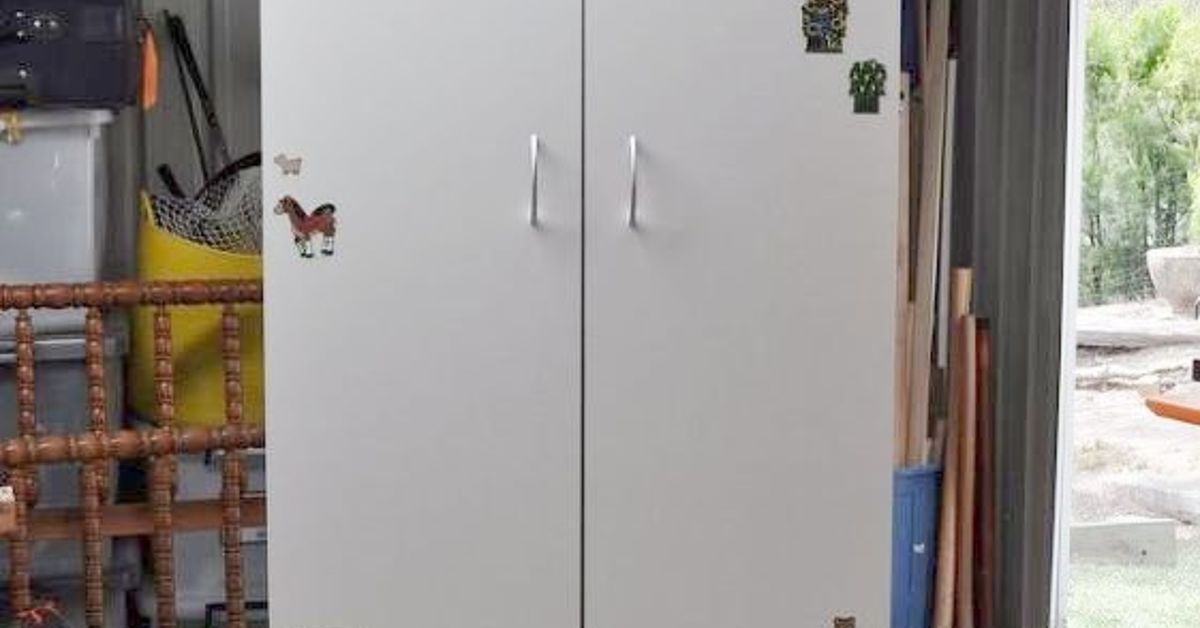
Note: This article is based on real DIY guidance synthesized from reputable U.S. home-improvement and paint-industry sources. It is formatted for web publishing and does not include source links in the visible copy.
An old chipboard armoire is the furniture equivalent of a retired mall food court sign: bulky, slightly tired, and somehow still hanging on. But before you drag it to the curb and whisper, “You had a good run,” know this: a chipboard armoire can absolutely become something stylish, useful, and shockingly expensive-looking with the right prep, paint, and patience.
Whether you inherited a dated honey-oak monster, scored a bargain from Facebook Marketplace, or have one of those flat-pack armoires that has survived three moves and one emotional breakdown, this DIY project can give it a second life. The trick is understanding what chipboard furniture needs. Unlike solid wood, chipboard does not forgive sloppy prep, soaking wet cleanup, or aggressive sanding. It wants a gentler touch, a smart primer, and enough drying time to stop acting dramatic.
In this guide, you will learn how to transform an old chipboard armoire step by step, from cleaning and repairs to paint, hardware, styling, and long-term durability. If you do it right, your finished piece can work as a wardrobe, pantry cabinet, linen closet, craft station, office hub, or entryway storage hero.
Why an Old Chipboard Armoire Is Worth Saving
A chipboard armoire may not have heirloom status, but it does have potential. Many older armoires have great proportions, useful storage, and enough surface area to make a makeover feel dramatic. Paint can modernize the whole silhouette, new hardware can change the mood instantly, and interior upgrades can make the piece far more functional than it was on day one.
The other big advantage is cost. Replacing a large storage cabinet with something new can get expensive fast. A DIY armoire makeover usually costs a fraction of a new piece, especially if the cabinet is still structurally sound. Translation: you can spend less money and still enjoy that very satisfying “Wait, that used to be what?” reaction from guests.
Know What You Are Working With Before You Start
What chipboard actually is
Chipboard, often called particle board, is made from wood particles and resin pressed into sheets. In furniture, it is often covered with laminate, melamine, veneer, or a factory finish designed to look like wood. That outer skin matters, because you are usually painting the finish on top, not raw wood underneath.
Why prep matters more than paint color
With solid wood, you can sand deeper, strip finishes, and recover from mistakes more easily. With chipboard, oversanding can damage the thin outer layer. Too much water can make swollen edges even worse. And if you skip the right primer, your beautiful paint job may start peeling the moment a drawer bumps into the frame. Harsh truth, yes. Helpful truth, also yes.
When to move forward and when to walk away
Your armoire is a good DIY candidate if the frame is stable, the doors still align reasonably well, and the damage is mostly cosmetic. Small chips, light swelling, scuffs, tired laminate, dated hardware, and ugly color are all manageable. But if the cabinet is severely water-damaged, collapsing at the joints, moldy, or missing major structural pieces, it may not be worth the time. Even paint has boundaries.
Supplies You Will Need
- Screwdriver or drill for removing hardware and doors
- Painter’s tape and drop cloths
- Mild cleaner or degreaser and microfiber cloths
- Fine-grit sandpaper, usually 150 to 220 grit
- Tack cloth or damp lint-free cloth
- Wood filler or repair filler for chips and dents
- Waterproof adhesive for loose laminate
- Bonding primer made for slick or hard-to-paint surfaces
- Cabinet, trim, or furniture paint
- Foam roller or fine-finish roller and angled brush
- Optional topcoat, depending on your paint system
- New knobs, pulls, hinges, feet, trim, wallpaper, or shelf liners if desired
How to Transform an Old Chipboard Armoire DIY, Step by Step
1. Empty it, disassemble what you can, and label everything
Take out shelves, rods, drawers, and all hardware. Remove doors if possible. Put screws and hinges in labeled bags, because nothing tests your character like staring at eight nearly identical screws after paint fumes and snacks. If the back panel is flimsy, be gentle. Chipboard furniture may look sturdy until you ask too much of one little cam lock.
2. Clean the surface like you mean it
Before sanding or priming, clean every exterior and interior surface thoroughly. Old furniture collects wax, furniture polish, cooking grease, dust, mystery residue, and the emotional energy of the early 2000s. Paint hates all of that. Use a mild cleaner or degreaser, then wipe dry. Avoid soaking the surface. The goal is clean, not waterlogged.
3. Repair chips, dents, peeling laminate, and swollen edges
This is where the makeover stops being cosmetic and starts being convincing. Fill chips and screw holes with wood filler or a compatible repair filler, then let it dry fully before sanding smooth. If laminate is peeling, reattach it with a waterproof adhesive and clamp or press it flat until cured.
For lightly swollen edges, sand very carefully just enough to smooth the raised area, then seal and fill as needed. Do not attack it like you are trying to erase the furniture from history. Chipboard edges are fragile, and aggressive sanding can make the damage worse instead of better.
4. Lightly sand for adhesion, not for punishment
On most chipboard armoires, you are not trying to strip the surface to bare material. You are only dulling the sheen so primer can grip. Use fine-grit sandpaper and work lightly, especially on corners and edges. If the armoire has a laminate or melamine finish, this scuff sanding step is critical. The surface should look deglossed, not shredded.
Once finished, vacuum the dust and wipe with a tack cloth or lint-free cloth. Any leftover dust will turn your paint finish into a texture study.
5. Prime with a bonding primer
This is the part that separates a real furniture makeover from a future peeling disaster. A bonding primer designed for slick, glossy, laminate, or difficult surfaces helps the paint adhere properly. Apply a thin, even coat with a fine-finish roller on flat areas and a brush in corners, grooves, and trim details.
If the armoire has dark sections, patched repairs, or areas that still look suspect, a second primer coat is often worth it. Let the primer dry fully according to the product instructions. Some surfaces also benefit from a very light sanding after primer to knock down texture before paint. Think smooth, not heroic.
6. Paint in thin coats and resist the urge to rush
Choose a durable furniture, cabinet, or trim paint. Satin, semi-gloss, and some matte furniture finishes work beautifully depending on the look you want. Apply two thin coats rather than one thick one. Thick coats tend to drip, stay tacky longer, and advertise every brush mark like a loud relative at Thanksgiving.
Use a roller on broad panels and a quality angled brush for edges and corners. Let each coat dry fully before the next. If the finish feels rough after the first coat, lightly sand with fine grit, wipe clean, and continue. This extra step can make a budget makeover look surprisingly polished.
7. Decide whether you need a topcoat
Not every painted armoire needs a separate sealer. Many cabinet and furniture paints are designed to cure into a durable finish on their own. But if you are using chalk-style paint, a fragile flat finish, or the cabinet will get rough daily use, a compatible topcoat can add protection. Always follow the paint system recommendations so you do not accidentally create adhesion issues.
8. Add style upgrades that make the piece look custom
This is where the transformation really happens. Paint gets you out of the “sad office storage” zone. Details get you into “where did you buy that?” territory.
- Swap the hardware: New knobs or pulls are the fastest visual upgrade.
- Add trim or molding: Thin applied trim can fake the look of inset panels or traditional doors.
- Change the feet: If the base allows it, updated feet can make the armoire feel lighter and more intentional.
- Line the back panel: Wallpaper, peel-and-stick paper, or a painted accent color adds depth inside.
- Upgrade hinges: Fresh hinges can improve function and appearance at the same time.
9. Reimagine the inside, not just the outside
A chipboard armoire makeover is more useful when the interior matches your actual life. If it was originally a clothing cabinet, it can become something much smarter:
- A linen cabinet with baskets and labeled shelves
- A pantry overflow cabinet with pull-out bins
- A coffee station with mugs, syrups, and small appliance storage
- A craft closet with pegboard, trays, and jars
- A home office hideaway with printer storage and cord management
- An entryway command center with shoe storage, hooks, and charging space
That interior redesign is what keeps the project from being “a painted cabinet” and turns it into a genuinely useful household upgrade.
10. Reassemble carefully and let it cure
Dry and cured are not the same thing. Paint may feel dry to the touch long before it reaches full hardness. Reassemble gently, avoid slamming doors, and wait the recommended cure time before loading shelves heavily or placing sticky items on painted surfaces. This patience is annoying, but it is far less annoying than peeling a basket off fresh paint two days later.
Best Color and Style Ideas for a Chipboard Armoire Makeover
Modern and clean
Paint the armoire soft white, warm greige, mushroom, or charcoal. Add simple black hardware and keep the lines crisp. This works especially well in bedrooms, hallways, and home offices.
Vintage-inspired
Use muted sage, dusty blue, soft black, or creamy taupe. Add traditional knobs, framed trim, and maybe a wallpapered back panel. Suddenly your old armoire has main-character energy.
Bold and dramatic
Try deep navy, forest green, oxblood, or smoky plum. This is perfect for a bar cabinet, reading nook storage, or a moody guest room piece. Keep hardware warm brass or aged bronze for contrast.
Playful and practical
For kids’ rooms, craft spaces, or laundry rooms, use cheerful colors like muted coral, soft teal, buttery yellow, or denim blue. Add labels and baskets so the armoire earns its floor space.
Mistakes to Avoid During a DIY Armoire Transformation
- Skipping the cleaning step because the surface “looks fine”
- Oversanding thin laminate or melamine surfaces
- Using too much water on chipboard edges
- Painting without a proper bonding primer
- Applying thick coats that sag or stay tacky
- Reassembling before the finish has cured
- Trying to stain laminate like it is raw wood
- Overloading shelves in a piece that was already a little tired
What This DIY Project Usually Costs
If you already own some supplies, this project can be surprisingly budget-friendly. A realistic range for a chipboard armoire makeover is often between $60 and $180, depending on paint quality, hardware choices, and decorative upgrades. If you add premium pulls, wallpaper, lighting, or custom feet, the number can climb. Still, it is usually far less than buying a new large storage cabinet with similar capacity.
Real-Life Experiences and Lessons From a Chipboard Armoire Makeover
The funny thing about transforming an old chipboard armoire is that the project almost never feels glamorous in the beginning. At first, it looks like work, not potential. You open the doors and find that strange manufactured wood smell, maybe a few stickers from another decade, and shelves with scratches that seem personally offended by your existence. But that is also the moment the makeover starts to get interesting. Once you remove the hardware and clean off the grime, the piece begins to look less like junk and more like a blank canvas.
One of the most common experiences DIYers have is underestimating how much better the armoire looks after the prep phase alone. Cleaning, repairing chips, and sanding down the shine can make a tired cabinet look calmer and more intentional before any paint even shows up. It is not dramatic television. No one gasps at a degreased side panel. But it is the difference between a finish that lasts and one that peels when you look at it too hard.
Another thing people notice is how emotional the color choice becomes. A big storage piece affects the whole room, so choosing between white, greige, green, navy, or black suddenly feels like a life decision rather than a paint decision. The safe move is often a mid-tone neutral that hides wear and works with changing decor. But bold colors can be the secret weapon. A dark green or deep charcoal armoire can look far more expensive than the original piece ever had a right to be. It is one of those rare projects where confidence really does pay off.
There is also a very specific DIY lesson that shows up again and again: hardware matters more than most people expect. You can spend hours painting a cabinet beautifully, but old brass knobs with a “budget office circa 2004” vibe will pull the whole look backward. Swapping the pulls, even for simple modern ones, can make the transformation feel intentional and finished. It is usually the moment the project stops looking homemade in the bad way and starts looking homemade in the very good way.
Patience is another recurring theme. The hardest part is not sanding. It is waiting. Waiting for filler to dry. Waiting for primer to set. Waiting between paint coats. Waiting for the final cure before loading the shelves. Most DIY frustration happens when someone is 85 percent done and decides the rules no longer apply. That is when fingerprints happen. That is when baskets stick. That is when doors get rehung too soon and leave little dents that haunt your memory.
But once the armoire is finished and styled, the payoff is huge. Old chipboard furniture often has generous storage, and after a makeover it can solve a real household problem. It can hide linens, organize office supplies, store seasonal decor, or become a pantry cabinet that saves your kitchen from chaos. That practical result is what makes the experience so satisfying. You are not just making something prettier. You are making your home work better.
And maybe that is the best part of this project: it teaches you that a piece does not have to start fancy to end up beautiful. Sometimes the most rewarding makeover in the room is the one that began as a clunky old armoire everyone else had already given up on.
Final Thoughts
If you want to know how to transform an old chipboard armoire DIY style, the answer is simple but not lazy: clean it well, repair the damage, sand lightly, use a bonding primer, paint in thin coats, upgrade the details, and give the finish time to cure. That is the formula. The fun part is choosing the personality of the final piece.
Done right, a chipboard armoire makeover can look polished, feel custom, and serve your home for years. Done wrong, it looks like a rushed weekend experiment with a grudge against primer. Choose the first path. Your future storage situation will thank you.










