
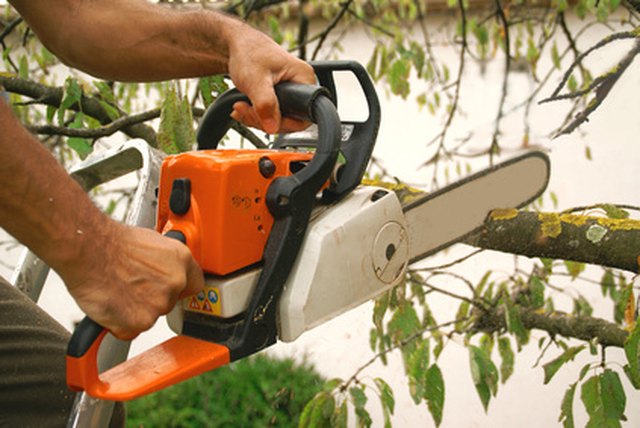
A sharp chainsaw chain is a beautiful thing. It pulls itself into the wood, throws clean chips, and makes you feel like you actually know what you are doing. But here is the tiny metal secret many beginners miss: sharp cutters are only half the story. The other half is the chainsaw depth gauge, also called the raker. Ignore it, and your saw may cut like a butter knife at a lumberjack contestor worse, bite too aggressively and become harder to control.
Learning how to use a chainsaw depth gauge is not complicated, but it does require patience, the right tool, and a healthy respect for physics. The depth gauge controls how much wood each cutter tooth removes as the chain travels around the bar. Too high, and the cutter takes a shallow nibble. Too low, and the cutter grabs too much wood, increasing vibration, rough cutting, and the risk of kickback. Think of the depth gauge as the polite dinner host of your saw chain: it decides how big each bite should be.
This guide explains what a depth gauge does, when to check it, what tools you need, and how to file chainsaw rakers step by step. Whether you cut firewood on weekends, maintain a rural property, or simply want your saw to stop acting moody, this article will help you tune your chain safely and correctly.
What Is a Chainsaw Depth Gauge?
A chainsaw depth gauge is the small metal hump that sits in front of each cutter tooth on the saw chain. Many people call it a raker, although “depth gauge” is the more technical term. Its job is to control the thickness of the wood chip the cutter removes.
Every cutter tooth has a sharp cutting edge. As the chain moves, the depth gauge rides over the wood just before the cutter reaches it. The height difference between the top of the depth gauge and the top cutting edge determines how deep the cutter bites. This difference is usually measured in thousandths of an inch, with many common chains using a setting around .025 inch. However, the correct setting depends on the chain type, pitch, manufacturer, and cutting conditions.
If you sharpen only the cutter teeth and never lower the depth gauges, the cutters gradually get shorter while the rakers remain relatively tall. The result is a chain that looks sharp but refuses to cut efficiently. That is when people start pushing harder, blaming the saw, blaming the wood, and sometimes blaming the moon. In many cases, the real problem is simply that the rakers need attention.
Why Depth Gauge Height Matters
The depth gauge is not just about speed. It affects safety, smoothness, vibration, engine load, bar wear, and the quality of the cut. Proper chainsaw raker height helps the chain feed into the wood at a controlled rate. That makes the saw easier to handle and reduces unnecessary strain on both the operator and the machine.
If the Depth Gauges Are Too High
When the depth gauges are too high, the cutters cannot take a proper bite. The chain may produce fine dust instead of chips, even if the cutting edges are sharp. You may notice that the saw feels weak, slow, or unwilling to pull itself through the cut. The operator often compensates by pressing down harder, which increases fatigue and can overheat the bar and chain.
If the Depth Gauges Are Too Low
When the depth gauges are filed too low, the cutters remove too much wood at once. This can make the saw chatter, grab, vibrate, or cut roughly. It may also increase the chance of kickback, especially if the bar nose contacts wood unexpectedly. Low rakers can make a small saw feel like it has entered a wrestling match with a tree and forgotten the rules.
Tools You Need to Use a Chainsaw Depth Gauge
You do not need a workshop full of expensive equipment. A basic chainsaw depth gauge setup is simple and affordable. The most important thing is using tools that match your chain.
Essential Tools
- Depth gauge tool: A small metal guide that sits over the chain and shows whether the raker is too high.
- Flat file: Used to file the exposed part of the depth gauge down to the correct height.
- Round file and file guide: Used to sharpen the cutter teeth before checking the depth gauges.
- Gloves: Chainsaw teeth are sharp even when the saw is off, and they do not apologize.
- Bar vise or bench vise: Helpful for holding the saw steady while filing.
- Owner’s manual or chain chart: Needed to confirm the correct depth gauge setting for your chain.
Some brands offer combination filing guides that sharpen the cutter and lower the depth gauge at the same time. These can be convenient, especially for beginners. Traditional separate depth gauge tools also work well and provide excellent control.
Before You Start: Safety First
Before filing a chainsaw chain, make sure the saw is completely off. For a gas saw, shut off the engine and let it cool. For a battery saw, remove the battery. For an electric corded saw, unplug it. Engage the chain brake, wear gloves, and work in a stable area with good lighting.
Never adjust a chain while the saw can accidentally start. That sounds obvious, but many workshop mistakes begin with “I was only going to do one quick thing.” Quick things have a way of becoming expensive things.
Also inspect the chain before sharpening or filing the rakers. Look for cracked cutters, broken tie straps, damaged drive links, missing rivets, or severe wear. A damaged chain should be repaired by a qualified person or replaced. Filing cannot fix metal fatigue, and optimism is not a replacement for safe equipment.
Step-by-Step: How to Use a Chainsaw Depth Gauge
Step 1: Clean the Chain
Start by cleaning the chain and bar area. Remove sawdust, oil sludge, bark, and pitch buildup. A dirty chain makes it harder to see what you are doing and can clog files. You do not need to polish the chain like jewelry, but it should be clean enough that the cutters and rakers are easy to inspect.
Step 2: Tighten the Chain Correctly
Set the chain tension before filing. The chain should sit snugly against the bottom of the guide bar while still moving freely by hand. If the chain droops, it will rock while you file. If it is overly tight, it can be difficult to move and may give you a false sense of alignment.
Secure the bar in a vise if possible. A stable saw is easier to file accurately, and accurate filing is the whole point. If you are in the field, a stump vise can be a handy little hero.
Step 3: Sharpen the Cutter Teeth First
Depth gauges should usually be checked after the cutter teeth are sharpened. This is because sharpening removes metal from the cutters and changes their height and length. If you adjust the rakers first, then sharpen heavily, the final depth relationship may still be wrong.
Use the correct round file size and filing angle for your chain. File each cutter with smooth, even strokes, usually from the inside of the cutter toward the outside. Keep the file level and follow the guide marks on the cutter or your filing guide. Try to make each cutter on one side the same length, then repeat on the other side. Uneven cutters can cause the saw to pull to one side, which is annoying in the same way a shopping cart with one bad wheel is annoyingexcept louder and sharper.
Step 4: Place the Depth Gauge Tool on the Chain
After sharpening, place the depth gauge tool over the chain according to the tool’s instructions. Most tools sit across the top of the cutters with a slot or opening positioned over the depth gauge. The raker should appear in the opening.
Make sure the tool is flat and seated properly. If the guide rocks or sits on debris, your reading will be inaccurate. Some depth gauge tools are marked for different chain types, such as hard wood, soft wood, or specific chain pitch. Use the correct side or slot for your chain and cutting conditions.
Step 5: Check Whether the Raker Sticks Above the Tool
Look at the depth gauge through the opening in the tool. If the top of the raker is below or flush with the guide, it usually does not need filing. If it sticks above the guide, it needs to be lowered.
This is where restraint matters. Do not file every raker just because you are holding a file and feeling productive. File only what the depth gauge tool shows you needs filing. Chainsaw maintenance rewards precision, not enthusiasm with forearm muscles.
Step 6: File the Depth Gauge With a Flat File
With the depth gauge tool still in place, use a flat file to remove the exposed metal from the raker. File horizontally and keep the file flat against the guide. Use smooth forward strokes. Most rakers need only a few passes. Stop when the raker is level with the top surface of the tool.
Avoid dragging the file backward with pressure. Files are designed to cut on the forward stroke. Lifting slightly on the return stroke helps the file last longer and gives you better control.
Be careful not to hit the freshly sharpened cutter with the flat file. A few careless strokes can dull the cutting edge you just worked so nicely to restore. That is like washing your truck and then immediately driving through a mud puddle because it was “kind of in the way.”
Step 7: Round the Front of the Depth Gauge
After lowering a raker, lightly round its leading edge to restore the original shape. This helps the chain feed smoothly and reduces harsh grabbing. Do not lower the highest point further while rounding. The goal is to smooth the front profile, not keep filing until the raker looks like a tiny ski jump.
Many manufacturers recommend maintaining the original rounded or ramped shape of the depth gauge. A flat-topped, sharp-edged raker can make cutting rougher and less predictable.
Step 8: Repeat for Every Depth Gauge
Move the chain forward and check the next raker. Work around the entire chain, using the tool on each depth gauge. Keep your strokes consistent. Some rakers may need filing, while others may not. This depends on how evenly the cutters were sharpened and how much metal was removed.
Mark your starting point with a permanent marker or a piece of tape on the chain. Otherwise, it is surprisingly easy to go around twice and wonder whether you have entered a small metal maze.
Step 9: Inspect Your Work
When all depth gauges have been checked and filed as needed, rotate the chain by hand. Make sure it moves freely. Look for burrs or sharp irregular edges on the rakers. Check that the cutters still look sharp and undamaged.
Recheck chain tension before cutting. Filing and handling can slightly change how the chain sits on the bar. Proper tension helps the saw cut safely and prevents the chain from derailing.
Step 10: Test Cut Carefully
Make a test cut in clean wood. A properly sharpened and adjusted chain should pull itself into the cut without heavy pressure. It should throw chips, not powder. The saw should feel smooth, controlled, and efficient.
If the saw cuts slowly and makes dust, the cutters may still be dull or the depth gauges may remain too high. If the saw grabs, chatters, or feels aggressive, the depth gauges may be too low or uneven. Stop and inspect before continuing.
How Often Should You Check Chainsaw Depth Gauges?
A practical rule is to check the depth gauges every few sharpenings, especially if you sharpen by hand. If you remove a lot of metal from the cutters because the chain hit dirt, rock, wire, or a mystery object hiding in a log, check the rakers immediately afterward.
Professional users may check them more often because they sharpen frequently and need predictable performance. Casual users may not need to file rakers every time, but they should still inspect them regularly. The more the cutters are filed back, the more important raker height becomes.
Common Mistakes When Filing Chainsaw Rakers
Using the Wrong Depth Gauge Tool
Depth gauge tools are not all the same. A tool designed for one chain pitch or setting may not be correct for another. Always match the tool to the chain. If you are not sure, check the chain manufacturer’s chart or ask a dealer.
Filing Without a Gauge
Experienced filers may sometimes use other measuring methods, but beginners should use a proper depth gauge tool. Guessing by eye is risky. A difference of a few thousandths of an inch can change how the saw behaves. Your eyeball may be talented, but it is not a precision instrument.
Taking Off Too Much Metal
Lowering depth gauges too much can make the chain aggressive and unsafe. File slowly. Check often. Remember, you can always remove more metal, but putting it back requires a level of wizardry not usually included in the toolbox.
Forgetting to Round the Leading Edge
After filing the raker flat to the guide, lightly restore the rounded front shape. This helps the cutter enter the wood smoothly. Skipping this step may leave the chain feeling rough.
Ignoring Uneven Cutter Lengths
If some cutters are much shorter than others, the chain may cut unevenly even if the depth gauges are technically filed. In some cases, the shortest cutter becomes the reference point, and the rest of the chain should be brought into balance. Severely uneven chains may be better corrected with a grinder or replaced.
Depth Gauge Settings: What Number Should You Use?
Many common saw chains use a depth gauge setting around .025 inch, but that is not universal. Some chains may call for .026, .030, .031, or another specification. Chain pitch, cutter style, saw size, bar length, and intended use all matter.
Softwood cutting may sometimes use a slightly more aggressive setting than hardwood, but this should be done only within the chain manufacturer’s recommendations. Frozen wood, dirty wood, small saws, and low-power electric models often perform better with conservative settings. When in doubt, follow the manufacturer’s specification rather than advice from a guy at the woodpile named “Sparks.”
Signs Your Depth Gauges Need Adjustment
- The chain is sharp but still cuts slowly.
- The saw produces fine dust instead of wood chips.
- You have to push hard to make the saw cut.
- The cutters have been sharpened several times.
- The saw cuts unevenly after sharpening.
- The chain feels grabby, rough, or overly aggressive.
- You notice excessive vibration during cutting.
These symptoms can also come from other issues, such as a dull chain, damaged bar, poor chain tension, wrong file size, or dirty wood. Still, depth gauge height is one of the first things worth checking because it is easy to measure and correct.
Depth Gauge Tool vs. 2-in-1 Filing Guide
A traditional depth gauge tool and flat file give you direct control. You sharpen the cutters first, then check and lower the rakers separately. This method is affordable, accurate, and widely used.
A 2-in-1 filing guide combines round files and a flat file in one tool. As you sharpen the cutter, the tool also helps lower the depth gauge. This can simplify maintenance and reduce guesswork, especially for homeowners. The trade-off is that you must use the correct guide for your chain, and you still need to understand what the tool is doing.
Either method can work well. The best tool is the one that matches your chain and helps you file consistently.
Safety Tips for Better Chainsaw Cutting
A properly filed depth gauge improves cutting, but it does not replace safe chainsaw operation. Always wear chainsaw chaps, eye protection, hearing protection, gloves, boots, and a helmet when appropriate. Keep both hands on the saw, avoid cutting with the upper tip of the bar, and never cut above shoulder height.
Use a sharp chain, correct chain tension, a functioning chain brake, and a properly maintained bar. Keep the chain out of dirt, rocks, and metal. Dirt is basically sandpaper with bad intentions, and it can dull a chain in seconds.
Practical Example: Firewood Chain Maintenance
Imagine you are cutting oak firewood with a mid-size gas chainsaw. The chain was sharpened three times during the season. The cutters look sharp, but the saw has started making dust and needs pressure to cut. You place a .025-inch depth gauge tool over the chain and notice that many rakers sit above the slot.
You file each exposed raker flush with the tool, then lightly round the front edge. After checking the full chain and resetting the tension, you make a test cut. The saw now pulls itself into the oak and throws chips again. You did not magically increase engine power. You simply restored the correct relationship between the cutter and the depth gauge.
When to Replace the Chain Instead of Filing
Filing is useful only when the chain is otherwise in good condition. Replace the chain if cutters are worn past the service marks, links are cracked, rivets are loose, drive links are damaged, or the chain has stretched excessively. Also replace it if it has been overheated, heavily rocked, or damaged by metal.
A chain is a wear item. Trying to squeeze one more day out of a dangerous chain is not thrift; it is a bad negotiation with physics.
Extra Field Experience: What Real Use Teaches You About Chainsaw Depth Gauges
The first thing experience teaches about using a chainsaw depth gauge is that the chain rarely lies. When a chain is right, you can feel it immediately. The saw settles into the cut, the chips fly in steady curls, and your arms are not doing the work the chain should be doing. When the rakers are too high, the saw feels lazy. It may sound busy, but it does not produce much. That is usually the moment a beginner thinks the engine is weak, the bar is bad, or the wood is “extra hard today.” Sometimes the wood is hard. More often, the chain geometry is off.
One useful habit is to sharpen and check depth gauges before you are exhausted. Filing at the end of a long cutting day is when mistakes happen. Your hands are tired, the light is fading, and your patience has wandered off to look for snacks. A better routine is to touch up the chain during breaks or before starting the next session. A few calm minutes with a file can save an hour of fighting the saw.
Another lesson is that clean wood is a gift. If you are cutting logs that have been dragged through soil, the chain will dull faster. After sharpening a rocked or dirt-dulled chain, the cutters may need enough filing that the depth gauges should be checked right away. Do not assume the rakers are fine just because you checked them last month. Chainsaw chains do not care about your calendar; they care about metal removed from the cutters.
In hardwood, conservative depth gauge settings often feel smoother. The saw may cut a little less aggressively, but it is easier to control and less tiring. In softer wood, a properly matched chain can take a slightly bigger chip if the manufacturer allows it. Still, aggressive is not the same as efficient. A chain that grabs and chatters wastes energy, beats up the bar, and makes the operator tense. Smooth cutting wins over dramatic cutting almost every time.
It also helps to carry a small filing kit in the field. A depth gauge tool, flat file, round file, file guide, marker, and gloves take up little room. Marking the first cutter or raker saves confusion when working around the chain. Without a mark, it is very easy to keep filing while wondering why the chain suddenly seems endless. Chains are loops, and loops enjoy making humans feel foolish.
Pay attention to the chips. Big, consistent chips usually mean the chain is sharp and feeding correctly. Powder means something is wrong. Long stringy pieces, rough grabbing, or violent chatter may mean the rakers are too low or uneven. The cut surface can also tell a story. A saw that pulls left or right may have uneven cutters, uneven filing angles, or mismatched cutter lengths. The depth gauges matter, but they are part of a system.
Over time, the best chainsaw users develop a light touch. They do not force the saw. They let the chain work. Proper raker height makes that possible. When the saw is tuned well, you guide it instead of wrestling it. That means cleaner cuts, less fatigue, better fuel or battery efficiency, and safer work. The humble depth gauge may be small, but it has a big influence on how civilized your chainsaw feels. Treat it with respect, and your saw will stop acting like a caffeinated beaver with anger issues.
Conclusion
Knowing how to use a chainsaw depth gauge is one of the most valuable maintenance skills any chainsaw owner can learn. The depth gauge controls how much wood each cutter removes, which affects speed, smoothness, safety, and overall cutting performance. File the cutters first, place the correct depth gauge tool over the chain, lower only the rakers that sit above the guide, and lightly restore the rounded leading edge. Work slowly, use the manufacturer’s specifications, and never guess when a simple tool can measure the setting for you.
A well-maintained chain does not just cut faster; it cuts smarter. It reduces strain on the saw, saves your energy, and helps you stay in control. And in chainsaw work, control is not optionalit is the whole game.
Note: Always follow your chainsaw and saw chain manufacturer’s specifications. Depth gauge settings vary by chain type, and safe filing depends on using the correct guide, file, and technique.













