
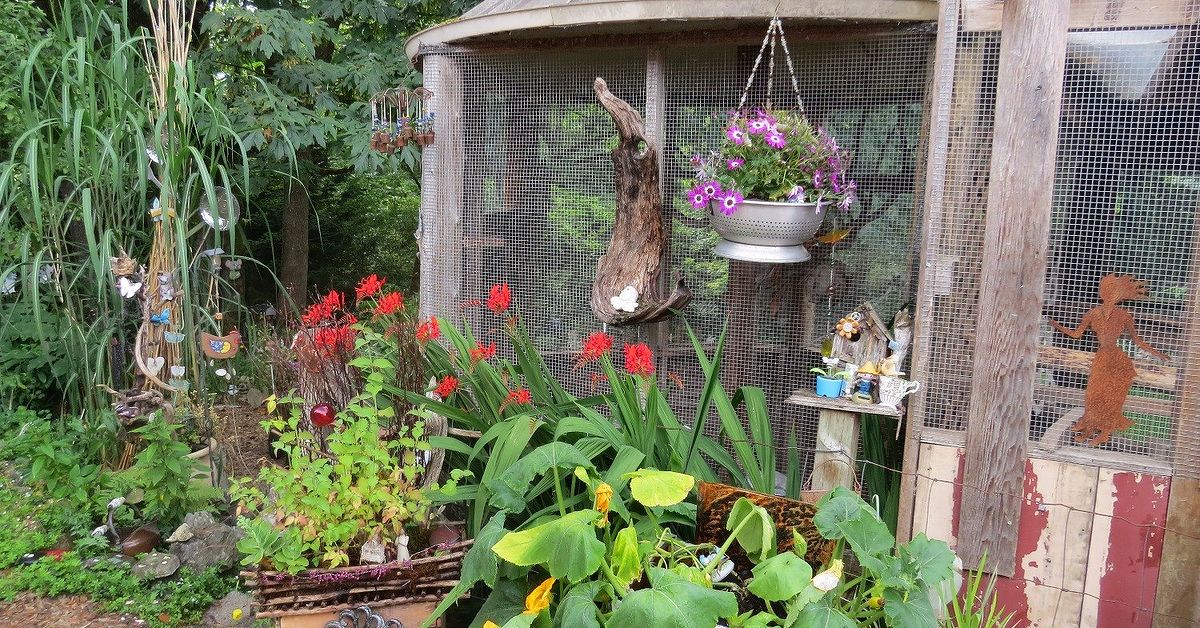
Some people dream of a walk-in closet. Others want a shiny kitchen with a refrigerator that looks like it could launch a satellite. Me? I dream of outdoor craft rooms: sunny little backyard spaces where ribbon, paint, fabric, wood scraps, dried flowers, glue guns, and half-finished ideas can live without taking over the dining table like an extremely colorful invasion.
An outdoor craft room can be a shed, garden room, converted porch, greenhouse corner, detached studio, covered patio, or even a clever workstation tucked beside the garage. The magic is not in the square footage. It is in the feeling: a dedicated creative space that lets you step out of the house and into your own world. No laundry pile staring at you. No kitchen counter demanding to be wiped. No one asking why there is glitter in the cereal. Again.
Whether you sew, paint, scrapbook, build wreaths, refinish furniture, make pottery, arrange flowers, or simply collect craft supplies with the confidence of a small museum curator, an outdoor craft room can turn creative chaos into a usable, inspiring retreat. Let’s walk through how to design one beautifully, practically, and with enough storage to keep the glue sticks from forming a tiny rebellion.
What Is an Outdoor Craft Room?
An outdoor craft room is a dedicated creative workspace located outside the main living area. It might be a backyard shed converted into an art studio, a garden room used for sewing and painting, a covered deck with weatherproof storage, or a small detached studio built for hobbies. Unlike a typical storage shed, a craft room is designed for comfort, organization, lighting, airflow, and creative focus.
The best outdoor craft rooms combine the personality of a studio with the toughness of an outdoor structure. That means sturdy flooring, moisture-aware storage, good ventilation, layered lighting, and surfaces that can survive paint splatters, hot glue, clay dust, potting soil, and the occasional “I thought this would be a quick project” disaster.
Why Move Your Craft Room Outdoors?
1. You Get a Real Creative Zone
When craft supplies live in five closets, three bins, and one mysterious bag behind the sofa, creativity becomes a treasure hunt. A backyard craft room gives everything a home. Paints stay with brushes. Fabric stays with thread. Scissors stay where scissors belong, unless they are the good scissors, in which case they will still vanish because that is one of nature’s laws.
2. Messy Projects Become Less Stressful
Outdoor craft rooms are perfect for projects that do not behave politely indoors. Sanding, staining, wreath making, floral arranging, large-scale painting, kids’ crafts, and furniture makeovers all benefit from a separate space. You can close the door on a half-finished project and return later without clearing everything for dinner.
3. Nature Boosts Inspiration
A garden view, natural light, birdsong, fresh air, and seasonal color can change the way you work. Even a small window facing a planter box can make a craft room feel calmer and more imaginative. Creative spaces do not have to be fancy; they need to make you want to begin.
4. It Helps Protect the Rest of the House
If your hobbies involve dust, dye, resin, glue, clay, sawdust, or tiny beads with Olympic-level escape skills, moving the work outdoors helps protect floors, furniture, and family patience. The goal is not to hide your hobby. It is to give it a kingdom.
Choosing the Right Outdoor Space
Before buying shelves or painting the door a charming shade of “creative genius blue,” choose the right location. A craft room should be easy to access, protected from standing water, and close enough to the house that you will actually use it. A gorgeous studio at the far end of a muddy yard sounds romantic until you need to carry a sewing machine through drizzle.
Backyard Shed
A shed is one of the most popular options for an outdoor craft room because it already has walls, a roof, and a door you can dramatically open when inspiration strikes. Wood sheds are easy to customize with shelves, pegboards, windows, and insulation. Resin and metal sheds can also work, especially for storage-heavy crafts, but they may need extra thought for temperature control and interior finishing.
Garden Room
A garden room is more like a small detached living space than a basic shed. It may include insulation, finished walls, electrical outlets, windows, and a more polished interior. This option works beautifully for sewing, writing, painting, jewelry making, paper crafts, and year-round creative work.
Covered Patio or Porch
If building a separate structure is not realistic, a covered porch or patio can become a seasonal craft room. Use outdoor cabinets, rolling carts, weather-resistant bins, and foldable tables. This setup is ideal for casual crafting, kids’ activities, garden projects, and messy weekend DIY sessions.
Garage or Carport Corner
A garage craft zone is practical for woodworking, furniture painting, and projects requiring tools. Add a workbench, wall-mounted storage, bright task lighting, and a curtain or divider to separate craft supplies from lawn equipment. Nothing kills the creative mood faster than accidentally storing your watercolor paper beside a leaf blower.
Designing the Layout: Work Zones Matter
A successful outdoor craft room needs zones. Even a small 8-by-10 shed can work beautifully if every area has a job. Think of the room like a tiny creative factory, except cuter and with better snacks.
The Main Work Surface
Start with the largest table or workbench that comfortably fits. A deep tabletop gives you space to cut fabric, spread out paper, assemble wreaths, paint signs, or sort supplies. If you work standing up, choose counter height. If you sew, draw, or scrapbook, seated desk height may be more comfortable.
Durable surfaces are your friend. Butcher block, laminate, sealed plywood, stainless steel, and old dining tables can all work. The key is choosing something you will not treat like a priceless antique. Craft tables should be allowed to earn a few honorable scars.
The Storage Wall
Use vertical space aggressively. Pegboards, open shelves, wall rails, hooks, magnetic strips, and stackable bins keep supplies visible. The more you can see, the less likely you are to buy your seventh bottle of white acrylic paint because the first six were hiding behind ribbon.
The Wet or Messy Zone
If your crafts involve paint, clay, dye, flowers, or glue, create a messy zone near the door or window. Use washable mats, trays, buckets, and lidded containers. If plumbing is not available, keep a water jug, basin, paper towels, and a dedicated cleanup caddy nearby.
The Quiet Detail Zone
Jewelry making, embroidery, calligraphy, model painting, and paper crafts need good lighting and a calm surface. Place this zone near a window or under adjustable task lighting. Add a comfortable chair because creative joy is harder to feel when your back is filing a formal complaint.
Storage Ideas for Outdoor Craft Rooms
Storage is where outdoor craft rooms either become dreamy or deeply haunted. The challenge is keeping supplies organized while protecting them from moisture, temperature swings, dust, insects, and sunlight.
Use Clear Containers
Clear bins help you see what you own. Label them anyway, because future-you deserves kindness. Use airtight containers for paper, yarn, fabric, dried flowers, and anything that dislikes humidity.
Install Pegboards
Pegboards are the superheroes of craft room organization. Hang scissors, rulers, tape, thread, baskets, pliers, paintbrushes, and small tools. Paint the pegboard to match your room, or leave it plain for a classic workshop look.
Add Rolling Carts
Rolling carts are ideal for flexible hobbies. One cart can hold painting supplies, another can hold sewing tools, and another can hold kids’ craft materials. Roll the cart to your table, use what you need, then park it back in place.
Choose Closed Cabinets for Delicate Supplies
Open shelves look beautiful, but closed cabinets protect supplies better. Use them for fabric, specialty paper, adhesives, electronics, seasonal décor, and items that fade in direct sun.
Keep Dangerous Materials Separate
Solvents, spray paints, adhesives, blades, heat tools, and flammable materials should be stored carefully in original containers and away from children, pets, heat, and direct sunlight. A craft room should feel magical, not like a chemistry experiment with curtains.
Lighting: The Secret Ingredient
Outdoor craft rooms need layered lighting. Natural light is wonderful, but it changes throughout the day and disappears exactly when you are trying to thread a needle.
Natural Light
Windows, glass doors, skylights, and light-colored walls make small studios feel larger. North-facing light is often softer and more consistent, while bright direct sun may require shades to protect paper, fabric, and artwork from fading.
Task Lighting
Add adjustable lamps over worktables, sewing machines, painting areas, and detail stations. LED task lights are useful because they stay cooler and provide focused brightness.
Ambient Lighting
Ceiling lights, wall sconces, or plug-in fixtures make the room usable after sunset. If your outdoor craft room has electrical wiring, use proper outdoor-rated or code-compliant fixtures where needed and hire a qualified electrician for permanent installations.
Comfort, Ventilation, and Weather Protection
A backyard craft room should be comfortable enough that you want to stay, but durable enough to handle outdoor conditions. That balance matters.
Ventilation
Good airflow helps reduce moisture, odors, and stuffiness. Windows, vents, exhaust fans, ridge vents, and soffit vents can all improve air movement. Ventilation is especially important when working with paints, sprays, adhesives, solvents, or materials that release fumes.
Moisture Control
Moisture is the enemy of paper, fabric, wood, yarn, and metal tools. Keep the structure raised on a proper foundation, seal gaps, maintain the roof, use weatherstripping around doors, and avoid placing boxes directly on the floor. A small hygrometer can help you monitor humidity.
Insulation
If you want to use the room year-round, insulation can make a big difference. Walls, floors, and roofs may all need attention. However, insulation should not block ventilation. A sealed-up shed with trapped moisture is not a studio; it is a future mold documentary.
Heating and Cooling
Portable fans, safe heaters, window coverings, shade sails, and mini-split systems may help regulate temperature depending on your climate and structure. Always follow local codes and manufacturer instructions, especially with electrical or heating equipment.
Safety First: Permits, Power, and Practical Rules
Outdoor craft rooms may feel whimsical, but safety is not optional. Before building or converting a structure, check local zoning rules, setback requirements, building permits, and homeowners association guidelines. Many areas allow small sheds without a full building permit, but rules vary widely. Electrical, plumbing, permanent foundations, heating, or larger structures often trigger additional requirements.
For electricity, use a licensed professional when adding permanent wiring, outlets, lighting, or heating and cooling equipment. Outdoor and accessory-building electrical work may require permits and protective devices such as GFCI outlets. Extension cords should not become a permanent power plan. They are temporary helpers, not lifestyle choices.
Also read art supply labels carefully. Many art materials sold in the United States are subject to labeling rules for chronic health hazards. Look for safety seals, age guidance, caution labels, and ventilation instructions. This is especially important if children use the craft room.
Decorating My Outdoor Craft Rooms
Now for the fun part: personality. Outdoor craft rooms should be practical, but they should also make your heart do a tiny tap dance when you open the door.
Pick a Mood
Do you want a cottage garden studio with floral curtains and painted furniture? A clean modern maker space with white walls and black metal shelves? A rustic workshop with reclaimed wood and vintage signs? Choose a style that matches the way you create.
Use Color Strategically
Light colors can make a small room feel bigger, while bold colors can energize the space. A cheerful door, painted pegboard, patterned rug, or colorful storage bins can add charm without overwhelming the room.
Bring in Plants
Plants soften the edges of a workspace and connect the room to the garden. Choose low-maintenance varieties and avoid placing them where water could damage supplies. A little greenery is inspiring. A jungle growing over your glue gun is less ideal.
Create a Display Area
Reserve one wall, shelf, or corkboard for finished projects, inspiration photos, fabric swatches, sketches, and seasonal ideas. Seeing your own work displayed can motivate you to keep going.
Best Crafts for Outdoor Craft Rooms
Almost any hobby can work in an outdoor craft room, but some are especially well suited to a separate backyard space.
Painting and Mixed Media
A shed studio with washable floors, good airflow, and a large table is perfect for acrylic painting, watercolor, collage, and mixed media. Store paper flat, keep paints sealed, and use trays to contain spills.
Sewing and Quilting
Sewing needs clean storage, steady lighting, and a comfortable chair. Use closed bins for fabric, wall racks for thread, and a large table for cutting. Keep machines protected from humidity and dust when not in use.
Wreath Making and Floral Crafts
Outdoor rooms are wonderful for wreaths, garlands, dried flowers, and seasonal décor. Install hooks for hanging works in progress and use tall bins for stems, ribbons, and branches.
Furniture Makeovers
If you refinish small furniture, choose a craft room with durable floors, strong ventilation, and easy outdoor access. Keep sanding, staining, and spraying procedures safe and separate from delicate supplies.
Kids’ Crafting
An outdoor craft room can be a fantastic family creativity zone. Use washable surfaces, low shelves, non-toxic supplies, and clearly labeled bins. Bonus: glitter outdoors is still glitter, but at least it is slightly farther from the sofa.
Budget-Friendly Outdoor Craft Room Ideas
You do not need a luxury studio to create a beautiful outdoor craft room. Start with what you have and upgrade gradually.
Repurpose Furniture
Old dressers, bookcases, dining tables, filing cabinets, and kitchen carts can become craft storage. Paint them, seal them if needed, and give them a second life.
Use Thrifted Containers
Jars, baskets, tins, crates, and gift boxes can organize small supplies. Matching containers look nice, but functional storage matters more than perfection.
Build a Simple Workbench
A basic workbench made from lumber and a sturdy top can outperform an expensive desk. Add shelves below for bins and hooks along the side for tools.
Start Seasonal
If insulation and electricity are not in the budget yet, use the room seasonally. Store weather-sensitive materials indoors and bring them out during craft sessions.
Common Mistakes to Avoid
Ignoring Moisture
Even beautiful outdoor rooms can become damp. Protect supplies with sealed containers, airflow, raised storage, and regular maintenance.
Not Planning Enough Table Space
Crafting expands. Always. A tiny desk may look cute, but most hobbies need room to spread out.
Using Poor Lighting
Dim lighting makes detail work frustrating and can distort colors. Combine daylight, overhead lighting, and task lamps.
Overdecorating Before Organizing
Decor is fun, but storage comes first. A charming studio still needs a place for glue, scissors, thread, paint, and the mysterious collection of “useful someday” cardboard pieces.
My Outdoor Craft Rooms: Personal Experiences and Lessons Learned
The first thing I learned about outdoor craft rooms is that the room will tell you what it wants to become. You may begin with a grand plan involving matching baskets, a perfect table, and a color-coded ribbon wall worthy of applause. Then you actually start crafting and discover that what you really need is a bigger trash can, better lighting, three more hooks, and a chair that does not make you question your life choices after twenty minutes.
My favorite outdoor craft room experience started with a plain backyard shed. Nothing glamorous. It had dusty corners, one stubborn door, and a floor that had clearly met many garden tools. But it had potential. I cleaned it out, painted the walls a warm white, added a secondhand table, and installed pegboard above the main workspace. Suddenly, the shed stopped feeling like storage and started feeling like permission. Permission to leave a project unfinished overnight. Permission to make a mess. Permission to try things that might fail without having to explain why the kitchen smelled faintly like spray adhesive.
One of the biggest improvements was creating zones. At first, everything landed on the same table: paint, scissors, ribbon, garden gloves, half-dried pinecones, and coffee. This was not a system. This was a personality test. Once I separated supplies by activity, the whole space became easier to use. Wreath materials went near the door because they were bulky. Paint stayed near the washable mat. Paper crafts moved to a dry cabinet. Tools hung on the pegboard where I could grab them quickly. The room did not get bigger, but it felt twice as useful.
I also learned that outdoor craft rooms need regular “reset days.” Creative people often say they like a little mess, and that is true. A little mess can feel alive. But there is a difference between creative mess and archaeological dig site. Once a month, I like to clear the table, wipe surfaces, check for moisture, toss dried-out markers, sort scraps, and return wandering tools. It takes less time than expected and makes the next project feel inviting instead of mildly threatening.
Another lesson: comfort is not a luxury. A fan in summer, a cozy rug underfoot, a supportive chair, and a lamp in the right place can decide whether you use the room often or avoid it like a gym membership in February. Outdoor craft rooms should feel easy to enter. If you have to move six boxes, plug in three cords, and fight a spider for chair rights, you will probably craft indoors instead.
Weather taught me humility. Paper, fabric, and unfinished wood do not enjoy damp air. I now keep delicate materials in sealed containers and avoid storing anything precious directly on the floor. I also learned to keep a small “grab-and-go” caddy with basics: scissors, pencil, tape, ruler, glue, clips, and a notebook. That little caddy saves more time than any fancy storage system because it prevents the classic craft-room workout: walking in circles looking for the one tool you just had.
The best part of having an outdoor craft room is the mental shift. Stepping outside to create feels intentional. It separates hobby time from housework time. Even a short session can feel refreshing because the space is designed for making, not multitasking. There is something wonderful about hearing rain on the roof while sorting fabric, or opening the door on a sunny morning and seeing a half-finished project waiting patiently. It turns creativity into a ritual.
And yes, outdoor craft rooms are never truly finished. There will always be another shelf to add, another bin to label, another idea to test, another corner to improve. That is part of the charm. A craft room grows with you. It reflects your hobbies, your seasons, your experiments, and your delightful inability to walk past a clearance aisle without imagining what that basket could hold.
Conclusion
My outdoor craft rooms are more than backyard workspaces. They are creative retreats, storage solutions, mini studios, and quiet reminders that making things matters. Whether you transform a shed, porch, garage corner, or garden room, the goal is the same: build a space that supports your creativity instead of fighting it.
Start with the basics: a dry structure, a sturdy work surface, smart storage, good lighting, ventilation, and safe material handling. Then add the details that make the space yours: plants, color, music, display walls, comfortable seating, and maybe a secret snack drawer. Actually, definitely a snack drawer.
An outdoor craft room does not have to be perfect. It has to be useful, welcoming, and ready for the beautiful mess of making. Give your supplies a home, give your ideas a place to land, and give yourself the joy of stepping into a room built for imagination.










