
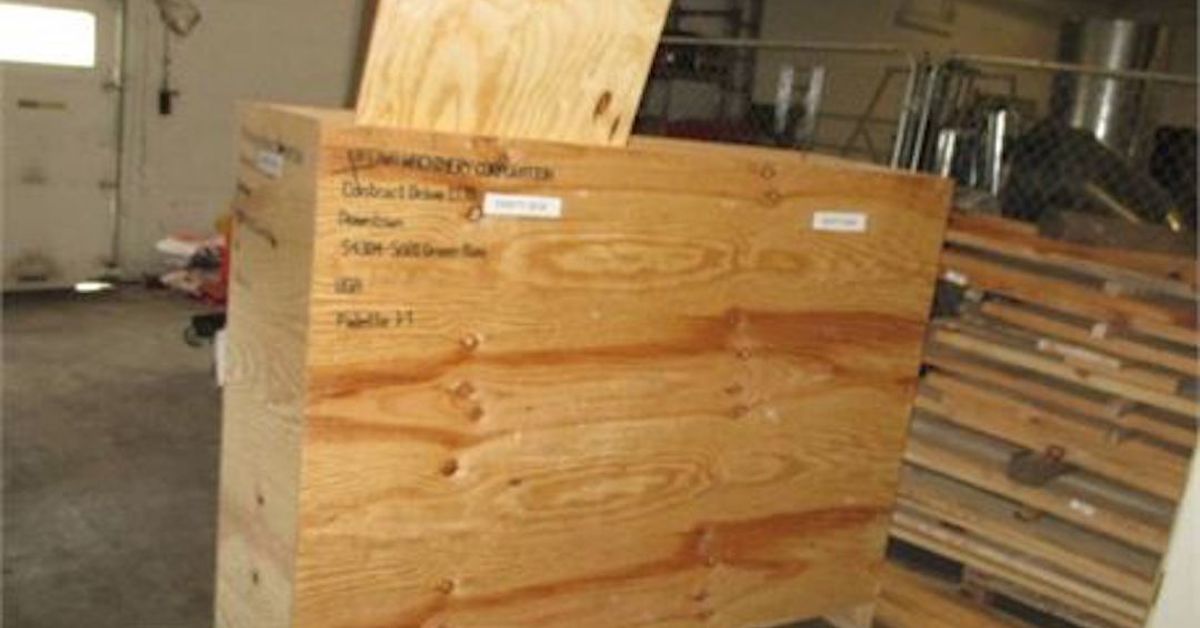
A large wooden shipping crate rarely arrives looking glamorous. It is usually dusty, overbuilt, decorated with mysterious stamps, and held together by enough fasteners to make a nail gun feel emotionally insecure. Yet beneath that industrial exterior is a surprisingly generous supply of lumber, panels, braces, and character-rich hardware.
With careful planning, one substantial crate can become two functional pieces: a full-height serving bar for entertaining and a compact beverage station for coffee, mocktails, glassware, or overflow drink service. The project saves usable material, creates coordinated furniture, and gives your home a story more interesting than, “It was on sale next to the patio cushions.”
The key is to treat the crate as a source of parts rather than simply cutting the box in half. By inventorying the lumber, reinforcing the original panels, and assigning the best pieces to the most visible surfaces, you can build two home bars that look intentional instead of improvised.
Why Turn One Shipping Crate Into Two Home Bars?
A shipping crate is designed to protect heavy cargo, so it often contains more material than an ordinary decorative box. Depending on its size and construction, you may find thick skids, framed side panels, plywood sheets, corner posts, metal brackets, and solid boards that can be reused as shelves or trim.
Dividing that material between two bars offers several advantages:
- You create matching furniture for two different areas of the home.
- You use awkward offcuts as shelves, rails, bottle dividers, or decorative panels.
- You can separate guest service from drink preparation.
- You preserve the crate’s industrial character without allowing it to dominate the room.
- You reduce the amount of usable wood headed toward disposal.
The first bar can serve as the social centerpiece. The second can sit against a wall, roll onto a patio, or work as a coffee station during the week. One piece hosts the party; the other quietly prevents the kitchen counter from becoming a parking lot for bottles, cups, and lime wedges.
Inspect the Crate Before Reusing It
Not every shipping crate belongs inside a home. Before reaching for a pry bar, determine where the crate came from and what it carried. Reject wood with chemical odors, oily patches, heavy discoloration, insect damage, widespread mold, or an unknown history involving hazardous cargo.
Read the Wood-Packaging Mark
International wood packaging may display an ISPM 15 mark containing an IPPC symbol, a country code, a facility number, and a treatment code. “HT” indicates heat treatment, while “MB” indicates methyl bromide fumigation. The mark explains how the packaging was treated for international shipping; it does not guarantee that the crate is clean, furniture-grade, or free from cargo-related contamination.
When the history is uncertain, particularly if the wood smells strange or shows suspicious residue, choose another crate. Free lumber stops being a bargain when it introduces a problem into your living room.
Check for Moisture and Mold
Wood should be completely dry before it is brought indoors or sealed with a finish. Light surface dirt may be cleaned with detergent and water, followed by thorough drying. Extensive mold growth, deep staining, persistent odors, or prolonged water saturation are reasons to discard affected boards rather than disguise them beneath stain.
Find Every Nail, Staple, and Metal Strap
Inspect every board before cutting, planing, or sanding it. Shipping crates are famous for hiding broken nails precisely where a saw blade would prefer not to meet one. Use pliers, a nail puller, a punch, and a strong magnet to locate metal. Wear gloves, eye protection, hearing protection, and appropriate respiratory protection while dismantling and sanding.
Plan the Two-Bar Layout Before Demolition
Photograph the crate from every side before taking it apart. Label major panels with painter’s tape and note which surfaces have the best grain, stamps, scratches, or original lettering. A scarred panel that looks rough in the workshop may become the visual feature guests admire later.
Next, create a material inventory. Measure and list:
- Full side and end panels
- Corner posts and base skids
- Usable plywood sheets
- Solid boards suitable for shelves
- Original hinges, handles, brackets, and stamps
- New lumber needed for structural reinforcement
Do not force both bars to rely entirely on salvaged wood. New plywood, straight dimensional lumber, screws, and countertop material can make the finished pieces safer and more durable. Reclaimed boards provide the personality; fresh framing quietly handles the serious work.
Bar One: Build a Full-Height Entertaining Bar
The larger side panel is a natural starting point for a freestanding serving bar. A conventional home bar is often about 42 inches high. An overhang of at least eight inches provides basic knee room, while roughly two feet of bar width per stool helps guests sit without competing for elbow territory.
Suggested Finished Size
For a moderately sized room, consider a finished bar approximately 60 to 72 inches wide, 24 to 30 inches deep, and 42 inches high. Adjust those dimensions to suit the salvaged panels and available floor space. Leave generous walkways around the bar, especially behind the serving side.
Construct a Reinforced Frame
Build an internal frame from straight lumber rather than trusting the crate panel alone. Create two rectangular end frames, connect them with horizontal rails, and add diagonal bracing or plywood gussets to resist side-to-side movement. Secure the reclaimed front panel to this frame with screws driven from the hidden side.
If the bar will stand near a wall, anchoring it can improve stability. A freestanding unit should have a broad base, a securely attached top, and enough weight low in the cabinet to resist tipping when guests lean on it. People will lean on it. They may even lean on it while explaining why they definitely do not need karaoke.
Add Functional Storage
Use remaining crate boards to create adjustable or fixed shelves behind the bar. A practical arrangement includes:
- A tall lower section for bottles or small appliances
- A shallow shelf for cocktail tools and napkins
- Stemware racks beneath an upper shelf
- A drawer or divided box for openers, coasters, and measuring tools
- A removable bin for recycling
Keep frequently used items between waist and shoulder height. Heavy bottles belong on lower shelves, where they improve stability and are less likely to perform an unscheduled gravity demonstration.
Build a Durable Bar Top
The bar top receives the most wear, so it deserves more than a loose collection of rustic boards. Install a stable plywood substrate over the frame. Then apply reclaimed planks, butcher block, hardwood, metal, laminate, or another durable surface.
Wooden planks should be secured, flattened, and sealed against spills. Slightly round or ease exposed edges so they are comfortable against hands and forearms. A raised serving top can be added above a lower preparation counter, but a single-level top is easier for a first-time builder and generally requires less material.
Bar Two: Build a Compact Beverage Station
The second bar can be smaller and more flexible. An end panel, part of the crate base, and leftover boards are usually enough to create a wall-side dry bar, rolling drink cart, or coffee-and-cocktail cabinet.
Suggested Finished Size
A compact station around 32 to 48 inches wide, 16 to 22 inches deep, and 34 to 36 inches high fits many dining rooms, kitchens, and living areas. Unlike the taller serving bar, this unit works at standard counter height and does not require guest seating.
Choose a Configuration
Three layouts work particularly well:
- Wall-side cabinet: Add doors or open shelves and place the unit beneath artwork or floating glassware shelves.
- Rolling bar cart: Install four properly rated casters, including at least two locking casters.
- Fold-down bar: Hinge a reinforced panel to create a serving surface that closes when not in use.
A compact bar does not need plumbing to be useful. A dry bar can hold a serving tray, ice bucket, coffee maker, sparkling-water machine, or small beverage refrigerator if the appliance has adequate ventilation and the structure can support its weight.
Make the Second Bar Visually Related, Not Identical
Use the same finish, hardware family, or stencil style on both pieces, but allow their functions to shape their appearance. The tall bar may feature a dramatic crate stamp across the front. The smaller unit might repeat that detail on one drawer or shelf edge.
This approach prevents the furniture from looking like matching restaurant equipment. They should appear related, like siblingsnot like they were required to wear identical sweaters for a family photograph.
How to Preserve the Crate’s Character
The charm of reclaimed shipping-crate wood comes from marks that new lumber cannot convincingly imitate: saw patterns, dents, nail holes, faded lettering, color variation, and worn edges. Preserve selected imperfections while removing hazards.
Clean Without Erasing the Story
Begin with a stiff brush and vacuum. Wash only as aggressively as necessary, then allow the wood to dry fully. Sand splintered areas and surfaces that people will touch, but avoid grinding every board until it looks newly purchased.
Start with a moderate grit and move to a finer grit for exposed surfaces. Corners, handles, shelf fronts, and bar-top edges should feel smooth. Decorative front panels can remain more textured as long as they are clean and do not shed splinters.
Stabilize Knots and Cracks
Secure loose knots before finishing. Small cracks and voids may be stabilized with an appropriate wood repair product or clear adhesive, depending on their size and location. Replace any board that is split through a structural connection point.
Select the Right Finish
A clear finish highlights stamps and natural color. Stain creates a more uniform appearance but may darken original markings. Paint can unify mismatched woods, especially when selected boards are left natural as accents.
For surfaces exposed to drinks, use a durable finish intended for furniture or countertops and follow the manufacturer’s instructions for preparation, ventilation, application, drying, and curing. Do not place bottles, food, or glassware on the surface until the finish has fully cured.
Lighting and Styling the Finished Home Bars
Lighting can make a simple beverage station feel intentional. Warm, low-level illumination creates atmosphere and highlights glassware without turning the room into an airport security checkpoint. Consider plug-in sconces, rechargeable lamps, or concealed LED lighting installed according to product instructions.
Style the bars selectively. Display attractive bottles, decanters, glassware, or coffee supplies, but store backup inventory behind doors or in baskets. Too many items create visual clutter and reduce preparation space.
Useful finishing touches include:
- A washable serving tray
- A small lamp with warm light
- Hooks for towels or bar tools
- A framed menu for cocktails, mocktails, or coffee drinks
- A shallow bowl for citrus fruit
- Coasters that protect the reclaimed-wood finish
- One plant that can survive occasional neglect
Common Mistakes to Avoid
Cutting Before Creating a Material Plan
Once a long board becomes three short boards, inspirational thinking will not put it back together. Prepare both cut lists before making the first irreversible cut.
Assuming the Original Crate Is Furniture-Ready
Crates are built to survive transportation, not necessarily to remain square, resist lateral pressure, or support a countertop overhang. Reinforce both bars with proper frames and secure joinery.
Using Every Rustic Board
Some wood is simply too damaged, contaminated, twisted, or weak to reuse. Discarding an unsafe board is not wasteful; it is evidence that the project manager has met the project manager.
Overloading the Mobile Bar
Use casters rated for more than the combined weight of the cabinet, countertop, bottles, appliances, and accessories. Lock the wheels before serving, and avoid mounting heavy storage high above the base.
Forgetting the Workflow
Before attaching shelves permanently, imitate the motions of preparing a drink. Where will the glasses go? Can you reach the opener? Is there a place to set a bottle while measuring? A beautiful bar that requires six unnecessary steps per beverage will eventually become an expensive mail table.
Builder Experience: What This Two-Bar Project Is Really Like
The first major lesson is that dismantling the crate usually demands more patience than assembling the furniture. Shipping fasteners are not decorative suggestions. They may be driven deeply, bent over, hidden beneath battens, or placed in locations apparently selected by someone with a personal grudge against pry bars.
Working slowly preserves more lumber. Driving nail points backward with a punch often causes less damage than pulling every fastener through the finished face. Labeling boards also becomes surprisingly valuable. Without labels, several nearly identical pieces will wait until the end of the project to reveal that only one fits the final opening.
The second lesson is that the ugliest panel may become the best feature. A board with faded shipping marks, uneven color, and shallow dents can look unimpressive on the floor. Once cleaned, framed, and placed beneath a smooth countertop, it gains context. The polished portions make the rough surface appear intentional.
Builders also tend to discover that the two bars should not receive equal amounts of material. The tall bar needs stronger framing, a substantial top, and enough depth for storage. The compact bar benefits from simplicity. Trying to divide every board evenly may weaken the main piece while burdening the smaller one with decorative lumber it does not need.
Another practical lesson is to build the countertop early. The top establishes the final width, depth, overhang, and visual proportions. Waiting until the end may leave you designing a countertop around a frame that is slightly too narrow, slightly out of square, and extremely confident about both conditions.
During finishing, restraint produces better results than aggressive restoration. Sand the places touched by hands, clothing, and glassware. Preserve selected saw marks and stamps. The goal is not to make old wood look new; it is to make old wood feel clean, stable, and welcome indoors.
The most enjoyable surprise often appears after installation. The smaller beverage station may receive more daily use than the large entertaining bar. It can hold morning coffee supplies, afternoon sparkling water, and evening drink ingredients. Meanwhile, the tall bar becomes the gathering point during parties, keeping guests connected to the host without crowding the kitchen’s main work area.
Finally, test both bars before declaring victory. Load the shelves, press against the tops, lock the casters, open every door, and simulate service. Adjust shelf heights and hardware while tools are still nearby. A ten-minute test can reveal a wobble, awkward handle, or inaccessible bottle space that would otherwise become a permanent personality trait.
Conclusion
Turning one shipping crate into two home bars is less about clever cutting than thoughtful material management. The strongest boards become frames, the cleanest panels become visible surfaces, the smaller pieces become shelves and trim, and selected scars provide the character.
The result can be a full-height entertaining bar paired with a compact beverage station that works for cocktails, mocktails, coffee, or everyday storage. By inspecting the crate carefully, removing hidden metal, reinforcing the structure, and applying a durable finish, you create furniture that is practical enough for regular use and distinctive enough to start conversations.
Note: Crate dimensions, wood condition, treatment history, and structural strength vary. Adapt the design to the material you actually have, follow tool and finish manufacturers’ instructions, and consult a qualified professional when electrical work, plumbing, structural anchoring, or uncertain contamination is involved.
Research basis for common home-bar dimensions, countertop overhang, seating allowances, storage planning, compact beverage centers, and entertaining layouts:
Research basis for international wood-packaging marks, heat treatment, methyl bromide markings, metal inspection, woodworking hazards, and reuse considerations:
Research basis for mold cleanup, drying, reclaimed-wood defects, knot stabilization, texture preservation, and outdoor-bar safety concepts:













