
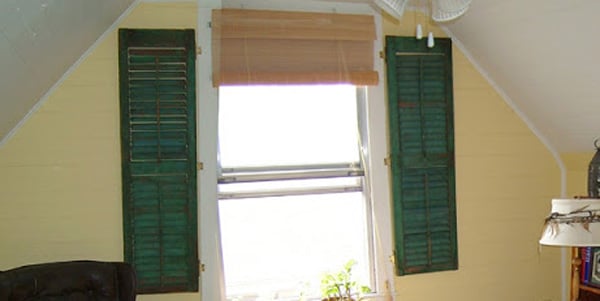
A yellow bedroom can go one of two ways. Done thoughtfully, it feels sunny, cheerful, and wonderfully nostalgic. Done carelessly, it can resemble the inside of a mustard bottle that has developed strong opinions about shag carpeting. The difference is not simply the shade of paint. A successful retro remodel depends on understanding the room’s history, preserving the details worth saving, correcting hidden problems, and balancing vintage personality with modern comfort.
The original “Yellow Room” remodel that inspired this topic involved one of two upstairs bedrooms in an older home. Beneath the visible floor covering, the renovators discovered layer after layer of rugs, carpet remnants, padding, a vintage vinyl rug, paper, and finally the actual wood floor. The room also featured thick solid-pine beadboard and an unfinished closet projectan excellent reminder that old rooms often contain both delightful surprises and jobs that somehow survive every deadline.
This guide takes that charming before-and-after idea further, showing how to create a retro yellow room that feels authentic without turning the space into a museum exhibitor a time capsule nobody is allowed to sit in.
Begin With the Room’s Story, Not the Paint Store
Before choosing curtains, wallpaper, or the precise shade of buttercup yellow, examine what is already in the room. Historic interiors gain much of their personality from their proportions, floor plans, wall finishes, woodwork, flooring, doors, and other character-defining elements. Preservation guidance recommends identifying those features before making changes that could conceal or destroy them.
Document Everything Before Demolition
Take wide photographs of every wall, followed by close-ups of baseboards, door hardware, vents, floor transitions, built-ins, wallpaper fragments, and unusual construction details. Measure the room, closet, windows, doors, and major furniture pieces. Label hardware as it comes off, because three weeks later every small brass hinge will look like every other small brass hinge.
Lift floor coverings carefully rather than attacking them with the enthusiasm of a game-show contestant. An old rug may be reusable after professional cleaning. Vintage linoleum or patterned vinyl may provide color inspiration even when it is too damaged to retain. A scrap of wallpaper can help establish the room’s original era and guide the new palette.
Decide What Deserves to Stay
Retro remodeling is most convincing when it preserves authentic materials instead of replacing everything with brand-new products pretending to be old. Original beadboard, pine flooring, substantial trim, period doors, built-in shelves, and vintage hardware can become the foundation of the finished design.
That does not mean every old object is sacred. Water-damaged flooring, crumbling plaster, deteriorated wiring, unstable shelving, and deeply stained textiles are not “character”; they are future repair bills wearing vintage costumes. The goal is selective preservation: save what gives the room identity, repair what can be repaired, and replace only what no longer performs safely.
Handle Old Paint and Dust Safely
Homes built before 1978 are more likely to contain lead-based paint, sometimes buried beneath several newer coats. Paint that remains intact may pose little risk, but peeling finishes and renovation work can release hazardous chips and dust. The Environmental Protection Agency recommends consulting certified professionals and using lead-safe practices when disturbing painted surfaces in older homes.
Do not dry-sand mystery paint just because the tutorial you watched made the process look soothing. Confirm what you are dealing with, isolate the workspace, protect occupants, control dust, and clean thoroughly. Painted windows, doors, stairs, trim, and other friction surfaces deserve particular attention because repeated movement can generate dust.
Repair Moisture Problems Before Decorating
A beautiful yellow finish cannot fix a leaking roof, sweating pipe, damp exterior wall, or poorly ventilated room. Uncontrolled moisture is a major cause of deterioration in older buildings, contributing to rot, corrosion, failed finishes, mold, and structural damage. Diagnose the source before patching stains or covering them with primer.
Check the ceiling, exterior-facing walls, window frames, baseboards, closet corners, and the floor beneath old coverings. Musty odors, dark staining, bubbling paint, soft wood, and rusted fasteners are warning signs. Correct the leak or ventilation issue first, allow the materials to dry, and then repair the visible damage. Otherwise, the room may look finished for six weeks before the stain returns to announce that it has renewed its lease.
Choose the Right Yellow for a Retro Remodel
Yellow is not a single decorating decision. It ranges from pale cream and straw to ochre, mustard, marigold, lemon, and nearly orange gold. Brighter, more saturated yellows tend to work best in controlled doses, while softer or muted yellows are generally easier to use across four walls.
Match the Shade to the Room’s Natural Light
A yellow sample can appear gentle in the store and become startlingly electric beside a sunny window. Natural light changes throughout the day, while artificial light can strengthen either warm or cool undertones. Paint manufacturers therefore recommend testing movable samples on multiple walls and viewing them under morning, afternoon, and evening conditions.
For a north-facing or dim room, consider a soft golden cream, wheat, or muted butter yellow that adds warmth without turning muddy. In a bright south- or west-facing room, a quieter yellow with beige, brown, or gray undertones can keep the walls from glowing like a road-warning sign. Mustard and ochre are excellent for built-ins, furniture, headboards, or one feature wall when an all-over application feels too intense.
Use a Balanced Retro Color Palette
The easiest way to make yellow feel intentional is to give it reliable companions. Choose one dominant yellow, one grounding neutral, and one or two accent colors.
- Yellow, warm white, and walnut: Clean, mid-century, and easy to live with.
- Mustard, olive green, and rust: An unmistakably 1970s combination with earthy depth.
- Butter yellow, powder blue, and white: Cheerful, airy, and suitable for a guest room or child’s room.
- Golden yellow, teal, and dark brown: Dramatic without feeling like a themed diner.
- Pale yellow, blush pink, and natural pine: Soft, playful, and especially effective with vintage floral textiles.
Greens, oranges, browns, and citrus tones were strongly associated with 1970s interiors, while patterned fabrics and wallpapers helped make bedrooms feel playful rather than restrained. Contemporary retro rooms often borrow these recognizable colors without reproducing every period element at once.
Restore the Architectural Details
Bring Old Wood Floors Back Carefully
After removing layered carpeting, inspect the floor before renting the largest sanding machine available. Minor surface wear may need only cleaning, light abrasion, and a compatible new finish. Deep gouges, black discoloration, cupping, exposed bare wood, or structural movement usually require more extensive repair or professional refinishing.
Keep a few age marks when they do not affect performance. A perfectly uniform new-looking floor can feel disconnected from old beadboard and vintage furnishings. Clean boards, secure loose areas, patch with matching wood where possible, and choose a finish that highlights the grain rather than coating it in a thick layer of artificial orange.
Preserve Beadboard and Trim
Solid beadboard can become the room’s star feature. Clean it gently, repair split boards, fill only distracting holes, and decide whether the wood should remain natural, be refinished, or receive paint. Previously unpainted wood deserves careful consideration before painting because that decision is difficult to reverse.
For varnished trim that will be painted, preparation generally includes protecting nearby surfaces, removing hardware where practical, cleaning away grime, dulling the glossy finish, priming appropriately, and applying smooth coats with a quality brush or small roller. Careful preparation matters far more than purchasing a paint can whose label contains the word “miracle.”
Painting trim before walls can make crisp cut lines easier to achieve. In a yellow room, warm white trim creates a lively, traditional contrast, while cream trim produces a softer transition. Deep brown or olive-painted trim can look wonderfully retro, but it should be repeated elsewhere so it appears deliberate.
Complete Unfinished Storage Properly
A closet without finished doors may be charming for about twelve minutes. After that, it becomes an exhibition titled “Everything We Meant to Fold.” Match new closet doors to the room’s existing door style when possible. Reuse compatible hinges and knobs, align the rails and panels, and paint or stain the doors before final installation.
Inside, combine a hanging rod, shelves, baskets, and low shoe storage. A yellow room already has visual energy, so concealed storage helps prevent the finished space from becoming cluttered. Paint the closet interior a contrasting colorsoft blue, muted coral, or olivefor a small retro surprise that does not dominate the bedroom.
Add Retro Style Without Creating a Costume Set
Use Pattern in One or Two Strategic Places
Wallpaper can establish a retro identity quickly, especially in oversized florals, geometric curves, sunbursts, stripes, or abstract botanical patterns. Modern retro remodels often use wallpaper as a single focal wall or within built-ins, then repeat one of its colors in furniture or textiles.
When the walls are already a confident yellow, let the bedding or curtains carry the largest pattern. If the walls are pale, a patterned headboard or wallpapered wall can supply the drama. Mixing floral curtains, checked bedding, striped rugs, and geometric wallpaper is technically possible, but it requires either advanced design judgment or complete immunity to visual dizziness.
Mix Vintage Pieces With Modern Comfort
Choose furniture by silhouette rather than insisting that every item come from the same decade. A low walnut dresser, spindle bed, curved reading chair, or compact bookshelf can establish the retro mood. Pair those pieces with a supportive modern mattress, safe electrical components, lined curtains, and practical bedside storage.
Secondhand furniture often needs only cleaning, tightened joints, refreshed hardware, or new upholstery. Painting every wood piece white may create crisp contrast, but retaining some natural wood usually gives yellow walls the warmth and depth associated with mid-century and 1970s interiors. Successful renovations of older homes frequently preserve strong original elements while simplifying surrounding colors and furnishings.
Layer the Lighting
Use more than a single ceiling fixture. Combine ambient light with bedside lamps, a reading light, and perhaps a small accent lamp on a dresser or shelf. Warm light generally complements yellow walls and natural wood, while very cool bulbs may make creamy paint look flatter or slightly green. Lighting color temperature can significantly alter how paint undertones are perceived.
Color quality also matters. The Department of Energy recommends a color rendering index of at least 80 for interior lighting, while a CRI of 90 or above provides excellent color fidelity. High-quality bulbs help yellow paint, wood grain, patterned fabrics, and skin tones appear more natural.
A Practical Yellow Room Remodel Sequence
- Photograph and measure the room.
- Test questionable paint and flooring materials.
- Remove furnishings and unwanted floor layers carefully.
- Inspect for leaks, mold, damaged plaster, wiring problems, and loose boards.
- Repair structural, electrical, and moisture issues.
- Restore flooring, beadboard, trim, doors, and hardware.
- Build or finish the closet and other permanent storage.
- Test yellow paint samples in changing light.
- Paint the ceiling, trim, walls, and built-ins in a logical sequence.
- Install lighting, window treatments, furniture, rugs, and artwork.
- Live with the room briefly before adding more accessories.
That final step prevents a common decorating problem: continuing to add “one last vintage touch” until the room contains six ceramic mushrooms, four sunburst mirrors, a rotary telephone, and nowhere to place a glass of water.
Remodeling Experiences: Lessons From a Yellow Room Project
The following field notes are a practical composite based on common experiences encountered in older-room renovations.
The first lesson arrives before the room is even empty: old houses rarely reveal their full plan on day one. A corner of carpet is lifted to check the subfloor, and suddenly the project becomes an archaeological excavation. One layer leads to another. Some materials are ugly, some are damaged, and one is unexpectedly wonderful. The temptation is to throw everything away simply because demolition creates momentum. Later, the item most regretted is often not the expensive one, but the odd vintage rug or unusual hardware that would have looked brilliant after cleaning.
The second lesson is that preservation slows the project but improves the result. Removing hundreds of nails from old flooring is not glamorous. Neither is cleaning grooves in beadboard with a small brush while questioning every life choice that led to that moment. Yet those original materials give the finished room a depth that cannot be ordered in a flat-pack box. New paint looks better beside wood that has earned a few dents, and modern bedding feels more interesting against paneling that has survived several decorating eras.
Color selection also becomes more complicated once the room is cleared. A yellow that looked restrained on a tiny card may become much louder across an entire wall. The best decision is usually made after several large samples spend a full day moving around the room. One appears green in the morning. Another becomes orange at sunset. The eventual winner may be the least exciting sample in the store but the most comfortable one in the actual space.
Another recurring experience is discovering that the project everyone expects to finish quickly is the one that remains incomplete. Closet doors wait for hardware. A bed frame remains unpainted. One section of trim needs a final coat. This happens because nearly finished rooms become usable, and usable rooms quickly lose priority. Creating a written punch listand refusing to move all the furniture back until it is completecan prevent the last five percent of work from lingering for five years.
Budget surprises are unavoidable, but they do not always require expensive solutions. Original flooring may eliminate the cost of installing new material. A vintage chair may become the room’s focal point after cleaning and upholstery. Leftover wall paint can refresh a bookshelf, while a small amount of contrasting color inside a closet adds more personality than an expensive decorative object. Saving authentic materials often reduces both waste and spending.
The most valuable experience, however, is learning when not to change something. Early in a remodeling journey, “new” can feel automatically superior. With time, the standard becomes more thoughtful: Does the existing feature work? Is it well made? Does it tell the room’s story? Can it be repaired? The old beadboard, slightly imperfect floor, funny little chair, or faded pattern may be exactly what prevents the finished space from looking like every other bedroom online.
A successful yellow room therefore feels collected rather than manufactured. It contains evidence of the house’s past, evidence of careful repair, and enough modern convenience to make everyday life comfortable. The yellow provides optimism, but the preserved materials provide soul. Together they create a room that is nostalgic without being trapped in nostalgiaand cheerful without shouting before the coffee is ready.
Conclusion
A retro yellow room remodel succeeds when color is only one part of a larger story. Begin by uncovering and documenting the room’s original materials. Address lead, moisture, electrical, and structural concerns before cosmetic work. Restore good flooring, beadboard, trim, doors, and hardware whenever practical. Then choose a yellow that responds well to the room’s daylight, surround it with grounded colors and natural wood, and finish the space with a controlled mix of vintage pattern and modern function.
The finished room does not need to reproduce one historical decade perfectly. It needs to feel warm, useful, personal, and believable. Keep the details that make the house distinctive, let a few imperfections remain visible, and give yellow enough room to be joyful without allowing it to seize control of the entire property.













