
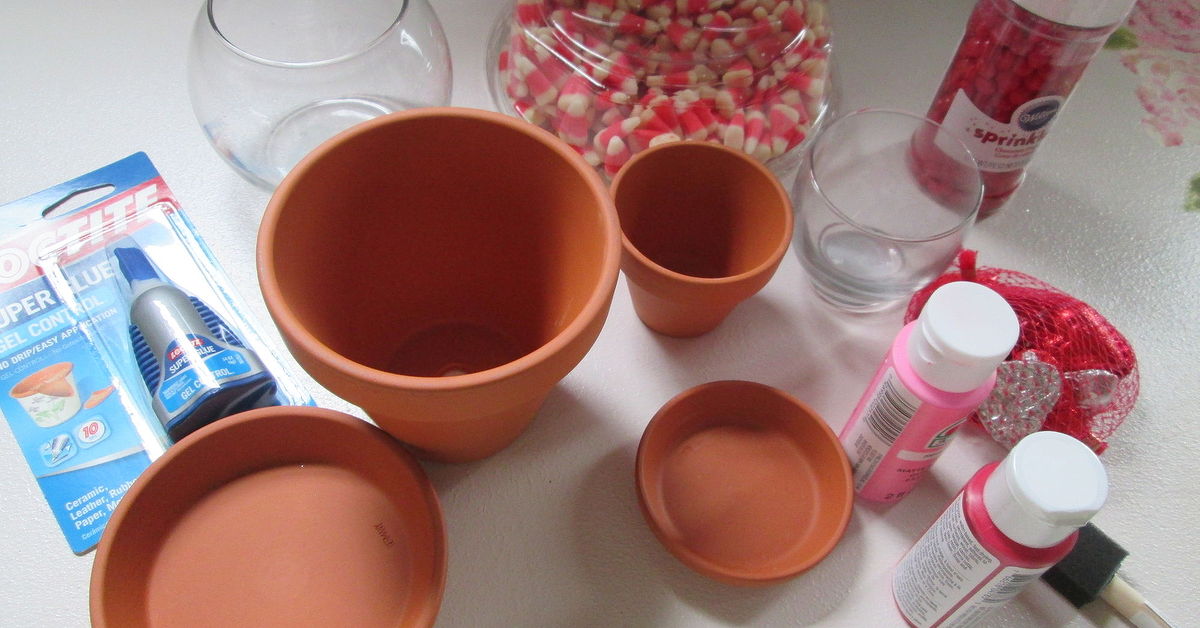
Some crafts politely ask for a weekend, a shopping cart full of supplies, and the patience of a saint. This is not one of them. A super easy candy/trinket jar is the kind of DIY project that says, “Give me a clean jar, a cute knob, a little glue, and ten minutes of creative confidence.” Suddenly, an empty glass jar becomes a charming candy holder, a desk organizer, a party favor, a teacher gift, or the tiny storage hero your messy drawer has been begging for.
The beauty of this project is that it works for almost everyone. You can make it fancy, farmhouse, glittery, minimalist, holiday-themed, kid-friendly, office-ready, or delightfully chaotic in the best possible way. It is inexpensive, beginner-friendly, and useful after the crafting fun is over. That is the DIY jackpot.
Why a DIY Candy/Trinket Jar Is the Perfect Quick Craft
A DIY candy jar is one of those rare projects that checks every box: it looks cute, costs very little, does not require advanced skills, and can be customized for any season or personality. It is also a smart way to repurpose glass jars instead of tossing them into the recycling bin after one heroic career as a pasta sauce container.
Clear jars are especially helpful because they let the contents become part of the design. Colorful wrapped candies, buttons, beads, paper clips, hair ties, mini clothespins, game pieces, craft pom-poms, or tiny notes can all turn the jar into a display piece. In other words, the jar does not just store thingsit shows off your tiny treasures like they are on a museum pedestal, except the museum has gummy bears.
For home organization, candy/trinket jars work beautifully on desks, bathroom counters, craft carts, bookshelves, entry tables, coffee bars, party tables, and kids’ rooms. They are small enough to fit almost anywhere but pretty enough to be seen. That is the secret sauce: practical storage that does not look like storage.
Materials You Need
You can make a super easy candy/trinket jar with basic craft supplies. Use what you already have before buying anything new. This project is wonderfully forgiving, which means perfectionists can take a well-earned snack break.
Basic Supplies
- One clean glass jar with a lid, such as a mason jar, jam jar, salsa jar, or small storage jar
- A decorative knob, wooden bead, small toy, faux flower, mini figurine, or drawer pull for the lid topper
- Strong craft glue, hot glue, or an adhesive suitable for glass and metal
- Acrylic paint or spray paint for the lid
- Ribbon, twine, stickers, vinyl decals, labels, or washi tape
- Wrapped candy, small trinkets, craft supplies, or office items for filling
Optional Extras
- Clear sealer for painted lids
- Chalkboard label stickers
- Fine glitter or metallic paint
- Adhesive gems, pearls, or alphabet stickers
- Seasonal embellishments such as mini pumpkins, snowflakes, hearts, stars, or bunnies
Step-by-Step: How to Make a Super Easy Candy/Trinket Jar
Step 1: Choose the Right Jar
Start with a jar that fits your purpose. A small jam jar is perfect for paper clips, earrings, wrapped mints, or tiny craft supplies. A pint-size mason jar works well for candy, party favors, cotton balls, crayons, or desk accessories. A larger jar can hold snack-size treats, sewing notions, mini toys, or seasonal decorations.
For food use, choose a jar with no cracks, chips, rust, strong odors, or sticky residue. If the jar previously held a sauce with a powerful smell, wash it well and let it air out. Nobody wants chocolate kisses with a mysterious pickle perfume.
Step 2: Wash and Dry Everything Completely
Wash the jar and lid with warm, soapy water. Remove labels by soaking the jar in warm water, then gently rubbing away the paper and adhesive. For stubborn glue, a little baking soda paste or cooking oil can help loosen the residue. Rinse thoroughly and let the jar dry completely before decorating.
This step matters. Paint and glue stick better to clean surfaces, and candy stays fresher in a dry container. Even a few hidden drops of water can make wrapped sweets sticky or cause metal lids to rust over time.
Step 3: Paint the Lid
The lid is where this project gets its personality. Paint it glossy white for a clean farmhouse look, black for modern contrast, red for Valentine’s Day, orange for Halloween, green for Christmas, pastel pink for baby showers, or metallic gold when you want the jar to look like it owns a tiny luxury boutique.
Use acrylic paint for easy indoor crafting or spray paint in a well-ventilated area. Paint only the outside of the lid if the jar will hold candy. Avoid painting surfaces that touch food. Let each coat dry before adding another, and follow the paint manufacturer’s curing directions before handling or filling the jar.
Step 4: Add a Lid Topper
Now comes the fun part: the topper. A wooden knob instantly makes the jar look like a mini apothecary container. A small plastic animal creates a playful party favor. A faux flower gives it a sweet spring feel. A drawer pull can make the lid look surprisingly elegant. A painted wooden bead works beautifully for minimalist or Scandinavian-inspired decor.
Apply glue to the bottom of the topper, press it firmly onto the center of the lid, and let it dry according to the adhesive instructions. If you are using hot glue, be careful with the heated tip and melted glue. Strong craft adhesive usually takes longer to dry but often creates a cleaner, sturdier bond.
Step 5: Decorate the Jar
Keep the glass clear if you want the candy or trinkets to be visible. If you prefer a decorated look, add a ribbon around the neck of the jar, tie on a small tag, apply a vinyl word such as “Sweet,” “Treats,” “Bits,” or “Joy,” or place a label on the front.
For a polished result, choose one main design style. For example, a rustic jar might use twine, kraft paper tags, and a wooden topper. A glam jar might use metallic paint, a crystal-style knob, and a satin ribbon. A playful kids’ jar might include bright stickers, rainbow candy, and a silly topper. The jar can wear many outfits; just do not make it wear all of them at once.
Step 6: Fill It Up
Fill the jar based on where it will be used. For edible treats, wrapped candy is the easiest and cleanest choice, especially if the jar is decorative rather than designed as a sealed food-storage container. For non-food use, try buttons, beads, binder clips, mini erasers, stickers, hair accessories, coins, game dice, craft gems, or little handwritten notes.
If you are gifting the jar, think about the recipient. A teacher might appreciate wrapped candies and colorful paper clips. A coworker might like mints and sticky notes. A crafter might love buttons, embroidery floss, or pom-poms. A friend might enjoy a “bad day emergency jar” filled with chocolate and tiny encouraging notes.
Design Ideas for Every Occasion
Birthday Candy Jar
Use bright paint, confetti-style stickers, curling ribbon, and colorful wrapped candy. Add a tag that says “A Little Jar of Birthday Cheer” or “Open in Case of Cake Emergency.” This makes a great last-minute gift that still feels personal.
Holiday Treat Jar
For Christmas, use red, green, white, silver, or gold accents and fill the jar with peppermint candies, wrapped chocolates, or mini ornaments. For Halloween, paint the lid black or orange and add googly eyes, bat stickers, or a tiny pumpkin topper. For Easter, choose pastel colors and fill the jar with wrapped chocolate eggs or jelly beans in a sealed inner bag.
Desk Trinket Jar
A trinket jar can rescue your desk from the chaos of runaway paper clips and mysterious tiny objects. Use a clean label and a neutral lid color for a workspace-friendly style. Fill it with binder clips, pushpins, rubber bands, mini sticky notes, or charging cable clips.
Bathroom Vanity Jar
For a bathroom, fill the jar with cotton rounds, hair ties, bath salts, floss picks, or sample-size items. Avoid storing unwrapped candy in a humid bathroom because moisture is not candy’s best friend. It is more like candy’s dramatic rival.
Party Favor Jar
Mini jars make adorable party favors. Match the lid color and ribbon to the event theme, then fill the jar with wrapped treats, tiny toys, stickers, or thank-you notes. For weddings, showers, and birthdays, add a small tag with the date or guest’s name.
Memory Jar
Instead of candy, fill the jar with folded notes, ticket stubs, tiny photos, or written memories. This is a lovely gift for friends, parents, grandparents, coaches, or anyone who appreciates sentimental keepsakes more than another mug. Although, to be fair, mugs also work hard.
Food-Safe Tips for Candy Jars
If your jar will hold candy, treat it like a food container first and a craft project second. Clean glass is generally a good choice for dry, shelf-stable treats, but decorations should stay outside the food-contact area. Do not place paint, glitter, glue, or decorative materials inside the jar where they can touch candy.
Wrapped candy is the safest and neatest option for decorative jars. It keeps the inside cleaner, reduces moisture problems, and makes sharing easier. If you use unwrapped candy, make sure the jar is food-safe, fully dry, and covered with a clean lid. Store it in a cool, dry spot away from direct sunlight, heat, and humidity. Chocolate near a sunny window is basically a science experiment with disappointment at the end.
Do not use a decorated candy jar for canning, heat processing, or long-term preservation unless all materials and lids are specifically intended for that purpose. A craft jar is for display and everyday storage, not for replacing proper food-preservation equipment.
Smart Tips for a Better-Looking Jar
Use Odd Numbers
If you add embellishments, groups of three often look more natural than groups of two or four. For example, three tiny stars on a tag or three small faux flowers near the ribbon can look balanced without feeling too perfect.
Repeat One Color
Choose one accent color and repeat it on the lid, ribbon, label, or filler. This makes the jar look intentional. A red lid with red candies and a red-striped tag feels coordinated even if you made it while dinner was in the oven.
Keep Labels Simple
Short labels usually look best. Try “Candy,” “Treats,” “Trinkets,” “Buttons,” “Clips,” “Joy,” “Sweet Stuff,” or “Tiny Treasures.” Long labels can look crowded on small jars.
Let Glue and Paint Cure
Dry-to-the-touch does not always mean fully cured. Give paint and adhesive enough time to set before filling, gifting, or wrapping the jar. This helps prevent smudges, sliding toppers, and the tragic moment when your cute lid knob decides to retire early.
Common Mistakes to Avoid
Using a Wet Jar
Moisture can ruin candy, weaken labels, and interfere with glue. Always dry the jar completely before decorating or filling.
Overdecorating the Glass
If the jar is full of colorful candy or pretty trinkets, let the contents shine. Too many stickers, ribbons, and gems can make the jar look busy. Sometimes the best design move is stepping away before the glitter takes control.
Choosing the Wrong Glue
Not every glue bonds well to glass, metal, ceramic, or plastic. Check the label before using it. If the topper is heavy, choose a stronger adhesive and allow plenty of drying time.
Forgetting the Recipient
A jar should match the person receiving it. A minimalist friend may not want neon glitter and seven bows. A child may love exactly that. Design with the final home in mind.
Budget-Friendly Ways to Make It Look Expensive
A candy/trinket jar can look high-end without a high-end budget. The trick is restraint. Clean glass, a neatly painted lid, a simple topper, and one well-tied ribbon can look better than a jar covered in every craft supply from the drawer.
Thrift stores, dollar stores, and your own recycling bin are great places to find jars. Old drawer knobs, wooden beads, small holiday ornaments, and leftover ribbon can become stylish accents. Matching several jars together also creates a more upscale effect. For example, three jars with black lids and wooden knobs can organize a desk, bathroom shelf, or coffee station while looking like a coordinated set.
Another easy upgrade is a handwritten tag on quality cardstock. A small tag tied with twine can make a simple candy jar feel thoughtful and handmade, not homemade in a “the glue is still warm” kind of way.
Creative Filling Ideas Beyond Candy
The name may say candy jar, but this project is not limited to sweets. A trinket jar can organize the little things that usually disappear into couch cushions, junk drawers, and the mysterious alternate universe where bobby pins go.
- For crafters: buttons, beads, ribbons, pom-poms, embroidery floss, glue sticks, or mini clothespins
- For students: erasers, paper clips, stickers, pencil grips, highlighter tabs, or reward tickets
- For offices: binder clips, pushpins, rubber bands, stamps, or wrapped mints
- For bathrooms: cotton balls, cotton swabs, bath salts, hair ties, or travel-size items
- For gifts: affirmation notes, wrapped chocolates, gift cards, tea bags, or tiny self-care items
- For kids’ rooms: marbles, building pieces, small toys, game tokens, or chore reward slips
My Experience Making Super Easy Candy/Trinket Jars
The first time I made a candy/trinket jar, I dramatically underestimated how satisfying it would be. I thought I was making one cute container. What actually happened was a full kitchen-table takeover involving jars, ribbon, paint, three kinds of glue, and the sudden belief that every small object in the house deserved its own labeled glass home.
My favorite version started with a simple salsa jar. After removing the label, I painted the lid matte black and glued a small wooden knob on top. That one tiny knob changed everything. Before the knob, the jar looked like it had recently survived taco night. After the knob, it looked like it belonged in a boutique gift shop that sells candles named after emotions.
I filled it with wrapped caramels and tied a kraft paper tag around the neck with twine. The finished jar took very little effort, but it looked intentional. That is the magic of this project. It rewards small details. A smooth painted lid, a centered topper, and a clean ribbon can make an ordinary jar feel special.
Another time, I made several mini trinket jars for a desk organizer setup. One held paper clips, one held pushpins, and one held tiny binder clips. I used the same lid color on all three so they looked like a set, even though the jars were different sizes and came from completely different grocery-store past lives. This taught me one of the best design tricks for DIY jars: consistency beats perfection. Matching colors or labels can pull mismatched jars together beautifully.
I also learned that filling matters more than people think. A clear jar filled with random items can look messy, but a jar filled with items in one color family looks instantly decorative. Red and silver wrapped candies feel festive. Pastel buttons look sweet and crafty. Gold paper clips look surprisingly fancy. Even cotton balls look spa-like if the jar is clean and the lid is pretty.
My biggest mistake was rushing the drying time. I once glued a topper to a lid, waited what felt like forever but was probably eight impatient minutes, and then picked it up by the knob. The knob came off in my hand with the quiet confidence of an object that knew I had ignored the glue instructions. Lesson learned: let the adhesive cure. The jar will still be cute tomorrow.
These jars are also great conversation starters. People notice them because they are familiar and charming at the same time. A decorated candy jar on a coffee table makes guests smile. A trinket jar on a desk makes clutter look planned. A small treat jar given as a gift feels personal without being complicated.
The best part is that every jar can be different. Some are elegant. Some are silly. Some are seasonal. Some are purely practical. But they all share the same wonderful quality: they turn small things into something worth displaying. And honestly, any project that makes paper clips feel glamorous deserves applause.
Conclusion: Small Jar, Big Charm
A super easy candy/trinket jar is proof that a great DIY project does not need to be expensive, complicated, or stressful. With a clean jar, a decorated lid, a simple topper, and a thoughtful filling, you can create a useful handmade piece for your home, office, party, classroom, or gift basket.
Whether you fill it with wrapped candy, tiny craft supplies, desk essentials, bathroom items, or keepsake notes, the finished jar adds charm while solving a real storage problem. It is quick enough for beginners, flexible enough for every season, and cute enough to make people ask, “Wait, you made that?” That is always the best kind of craft compliment.










