
Note: This article is written for general educational and home-improvement purposes. For valuable antiques, structural damage, suspected lead paint, mold, or major upholstery problems, consult a qualified furniture repair professional before experimenting with heroic DIY surgery.
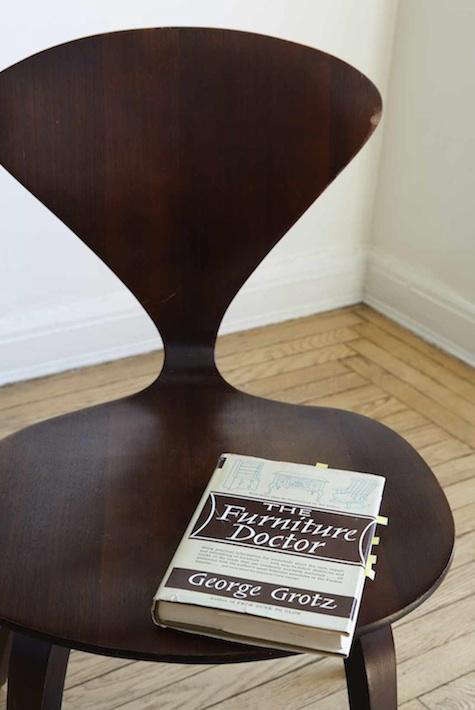
Every home has at least one piece of furniture quietly begging for medical attention. Maybe it is the wobbly dining chair that performs jazz every time someone sits down. Maybe it is the coffee table wearing a constellation of water rings like it survived a tiny hurricane. Or maybe it is an inherited dresser with gorgeous bones, stubborn drawers, and the emotional importance of a family photo album. That is where the idea of The Furniture Doctor comes in: not a person in a white coat with a stethoscope, but a practical mindset for diagnosing, repairing, preserving, and loving furniture before sending it to the curb.
Furniture repair is part craft, part science, and part detective work. A good furniture doctor knows when to clean, when to glue, when to refinish, when to leave a beautiful old finish alone, and when to call a professional before a “quick fix” becomes a weekend-long apology. In an age of fast furniture and next-day delivery, learning how to repair wood furniture, clean upholstery, restore finishes, and prevent future damage is not just thrifty. It is sustainable, deeply satisfying, and occasionally makes you feel like a magician with sandpaper.
What Does “The Furniture Doctor” Really Mean?
The phrase “The Furniture Doctor” has long been associated with furniture care, repair, and refinishing. It also evokes a very useful approach: treat each piece like a patient. First, diagnose the problem. Then choose the least invasive treatment that gives the strongest, safest, and most attractive result.
This matters because not all furniture problems need the same cure. A shallow scratch does not require stripping an entire table. A loose chair joint should not be “fixed” with a random screw through the side, unless you enjoy making future restorers sigh dramatically. A white water mark may sit only in the finish, while a black stain may mean moisture has reached the wood. A sagging sofa cushion may need fresh support foam, not a new couch. Good furniture restoration starts with restraint.
Step One: Diagnose the Furniture Before Repairing It
Before you reach for glue, stain, wax, or that mysterious can in the garage labeled “probably still good,” slow down. Look at the furniture under bright light and ask a few questions.
Is the problem cosmetic or structural?
Cosmetic issues include surface scratches, dull finishes, small dents, water rings, faded fabric, and minor veneer chips. Structural issues include loose joints, broken legs, cracked frames, collapsing drawer runners, failed springs, or unstable bookcases and dressers. Cosmetic repairs improve appearance; structural repairs restore safety and function.
What material are you working with?
Solid wood, veneer, particleboard, MDF, metal, leather, and upholstered fabric all behave differently. Solid wood can often be sanded, glued, filled, and refinished. Veneer needs a lighter touch because the decorative top layer may be thin. Particleboard swells when it absorbs moisture and may crumble if over-sanded. Upholstery has cleaning codes, fiber types, and dyes that can react badly to the wrong cleaner. In other words, furniture is not one big category. It is a waiting room full of very different patients.
Is the piece old enough to involve lead paint?
If painted furniture may date from before 1978, avoid sanding, scraping, or heat-stripping until you know whether lead-based paint is present. Disturbing old paint can create hazardous dust. A furniture doctor with common sense does not turn a cute vintage cabinet into a toxic confetti machine.
Essential Tools for a Home Furniture Doctor
You do not need a professional restoration shop to handle basic furniture repair. A small, well-chosen toolkit can solve many common problems.
Basic repair tools
Keep wood glue, clamps, painter’s tape, a rubber mallet, screwdrivers, a utility knife, a putty knife, wood filler, wax fill sticks, furniture markers, sandpaper in several grits, microfiber cloths, cotton swabs, and a small brush on hand. For cleaning, mild dish soap, distilled water, a vacuum with a brush attachment, and clean white towels are often safer than aggressive chemicals.
Finishing supplies
For finish touch-ups, consider paste wax, clear furniture polish appropriate for the finish, stain markers, shellac sticks, or wipe-on polyurethane for certain modern pieces. Always test products in an inconspicuous area. The underside of a chair seat is a far better place for regret than the center of a dining table.
How to Repair Scratches in Wood Furniture
Scratches are the paper cuts of furniture repair: small, annoying, and oddly dramatic. The right fix depends on depth.
Light surface scratches
For very light scratches that affect only the finish, clean the area first with a slightly damp microfiber cloth and dry it immediately. Sometimes dust and grime exaggerate the damage. A matching furniture marker, wax stick, or colored paste wax can help blend fine scratches into the surrounding finish. On darker wood, the old walnut trick may reduce the appearance of tiny scratches because the natural oils darken exposed lighter fibers. It is not a miracle cure, but it can be a surprisingly handy snack-based solution.
Medium scratches
For scratches that cut into the finish but not deeply into the wood, a wax fill stick or touch-up marker in a close color match can work well. Apply lightly, wipe away excess, and build color gradually. One heavy-handed pass can create a repair that shouts, “I tried my best!” from across the room.
Deep gouges
Deep gouges usually need filler. Choose a stainable wood filler for unfinished or refinish-ready wood, or a color-matched putty for finished pieces. Apply with a putty knife, let it cure, sand carefully if appropriate, and blend the color. If the furniture has a clear topcoat, you may need to seal the repaired area so it does not look dull compared with the surrounding finish.
How to Fix Water Rings and Heat Marks
Water rings are the ghosts of beverages past. A white ring usually means moisture is trapped in the finish. A dark ring often means moisture has reached the wood itself, which is harder to fix.
For white marks, start gently. Wipe the surface clean and dry. Some furniture owners try mild heat from a hair dryer on low, keeping it moving and never overheating the finish. Others use a small amount of non-gel toothpaste or a specialty water-ring remover. The key is caution: aggressive rubbing can turn one ring into one large cloudy patch, which is not the glow-up anyone ordered.
Dark stains may require deeper refinishing or professional attention, especially on veneer. If the stained area is on an antique, pause before sanding. Original finishes can carry historic and market value, and removing them can reduce both character and worth.
Loose Chairs, Wobbly Tables, and Joint Repairs
Loose joints are among the most common furniture repair problems. Chairs suffer especially because humans insist on leaning back, rocking sideways, and treating dining sets like gym equipment.
Why joints fail
Wood moves with changes in humidity. Glue ages. Dowels loosen. Screws strip out. Over time, a strong joint can become a squeaky negotiation. The best repair usually involves taking the joint apart enough to clean out failed glue, applying fresh wood glue, clamping the joint properly, and allowing full curing time.
Common mistake: adding screws everywhere
Screws can help in some modern furniture repairs, but they are not always the right answer for traditional wood joinery. Driving screws through visible parts of a chair may weaken the wood, damage the appearance, and complicate future restoration. A better furniture doctor respects the original construction whenever possible.
Veneer Repair: Small Fixes With a Light Touch
Veneer is a thin layer of attractive wood applied over a core material. It allows beautiful grain patterns and stable construction, but it does not forgive reckless sanding. If you sand through veneer, you cannot simply “unsand” it, no matter how sincerely you stare at the damage.
Loose veneer
If veneer is lifting but still intact, carefully introduce the right adhesive beneath the lifted area, press it flat, protect the surface with wax paper, and clamp it evenly. Avoid overloading glue, which can squeeze out and create a finishing problem.
Chipped veneer
Small chips can be filled with color-matched filler or burn-in repair materials. Larger missing sections may require a veneer patch cut to match the grain direction. This is where patience becomes more important than confidence. Matching color, grain, and sheen is an art.
Cleaning Wood Furniture Without Causing Damage
Most wood furniture does not need a dramatic cleaning ritual. Regular dusting with a soft cloth and prompt cleanup of spills prevent many problems. Dust may seem harmless, but it can act like a fine abrasive over time, especially when rubbed across glossy finishes.
For grime, use the mildest method first: a lightly damp microfiber cloth, followed by immediate drying. If needed, add a tiny amount of mild dish soap to water, test in a hidden area, wipe gently, and dry thoroughly. Avoid soaking wood. Water belongs in glasses, vases, and emotional movie scenesnot inside table joints.
Be careful with vinegar, alcohol, bleach, ammonia, and silicone-heavy sprays. Some products can dull, soften, cloud, or build up on finishes. If you do not know the finish type, test first and proceed slowly.
Upholstery Care: The Sofa Has Feelings Too
Furniture repair is not only about wood. Upholstered furniture collects dust, crumbs, pet hair, body oils, mystery stains, and the occasional popcorn kernel from three streaming subscriptions ago.
Read the cleaning code
Many upholstered pieces have a tag with a cleaning code. “W” generally indicates water-based cleaning may be used. “S” points to solvent-based cleaning. “WS” or “SW” may allow either method. “X” usually means vacuum only and call a professional for stains. These codes are not decorative alphabet soup; they are instructions that can save your sofa from a blotchy identity crisis.
Vacuum regularly
Use an upholstery attachment and crevice tool to remove loose debris. Rotate reversible cushions to reduce uneven wear. Blot spills immediately with a clean white towel. Do not scrub aggressively, because scrubbing can push stains deeper and distort fabric fibers.
When to call an upholstery professional
Call a pro for large stains, delicate fabrics, antique upholstery, leather damage, pet odor embedded in cushions, or anything involving dye transfer. Professional cleaning costs less than replacing a sofa you accidentally tie-dyed with enthusiasm.
Refinishing Furniture: When a Full Makeover Makes Sense
Refinishing is the big treatment plan. It can transform a damaged table, dresser, or chair, but it is not always necessary. Refinish when the existing finish is badly worn, flaking, sticky, deeply stained, or impossible to revive with cleaning and touch-up. Avoid refinishing valuable antiques without expert advice, because original finishes can be part of the piece’s history.
Basic refinishing process
A typical refinishing project includes removing hardware, cleaning the piece, making structural repairs, stripping or sanding the old finish, filling damage, smoothing the surface, applying stain if desired, and sealing with a protective finish. Work in a ventilated area, wear proper protection, and follow product directions carefully.
Painted furniture
Painting can be a stylish and practical option for damaged modern furniture, MDF, or pieces with unattractive repairs. Preparation matters. Clean thoroughly, sand or degloss, prime appropriately, and use durable paint. For particleboard or MDF, seal porous edges before painting so they do not drink primer like they just crossed a desert.
Furniture Safety: The Repair People Forget
A beautiful dresser is not truly restored if it can tip over. Tall furniture, bookcases, media units, and dressers should be anchored to the wall, especially in homes with children or older adults. Anti-tip brackets are inexpensive and can prevent serious injuries. The furniture doctor’s motto should be: make it pretty, make it functional, and make it not fall on anyone.
Also check hardware. Tighten loose knobs, replace missing drawer stops, smooth sharp splinters, and repair unstable legs. A finished piece should not merely photograph well; it should survive real life.
When DIY Furniture Repair Is a Great Idea
DIY is perfect for minor scratches, basic cleaning, small finish touch-ups, simple drawer lubrication, tightening hardware, replacing felt pads, waxing, and gluing straightforward loose joints. These repairs are affordable, satisfying, and low-risk when done carefully.
DIY is also excellent for learning. Start on inexpensive thrift-store pieces before attempting a family heirloom. A $20 side table is a friendly teacher. Grandma’s antique secretary desk is not where you should discover that you and chemical stripper are not emotionally compatible.
When to Call a Professional Furniture Doctor
Professional help is worth it for antiques, valuable designer furniture, complex veneer work, carved details, broken frames, severe water damage, smoke damage, leather restoration, reupholstery, and suspected lead paint. Professionals have specialty tools, finishing knowledge, color-matching experience, and the calm confidence of people who have already made their mistakes on someone else’s learning curve years ago.
Before hiring a furniture repair service, ask about experience with your type of piece, repair methods, finish options, estimated timeline, and whether they can preserve original materials. Photos help, but an in-person evaluation is often best for serious repairs.
Sustainable Furniture Repair: Why Saving Old Pieces Matters
Repairing furniture is good for the wallet, but it is also good for the planet. Many older pieces were built with solid wood, repairable joinery, and materials that can last generations. Keeping them in use reduces waste and avoids the cycle of buying low-quality replacements that may fail quickly.
Restoration also keeps stories alive. A scratched table may have hosted birthdays, homework, late-night snacks, tax paperwork, and one dramatic Monopoly game nobody talks about anymore. Repair does not erase those stories. Done well, it protects them.
Experiences From the Furniture Doctor’s Workshop
The best furniture repair lessons often come from real-life projects, especially the ones that begin with, “This should only take twenty minutes.” Anyone who has restored furniture knows that sentence is basically a haunted house door creaking open.
One memorable example is the classic wobbly chair. At first glance, it looks like a simple glue job. The owner wiggles the back, points to one loose rung, and says, “Can we just squeeze a little glue in there?” Sometimes yes, but often the old glue has failed inside multiple joints. If new glue is smeared over old brittle glue, the repair may hold for a week and then return with the same wobble plus a smug attitude. The better approach is to separate the loose joint, clean out the old adhesive, test the fit, glue properly, and clamp squarely. It takes longer, but the chair feels solid again instead of merely optimistic.
Another common case is the water-ring table. The owner usually arrives with a story involving a guest, a glass, and a coaster sitting unused two inches away. White rings can sometimes be improved with gentle methods, but the biggest lesson is patience. People often rub too hard, too soon, with too many products. By the time the table reaches a professional, the ring is gonebut so is the sheen around it. A careful furniture doctor works slowly, checks the finish, and blends the repair instead of attacking the mark like it insulted the family.
Then there is the thrift-store dresser with “potential,” which is furniture language for “bring snacks.” These pieces can be wonderful, but they reward inspection. Check drawer slides, back panels, veneer, odors, missing hardware, and signs of swelling. A dresser with sticky drawers may only need wax on the runners. A dresser with swollen particleboard sides may be a less charming adventure. The experience teaches a valuable rule: buy the bones, not the fantasy. Solid construction gives you options. Bad structure gives you content for a cautionary blog post.
Upholstery offers its own lessons. A small stain on a cushion may look easy until the wrong cleaner creates a pale halo larger than the original spot. The furniture doctor’s first move is always to read the cleaning code and test in a hidden area. The second move is blotting, not scrubbing. Scrubbing fabric can damage the weave and spread the stain. Blotting may not feel dramatic, but it is usually the adult in the room.
Perhaps the most rewarding experience is restoring an inherited piece. These projects are rarely just about wood, fabric, or finish. They are about memory. A scratched dining table might be where a family gathered for decades. A cedar chest might still smell faintly like blankets and old letters. In those cases, the goal is not to make the piece look factory-new. The goal is to make it stable, clean, useful, and dignified while keeping the marks that matter. A true furniture doctor knows the difference between damage and character. Damage weakens the piece. Character tells the story.
After enough repairs, one truth becomes clear: furniture usually asks for less than we think. A careful cleaning, a tightened joint, a blended scratch, a fresh coat of wax, or a properly repaired drawer can bring a tired piece back to life. The real skill is not forcing every item into a dramatic makeover. It is listening to what the piece needs and giving it exactly thatno more, no less, and preferably without gluing your sleeve to the chair.
Conclusion: Every Home Needs a Furniture Doctor Mindset
The Furniture Doctor is more than a catchy title. It is a practical way to look at the chairs, tables, dressers, sofas, and cabinets that support daily life. With the right diagnosis, gentle cleaning, smart repair techniques, and respect for original materials, many pieces can be saved, improved, and enjoyed for years.
Not every repair belongs in the DIY category, and not every old finish should be stripped away. But every furniture owner can learn to spot problems early, prevent avoidable damage, and make better choices before replacing something that still has plenty of life left. In a world full of disposable objects, repairing furniture feels refreshingly stubbornin the best possible way.













