
Note: This article is written as original, web-ready content based on current leather-craft, DIY, art-supply, and leather-care best practices.
Yes, leather painting is a thing. Not only is it a thing, it is a wildly useful, surprisingly stylish, and occasionally addictive thing. Somewhere between art class, sneaker culture, furniture restoration, and “I refuse to throw away this perfectly good bag,” leather painting has become a favorite trick for creative people who like their belongings with a little more personality and a lot less beige.
If you have ever looked at a scuffed leather wallet, faded chair, plain jacket, tired handbag, or pair of white sneakers and thought, “You could be cooler,” congratulations. You have officially entered the leather painting mindset. The good news is that painting leather is not reserved for professional cobblers, luxury restorers, or people who own suspiciously organized craft rooms. With the right leather paint, proper surface preparation, thin coats, patience, and a good finisher, ordinary leather goods can become custom pieces that look intentional instead of “I attacked this purse with leftover wall paint.”
Leather painting can be used for customization, repair, color blocking, lettering, illustration, restoration, and small decorative accents. It works especially well on smooth leather shoes, bags, belts, wallets, jackets, and some furniture. The trick is understanding that leather is flexible. It bends, stretches, wrinkles, and moves with daily use. That means the paint must move with it. Regular craft paint may sit stiffly on top and crack like a dramatic movie villain. Acrylic leather paint, by contrast, is designed to stay flexible when applied correctly.
What Is Leather Painting?
Leather painting is the process of applying specially formulated paint to leather surfaces to change their color, add artwork, cover wear, or create a custom design. It is different from dyeing leather. Leather dye penetrates into the fibers and changes the material more deeply, while leather paint creates a colored layer on the surface. Both methods have their place, but leather painting is usually the better choice when you want bold graphics, opaque coverage, crisp details, or a dramatic color change.
Think of dye as a stain and paint as a jacket. Dye blends into the leather’s personality. Paint gives it a new outfit. If you want to turn a tan wallet slightly darker, dye may be your friend. If you want to paint red cherries, navy stripes, gold stars, or a tiny portrait of your dog wearing sunglasses, leather paint is the obvious winner.
Why Leather Painting Has Become So Popular
Leather painting has grown because it sits at the intersection of sustainability, self-expression, and affordable style. People are tired of replacing items that still have life left in them. A scratched bag, faded pair of boots, or outdated leather stool may not need retirement; it may simply need a makeover.
Custom sneaker culture has also made leather painting more mainstream. Artists use flexible acrylic leather paints to transform plain shoes into wearable art. From subtle color changes to full cartoon scenes, hand-painted sneakers have shown that leather can be a canvas. And once people realize shoes can be painted, they begin eyeing everything else in the closet like a raccoon discovering a glitter drawer.
Another reason leather painting appeals to DIY fans is control. Instead of settling for whatever color a store sells, you can match your style exactly. Want a black belt with a painted copper edge? Do it. Want a vintage leather clutch with cream flowers? Absolutely. Want to rescue a chair that looks like it survived three moves and one emotionally complicated cat? Leather paint may not solve your cat’s attitude, but it can help the chair.
The Best Items to Paint
Not all leather pieces are equally easy to paint. Smooth, finished leather is usually the best place to start. Sneakers, wallets, belts, handbags, small accessories, and decorative panels are beginner-friendly because they offer manageable surfaces. Leather jackets can also be painted, especially on the back panel, sleeves, or lapels, but they require more patience because the material moves a lot.
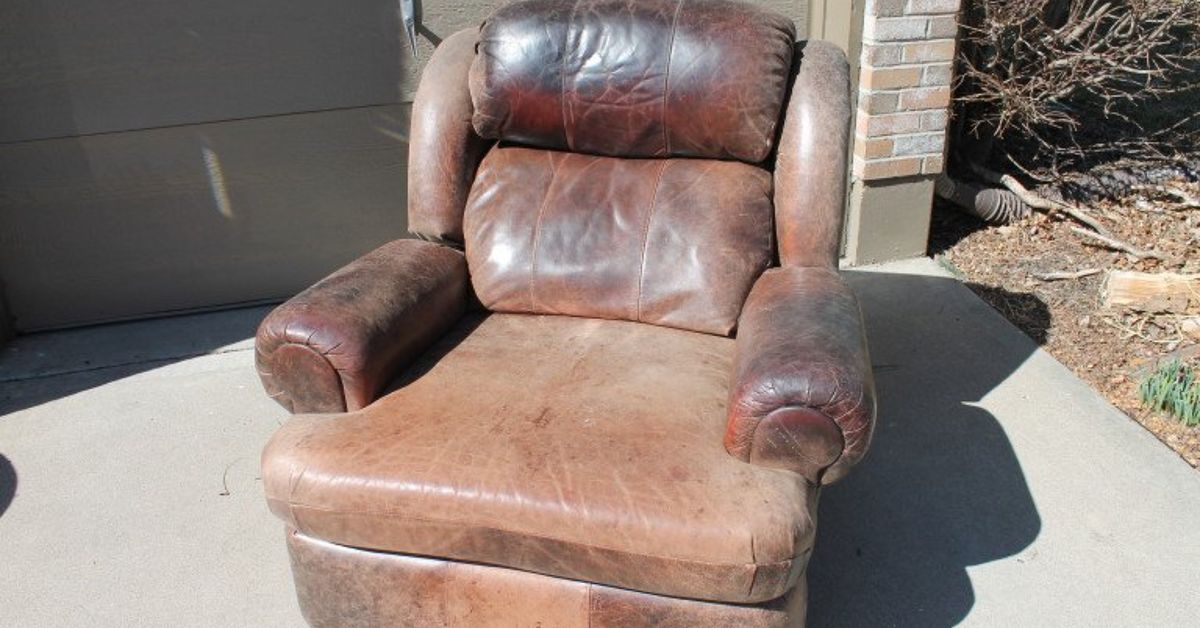
Furniture can be painted, but it is a bigger commitment. A leather chair or sofa experiences constant friction, pressure, body oils, and bending. If you paint leather furniture, preparation and sealing become especially important. A small painted detail on a chair is easier to maintain than changing an entire couch from espresso brown to cloud white. That is not a project; that is a relationship.
Suede, nubuck, heavily textured leather, oily leather, and cracked leather are more challenging. Paint can stiffen fuzzy surfaces and may not bond well to oily or damaged areas. Patent leather can be painted, but its glossy coating needs careful preparation. Faux leather and vinyl may also accept certain leather-and-vinyl paints, but they should always be tested first because synthetic materials vary widely.
What Kind of Paint Should You Use on Leather?
The safest choice is acrylic leather paint. These paints are water-based, flexible, and made for surfaces that bend. They are commonly used on sneakers, bags, jackets, boots, belts, and accessories. Good leather paint provides strong pigment, adheres well after preparation, and resists cracking when applied in thin layers.
Standard acrylic craft paint can work on some decorative leather projects, but it is less reliable on wearable or high-use items unless mixed with an appropriate medium and sealed properly. For anything that flexes often, leather-specific acrylic paint is worth the small upgrade. Your future self, the one not picking flakes off a shoe crease, will be grateful.
You may also see leather dyes, edge paints, finishers, deglazers, primers, and sealers. These are not all the same. Dye changes color by soaking in. Paint sits on top. Deglazer removes the original finish so paint can bond. Finisher protects the painted surface. Edge paint is used for leather edges, especially on bags, straps, and belts. Each product has a job, and when they work together, the final result looks cleaner and lasts longer.
Tools and Supplies You Need
You do not need a professional studio to start painting leather. A small setup is enough for most beginner projects. Gather acrylic leather paint, leather preparer or deglazer, a lint-free cloth, painter’s tape, fine brushes, a sponge or foam applicator, cotton swabs, a palette, leather finisher, and gloves. If you plan to paint detailed artwork, add a pencil, stencil, transfer paper, or fine-tip paint markers designed for leather.
Ventilation matters when using deglazers or solvents. Work in a well-ventilated area, keep products away from flames, and read labels before use. Leather painting is creative, but it should not come with a side quest called “why does the garage smell like a science experiment?”
How to Paint Leather the Right Way
1. Clean the Surface
Start by removing dirt, dust, oils, and residue. Use a leather cleaner or a lightly damp cloth, depending on the item and its condition. Let the surface dry completely. Paint does not like grease, and leather goods collect more oil than we like to admit. Handles, shoe uppers, armrests, and wallets are especially guilty.
2. Remove the Factory Finish
Most leather items have a protective topcoat. That coating helps the item resist moisture and stains, but it also prevents paint from bonding. A leather preparer and deglazer removes or dulls that finish. Apply it with a cloth and work gently. The goal is not to punish the leather; the goal is to create a surface the paint can grip.
Always test in a hidden area first. Some leather finishes react differently, and a test patch can save you from turning a beautiful bag into a cautionary tale.
3. Plan the Design
Sketch your design before painting. For geometric shapes, use painter’s tape to create crisp borders. For illustrations, lightly map out the design with a pencil or transfer method. If you are painting shoes, pay attention to flex points. Avoid piling heavy paint layers where the shoe bends most, especially across the toe box.
4. Apply Thin Coats
This is the golden rule of leather painting: thin coats win. One thick coat may seem faster, but it increases the risk of streaks, tackiness, cracking, and uneven texture. Apply a light layer, let it dry, then add another. Several thin coats create smoother, stronger color than one gloopy coat that looks like frosting with commitment issues.
Use a brush for detail work and a sponge or foam applicator for larger areas. If brushstrokes appear, let the coat dry and add another thin layer. Do not keep brushing wet paint forever. Overworking the surface can lift pigment and create patchy spots.
5. Let It Dry Properly
Drying time depends on paint type, thickness, humidity, and airflow. Most thin coats dry fairly quickly, but curing takes longer. Do not rush straight from painting to wearing, bending, stacking, or tossing the item into a bag. Let the paint settle. Leather painting rewards patience, which is rude but true.
6. Seal the Paint
Once the paint is fully dry, apply a compatible leather finisher. Finishers come in matte, satin, gloss, and high-gloss effects. They help protect the artwork from scratches, moisture, and everyday wear. Like paint, finisher should be applied in thin, even coats. A satin finish often looks natural on leather, while gloss can make colors pop. Matte is great for subtle designs, but it may show marks faster on some items.
Design Ideas for Leather Painting
Leather painting can be as simple or elaborate as you want. Beginners may enjoy painting small flowers on a wallet, adding initials to a luggage tag, refreshing faded belt edges, or creating color-blocked sneakers. Intermediate projects might include painted jacket panels, handbag murals, checkerboard boots, or metallic accents on a clutch.
For a polished look, choose a limited color palette. Black, white, tan, red, navy, forest green, cream, and metallic gold all work beautifully on leather. If your item is already a strong color, design with contrast in mind. White flowers on black leather feel dramatic. Gold details on brown leather feel vintage. Pale blue on cream leather feels fresh and coastal. Neon green on a formal briefcase says many things, not all of them approved by Human Resources.
Common Leather Painting Mistakes
The most common mistake is skipping preparation. Paint may look fine at first, but if the leather was not cleaned and deglazed, it can peel or rub away. The second mistake is applying paint too thickly. Thick paint reduces flexibility and can crack at bend points. The third mistake is forgetting to seal the design. Unsealed paint is more vulnerable to scratches and moisture.
Another mistake is choosing the wrong item for a first project. A full leather sofa is not the ideal beginner canvas unless you enjoy stress as a hobby. Start with a small accessory, a thrifted bag, or an old pair of shoes. Learn how the paint behaves before upgrading to your prized leather jacket.
Can You Paint Leather Furniture?
Yes, you can paint leather furniture, but it requires realistic expectations. Leather furniture gets heavy use, so the paint must be flexible, properly bonded, and sealed. Clean the furniture thoroughly, remove oils and conditioners, deglaze the surface, and apply thin coats. Large areas may need a sponge, sprayer, or specialized applicator for even coverage.
Painting furniture is best when the piece is structurally sound but cosmetically tired. If the leather is peeling, flaking, deeply cracked, or bonded leather that is separating, paint will not magically rebuild the surface. It may improve appearance temporarily, but it will not reverse material failure. Paint is talented, not supernatural.
How Durable Is Painted Leather?
Painted leather can be durable when the correct products and techniques are used. The final result depends on the type of leather, how well the surface was prepared, the quality of the paint, the number of coats, the finisher, and how the item is used. Decorative pieces may last for years with minimal wear. Shoes and bags need more care because they flex, rub, and encounter weather.
To protect painted leather, avoid soaking it, scraping it, or storing it in extreme heat. Clean it gently with a soft cloth. Do not use harsh cleaners unless the product label says they are safe for painted leather. If a small area wears down, touch-ups are usually easy. Keep a little leftover paint in a labeled container for future repairs. Your future touch-up session will feel very professional, even if you are doing it at the kitchen table next to a snack.
Leather Painting vs. Leather Dyeing
Leather painting and leather dyeing both change the appearance of leather, but they create different results. Dye penetrates and is excellent for natural leather, especially vegetable-tanned leather. It is ideal for rich, transparent color shifts and traditional leathercraft. Paint is better for opaque color, artwork, logos, patterns, and dramatic transformations.
If you want a natural, aged, or stained appearance, dye may be best. If you want crisp graphics, bright colors, or coverage over an existing shade, paint is better. Some artists use both: dye for the base color and paint for decorative details. That combination can create depth and personality without making the leather look overly coated.
Care Tips After Painting Leather
After painting, give the item time to cure before regular use. Store it in a cool, dry place. Keep painted areas from rubbing against rough surfaces. For shoes, avoid wearing them in heavy rain right away. For bags, avoid overstuffing them until the finish has fully settled. For jackets, hang them properly so painted areas do not crease sharply.
When cleaning painted leather, use a soft cloth and gentle motions. Do not scrub aggressively. If the item needs conditioning, avoid applying conditioner directly over painted artwork unless the paint and finisher manufacturer recommends it. Conditioners can soften leather, but they may also affect paint adhesion or sheen.
Experience Section: What Leather Painting Feels Like in Real Life
The first leather painting project often begins with suspicious optimism. You place an old wallet, sneaker, or thrift-store bag on the table and think, “How hard can this be?” Then you open the deglazer, tape off the edges, dip the brush, and suddenly you are acting like a museum conservator restoring a priceless artifact. This is normal. Leather painting has a funny way of making even a small keychain feel important.
One of the biggest lessons is that preparation feels boring until you see why it matters. Cleaning and deglazing can seem like chores standing between you and the fun part. But once you paint a properly prepared surface, the difference is obvious. The paint glides better, grips better, and dries more evenly. On an unprepared surface, the first coat may bead up or sit strangely, as if the leather is politely rejecting your artistic vision.
Another real-life discovery is that the first coat can look terrible. This is where many beginners panic. A thin first coat may appear streaky, uneven, or unimpressive. Do not judge the project too early. Leather painting is a layering process. By the second or third coat, the color begins to look richer. By the final coat, the project often transforms from “oh no” to “wait, did I just become talented?”
Small projects are the best teachers. Painting a cardholder, belt tip, shoe swoosh, or bag charm lets you practice brush control, drying time, and sealing without risking something expensive. You learn how tape behaves on curved leather. You learn that metallic paint needs patience. You learn that white paint over dark leather may require more coats than expected. You also learn that placing your elbow in wet paint is apparently a universal human tradition.
Hand-painted leather also creates a different emotional connection to an object. A plain pair of sneakers becomes the shoes you customized on a Saturday afternoon. A scuffed thrifted handbag becomes a conversation piece. A painted leather journal becomes a gift that feels personal without needing a dramatic budget. The finished item carries the marks of your decisions: the colors you chose, the lines you fixed, the tiny imperfections only you notice.
There is also a pleasant practicality to leather painting. It can rescue items that would otherwise sit unused. A faded black belt can get refreshed. A scratched bag can gain a floral design that hides the damage. A boring leather tray can become a stylish catchall for keys and sunglasses. Instead of buying something new, you give an existing item another chapter. That is creative, budget-friendly, and slightly smug in the best possible way.
The most satisfying projects usually respect the original leather rather than fighting it. Instead of covering every inch, consider accenting seams, corners, panels, straps, or embossed areas. Let some of the leather show. Contrast painted details with natural grain. A clean stripe, monogram, botanical border, or small illustration can look more expensive than a full-coverage makeover. In leather painting, restraint can be very stylish. Of course, if your heart demands hot-pink lightning bolts, the heart wants what it wants.
Finally, leather painting teaches patience. Let the coats dry. Let the finisher cure. Do not wear the shoes five minutes after sealing them, no matter how powerful your enthusiasm feels. The best results come from slowing down, building color gradually, and treating the final piece gently at first. Once you understand the rhythm, leather painting becomes less intimidating and more like a creative ritual: clean, prep, paint, dry, seal, admire, and casually pretend you are not checking every reflective surface to admire your work.
Conclusion
Leather painting is absolutely a thing, and it is a useful one. With flexible acrylic leather paint, careful preparation, thin coats, and a protective finisher, you can customize, restore, and refresh leather items in ways that feel personal and polished. The process is not complicated, but it does ask for patience. Clean the surface, remove the finish, paint lightly, let each layer dry, and seal the final design.
Whether you are painting sneakers, reviving a handbag, decorating a jacket, or testing a tiny design on a wallet, leather painting gives you creative control over items you already own. It is part art project, part restoration method, and part delightful excuse to say, “Thanks, I made it,” when someone compliments your bag. And honestly, that sentence never gets old.













