
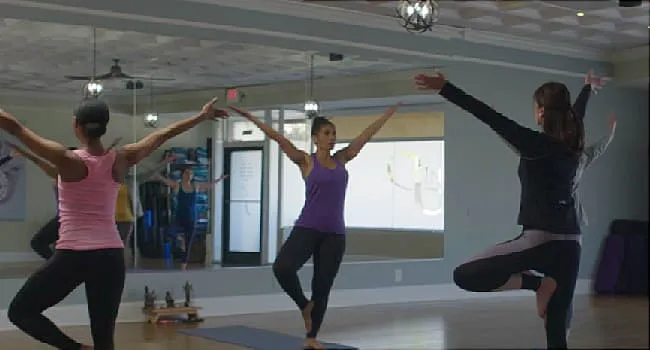
Osteoarthritis joint pain has a special talent for showing up at exactly the wrong time: when you are climbing stairs, getting out of a chair, opening a jar, or trying to look graceful while standing up from the floor. The good news is that movement can help. The even better news is that movement does not have to look like a superhero training montage. A gentle yoga video designed for osteoarthritis can be slow, practical, chair-friendly, and wonderfully un-dramatic.
Yoga is not a magic eraser for osteoarthritis, and it should never replace medical care, physical therapy, medication, or a treatment plan from a qualified clinician. But as part of a joint-friendly routine, modified yoga may help improve flexibility, balance, body awareness, posture, breathing, and confidence with everyday movement. In other words, yoga may not make your knees write thank-you notes, but it can help them feel less like rusty door hinges.
This guide explains how a yoga video on poses to ease osteoarthritis joint pain can be structured, which poses are commonly helpful, how to modify them, and how to practice safely when your joints have strong opinions.
Why Gentle Yoga Can Help With Osteoarthritis Joint Pain
Osteoarthritis happens when cartilage and other joint tissues change over time, often leading to pain, stiffness, swelling, and reduced range of motion. It commonly affects the knees, hips, hands, spine, and feet. Because symptoms can make movement uncomfortable, many people naturally move less. Unfortunately, less movement can lead to weaker muscles, tighter joints, poorer balance, and more stiffness. That is the unhelpful circle we are trying to interrupt.
Gentle yoga supports osteoarthritis care in several ways. First, it encourages range-of-motion movement, which helps joints move through comfortable patterns without forcing them. Second, many poses build light strength in the muscles around the joints. Stronger muscles can help support the knees, hips, shoulders, and spine. Third, yoga includes breathing and relaxation, which can calm the nervous system and make pain feel less overwhelming. Finally, yoga teaches pacing. Instead of pushing through pain like a motivational poster with bad advice, you learn to adjust.
What Makes a Yoga Video “Osteoarthritis-Friendly”?
A good yoga video for osteoarthritis joint pain should feel more like a helpful guide than a flexibility contest. The instructor should offer modifications, explain how to use props, avoid fast transitions, and encourage viewers to stay within a pain-free or low-discomfort range. The best routine is not the one that looks impressive on camera; it is the one you can repeat tomorrow without regretting your life choices.
Look for These Features in a Safe Yoga Video
An osteoarthritis-friendly yoga video should include a warm-up, slow transitions, chair options, wrist and knee modifications, and reminders to stop if pain becomes sharp, sudden, or worsening. It should avoid language like “push deeper,” “ignore discomfort,” or “no pain, no gain.” That phrase belongs in the same drawer as expired coupons and mystery charging cables.
Props are not cheating. A sturdy chair, yoga blocks, folded blankets, towels, cushions, and a wall can make poses safer and more comfortable. For knee osteoarthritis, a folded blanket under the knees can reduce pressure. For wrist or hand osteoarthritis, using fists, forearms, blocks, or a chair can reduce strain. For hip osteoarthritis, shortening the stance in standing poses can prevent overloading the joint.
Before You Press Play: Safety Tips for Osteoarthritis Yoga
Before starting a new yoga routine, talk with a healthcare provider, especially if you have severe pain, recent surgery, major balance problems, joint replacement, inflammatory arthritis, dizziness, or another medical condition. A physical therapist can help you identify which movements fit your body and which ones need editing.
Use the “comfortable challenge” rule. A stretch may feel mild or gently effortful, but it should not feel sharp, stabbing, electric, or unstable. If pain increases during a pose, reduce the range, use a prop, switch to a chair version, or skip it. If pain is worse later that day or the next morning, make the next session shorter and easier.
Warm up first. Five to ten minutes of easy movement, such as marching in place, shoulder rolls, ankle circles, or a short walk, can make yoga feel smoother. Heat may help some people loosen stiff joints before practice, while ice may feel better after activity if a joint feels irritated. Keep both warm and cold therapy comfortable, never extreme.
A Gentle Yoga Video Sequence for Osteoarthritis Joint Pain
The following sequence can be used as the foundation for a beginner-friendly yoga video. It is designed for slow pacing, clear instruction, and plenty of modifications. Each pose should be held for a few calm breaths, not treated like a test of spiritual endurance.
1. Seated Breathing and Posture Check
Start seated in a sturdy chair with both feet flat on the floor. Sit tall without stiffening. Let the shoulders soften, rest the hands on the thighs, and breathe slowly through the nose or mouth. Imagine creating space between the ribs and hips. This simple beginning helps the body transition from “daily chaos mode” to “we are doing something kind for the joints now.”
Modification: Place a cushion behind the lower back if sitting upright feels tiring. If the feet do not reach the floor, place a folded towel or book under them.
2. Gentle Neck and Shoulder Rolls
Slowly turn the head to the right and left, then gently tilt one ear toward the shoulder without forcing. Add shoulder rolls, moving the shoulders up, back, and down. This can ease tension around the neck and upper back, especially for people who spend long hours at a computer or looking down at a phone.
Joint-friendly tip: Keep movements small and smooth. Neck circles are not necessary and may bother some people, so controlled half-movements are often better.
3. Seated Cat-Cow
Sit tall with hands resting on the thighs. As you inhale, gently lift the chest and draw the shoulders back. As you exhale, round the upper back slightly and let the chin move toward the chest. This seated version of cat-cow can help mobilize the spine without requiring weight-bearing through the hands and knees.
Modification: Keep the movement tiny if the back feels sensitive. Think of it as oiling the spine, not auditioning for a gymnastics team.
4. Seated Side Bend
From the chair, place the right hand on the seat or thigh. Reach the left arm up only as high as comfortable, then lean slightly to the right. Keep both sitting bones grounded. Repeat on the other side. This pose stretches the sides of the torso and may help improve breathing space and posture.
Modification: Keep the top hand on the shoulder instead of reaching overhead if shoulder arthritis or stiffness is present.
5. Seated Spinal Twist
Sit tall and turn gently to the right, placing the left hand on the right thigh and the right hand beside the hip or on the chair back. Hold for a few breaths, then switch sides. Twists should feel mild and controlled, never forced.
Safety note: People with spinal conditions, osteoporosis, recent surgery, or nerve symptoms should ask a clinician whether twisting is appropriate.
6. Chair-Supported Mountain Pose
Stand behind a sturdy chair and hold the backrest lightly. Place feet hip-width apart, soften the knees, and stand tall. Press evenly through the feet while lifting through the crown of the head. This pose builds posture awareness and balance without requiring fancy footwork.
Modification: Practice near a wall or kitchen counter for extra support. If standing is uncomfortable, perform the same posture seated.
7. Chair-Supported Heel Raises
Holding the chair, slowly lift the heels, then lower them with control. This movement strengthens the calves and ankles, which can support walking and balance. Keep the movement slow and stop if the toes, feet, or knees feel irritated.
Specific example: A person with knee osteoarthritis might do five gentle heel raises instead of fifteen. The goal is consistency, not collecting repetitions like trophies.
8. Modified Warrior I
Stand facing the chair. Step one foot back a short distance, keeping both feet comfortable and stable. Bend the front knee only slightly, keeping it aligned over the ankle. Hold the chair for balance and lift the chest. This modified standing pose can build hip and thigh strength without a deep lunge.
Knee-friendly rule: Avoid bending the knee deeply. For many people with knee osteoarthritis, smaller angles feel better than dramatic yoga shapes.
9. Supported Half Forward Fold
Stand facing a chair or counter. Place hands on the support, step back slightly, and hinge at the hips until the back feels long. Keep the knees soft. This pose can stretch the back body and reduce stiffness after sitting.
Modification: If the hamstrings or lower back feel tight, keep the torso higher. A kitchen counter may work better than a chair because it requires less bending.
10. Reclined Knee-to-Chest Variation
Lie on your back with knees bent and feet on the floor, or stay in bed if getting to the floor is not realistic. Bring one knee slightly toward the chest, holding behind the thigh rather than pulling on the knee. Release and switch sides. This can gently move the hips and lower back.
Hip-friendly tip: Keep the opposite knee bent and the movement small. Do not force the thigh into the belly if the hip pinches.
11. Supported Bridge Pose
Lie on the back with knees bent and feet hip-width apart. Press gently through the feet and lift the hips a small amount. Keep the neck relaxed and lower slowly. Bridge can support glute and hip strength, which may help stabilize the pelvis and knees.
Modification: Lift only one or two inches, or place a folded blanket under the hips for a restorative version. Skip this pose if it causes back, hip, or knee pain.
12. Final Relaxation With Joint Scan
End by lying down or sitting comfortably. Bring attention to the feet, ankles, knees, hips, hands, shoulders, and jaw. Notice where the body feels softer. Relaxation is not filler; it is part of the practice. Osteoarthritis can create tension patterns, and a calm finish helps the body absorb the session.
Yoga Poses to Approach Carefully With Osteoarthritis
Some poses are not automatically forbidden, but they may need major modifications. Deep lunges, deep squats, full kneeling poses, long planks, downward-facing dog, intense twists, and one-legged balance poses can irritate joints if done too aggressively. Hot yoga may also be too intense for some people because heat can make it easier to overstretch without realizing it.
People with wrist or thumb osteoarthritis should be cautious with poses that load the hands, such as plank, tabletop, and downward-facing dog. A chair version can provide similar benefits with less pressure. People with knee osteoarthritis may prefer standing poses with short stances and shallow knee bends. People with hip osteoarthritis may need to avoid forcing external rotation, especially in poses that ask the knee to fall far out to the side.
How Often Should You Follow a Yoga Video for Osteoarthritis?
For beginners, ten to twenty minutes two or three times per week is a sensible starting point. Some people do better with five minutes daily, especially during stiff mornings. Others prefer a longer session on days when pain is lower. The best schedule is the one your joints accept and your life can actually support.
A helpful plan is to rotate yoga with other low-impact activities such as walking, cycling, swimming, water aerobics, or physical therapy exercises. Yoga can improve flexibility and balance, but osteoarthritis care usually works best with a mix of mobility, strengthening, aerobic activity, rest, and symptom management.
How to Film or Choose a Helpful Yoga Video
If you are creating a yoga video on poses to ease osteoarthritis joint pain, keep the camera angle clear and the instructions simple. Show the standard version, then immediately show the chair or prop-supported version. Use calm pacing. Include reminders like “bend only as far as comfortable,” “use the chair for balance,” and “skip this if it bothers your joint.”
A strong video might include three versions of the same movement: seated, supported standing, and floor-based. This makes the routine accessible to more people. For example, cat-cow can be done seated in a chair, standing with hands on a counter, or on hands and knees with padding. That flexibility is the whole point.
Common Mistakes to Avoid
The first mistake is doing too much too soon. Osteoarthritis joints often prefer polite invitations, not surprise parties. Begin with a short session and increase gradually. The second mistake is copying the instructor exactly. Your body is not a photocopier. Your version of the pose is allowed to look different.
The third mistake is ignoring pain signals. Mild effort is fine, but sharp pain, swelling, instability, or symptoms that linger should be taken seriously. The fourth mistake is skipping strength work entirely. Yoga can build strength, but some people also need targeted exercises from a physical therapist, especially for knee, hip, or spine osteoarthritis.
Experience-Based Tips: What It Feels Like to Use Yoga for Osteoarthritis Joint Pain
People often imagine that yoga for osteoarthritis will feel like a peaceful transformation scene: soft lighting, perfect breathing, joints moving like butter, and maybe a flute playing somewhere in the distance. Real life is usually less cinematic. The first session may feel awkward. The chair may squeak. One hip may say, “Absolutely not.” The dog may walk across the mat as if hired for quality control. That is all normal.
One common experience is that the body feels stiff at the beginning but gradually becomes more cooperative after several minutes. This is why a slow warm-up matters. A person with knee osteoarthritis may start seated, do ankle circles, practice seated cat-cow, then stand for a few chair-supported movements. By the end, walking across the room may feel a little smoother. Not perfect. Not brand new. Just smootherand that counts.
Another experience is learning that smaller movements can be surprisingly powerful. Many beginners think they need to stretch deeply to get benefits. In osteoarthritis yoga, the opposite is often true. A small supported side bend, a gentle twist, or a shallow bridge can create enough movement without irritating the joint. The pose does not need to be dramatic to be useful. A quiet, well-supported movement repeated consistently can do more than an intense pose performed once and then avoided forever.
Breathing also becomes more important than expected. When a joint hurts, people often hold their breath without noticing. During yoga, slow breathing gives the body a different message: we are safe, we are moving carefully, and there is no emergency here. This can reduce guarding, which is the muscular tension that builds around painful areas. Less guarding may make movement feel easier.
There is also a confidence benefit. Osteoarthritis can make people distrust their bodies. A well-designed yoga video gives options, and options create control. The viewer learns, “I can use a chair,” “I can skip kneeling,” “I can make the stance shorter,” and “I can stop before pain gets loud.” That sense of control is not a small thing. It can make someone more willing to stay active, go for walks, do home exercises, or return to hobbies.
Progress may show up in ordinary ways. Getting out of a chair may feel less clunky. Morning stiffness may pass a little faster. Balance may feel steadier while reaching for something on a shelf. The hands may feel less tense after gentle wrist and finger movements. These changes can be subtle, but they are meaningful because osteoarthritis care is really about daily function. The goal is not to win yoga. There is no trophy for deepest forward fold, and frankly, there should not be.
The most useful mindset is curiosity. Instead of asking, “Can I do the full pose?” ask, “What version of this pose helps me feel better?” Maybe warrior pose becomes a tiny supported step-back. Maybe downward dog becomes hands on a wall. Maybe floor practice becomes bed practice. This is not lowering the standard; it is making the practice intelligent.
Over time, the best yoga routine becomes personal. Some people love morning chair yoga because it helps them start the day. Others prefer evening stretches to reduce stiffness after sitting. Some enjoy a full video; others repeat three favorite poses. The winning routine is the one that feels safe, repeatable, and kind to the joints.
Conclusion
A yoga video on poses to ease osteoarthritis joint pain should be gentle, clear, adaptable, and realistic. The most helpful routines focus on mobility, light strength, balance, breathing, and relaxation. They use chairs, walls, blankets, and blocks without apology. They respect pain signals. They make movement feel possible again.
Osteoarthritis may change how you move, but it does not mean movement is off the menu. With the right modifications, yoga can become a practical tool for easing stiffness, supporting joint function, and building confidence one calm breath at a time. Think of it as maintenance for your body’s favorite hingesless forcing, more kindness, and absolutely no need to twist yourself into a human pretzel.













